Floating Vision: Searching for Home

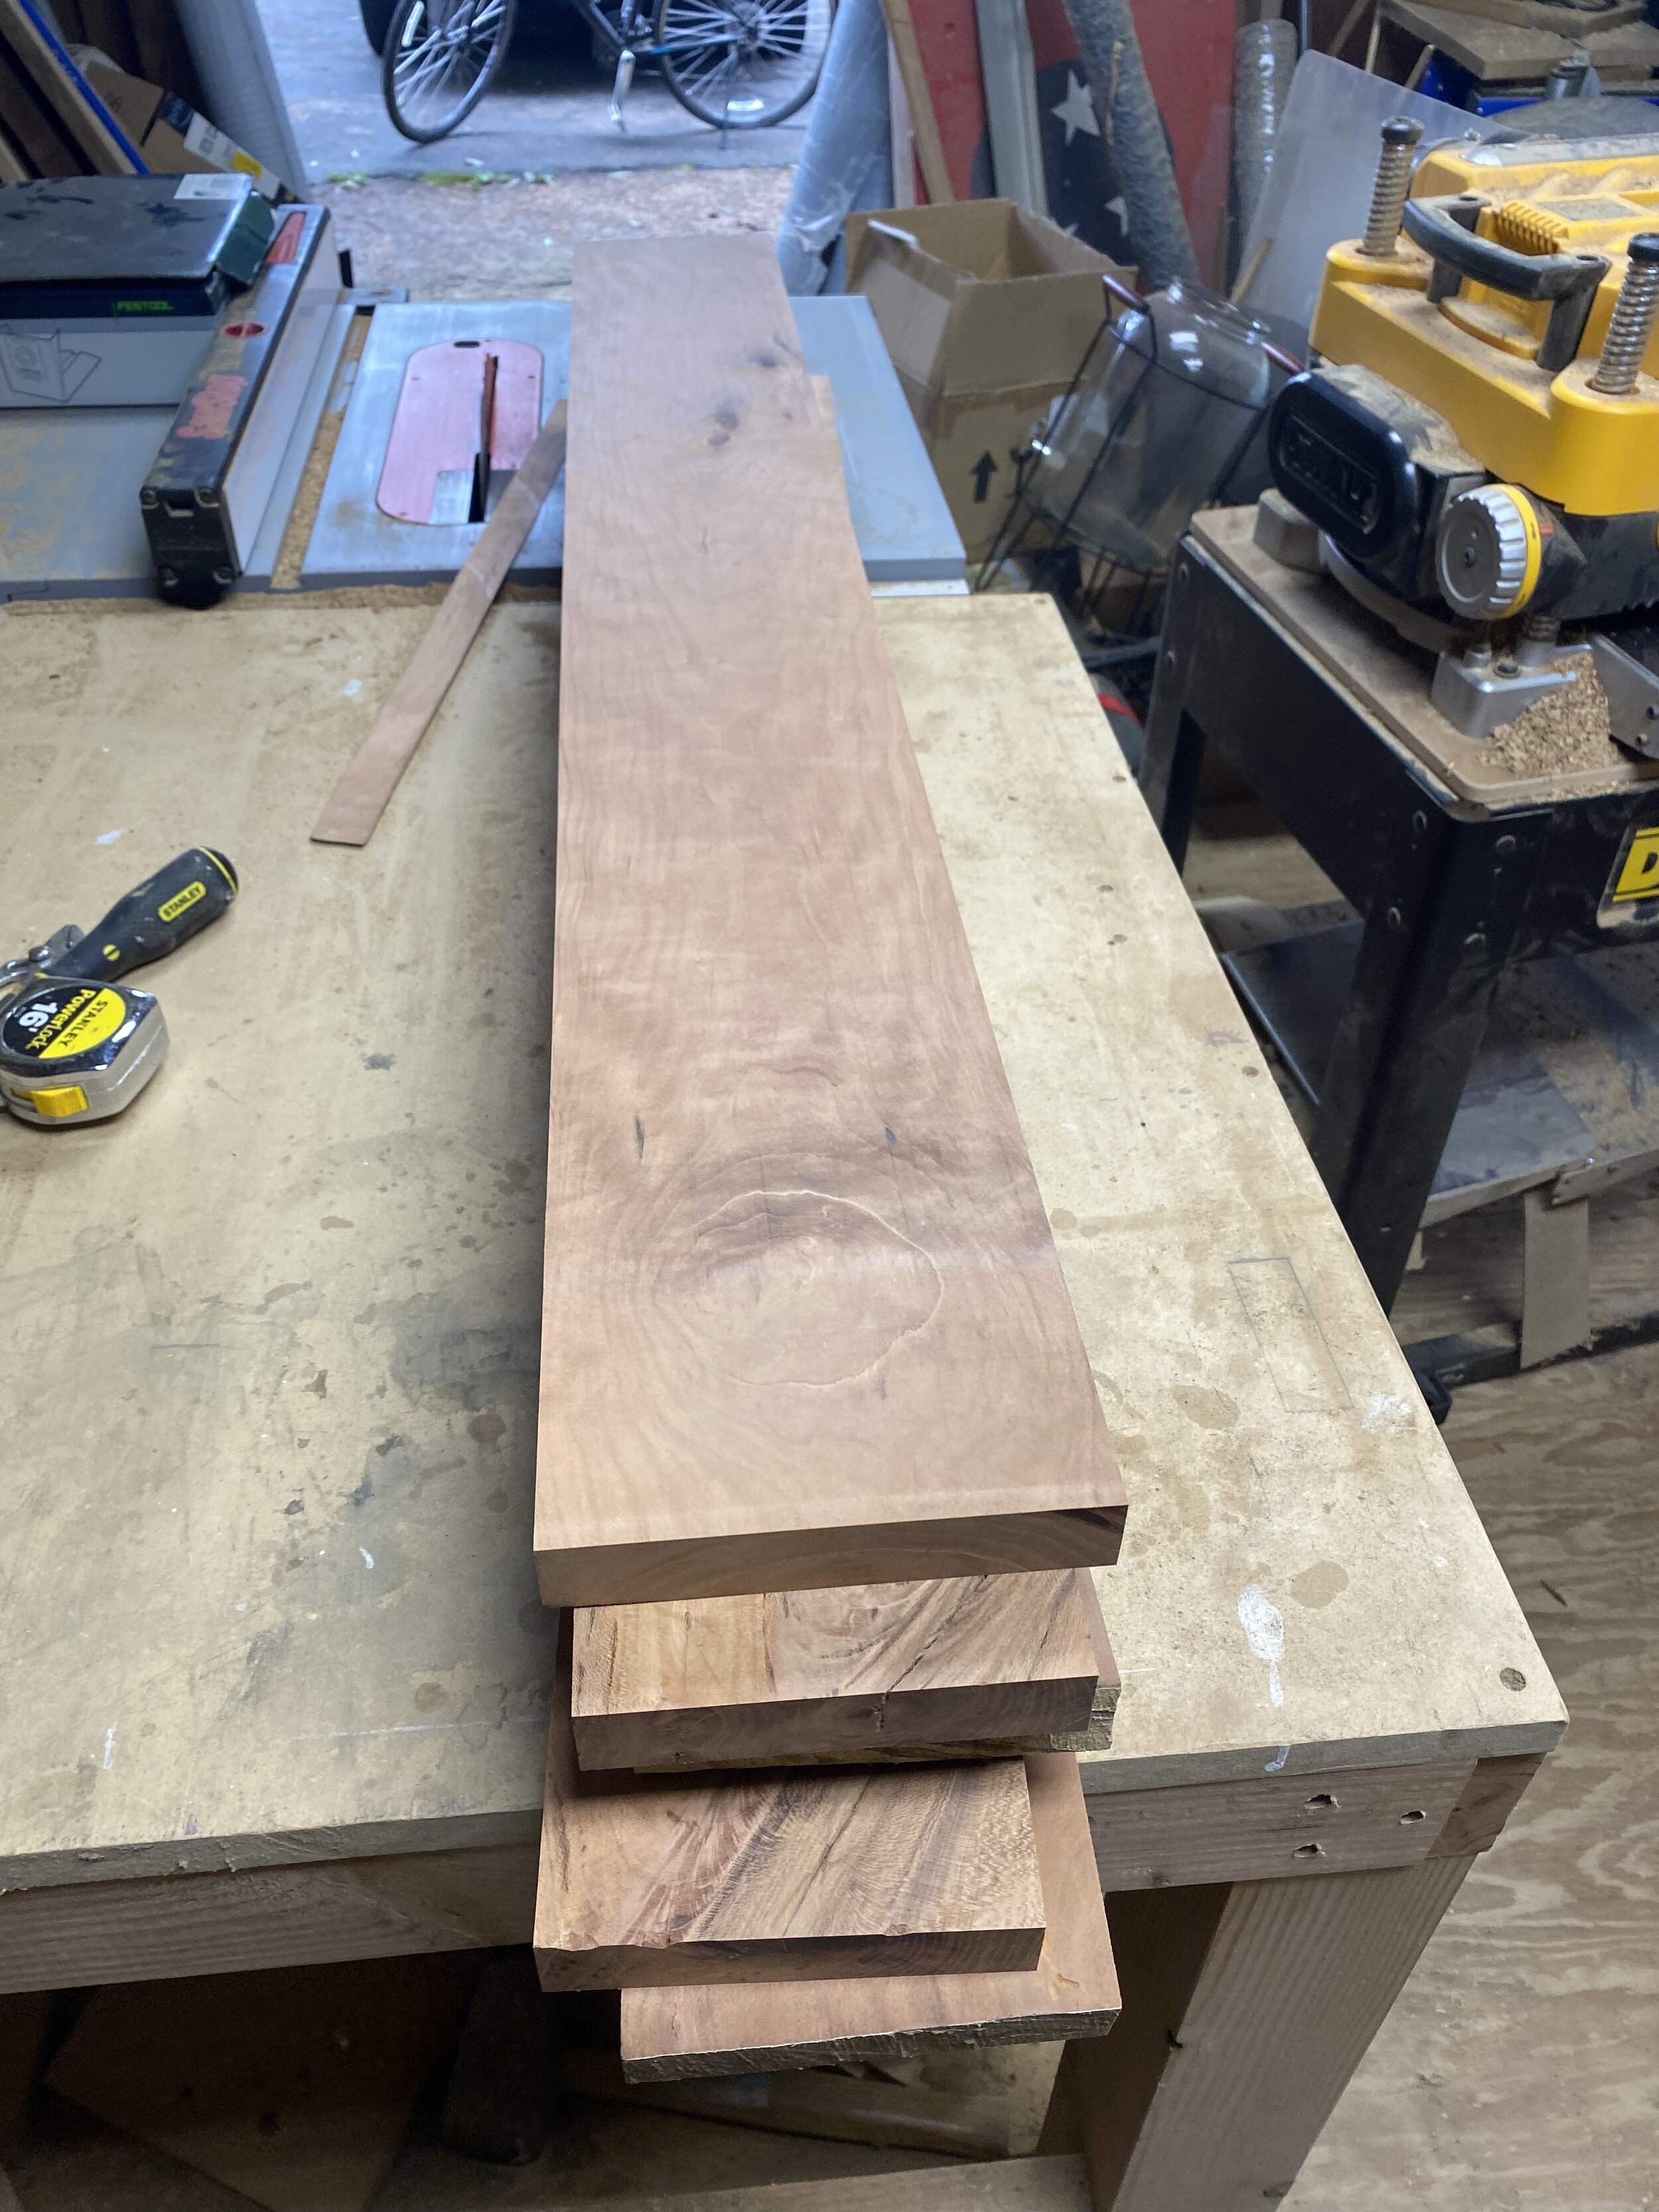
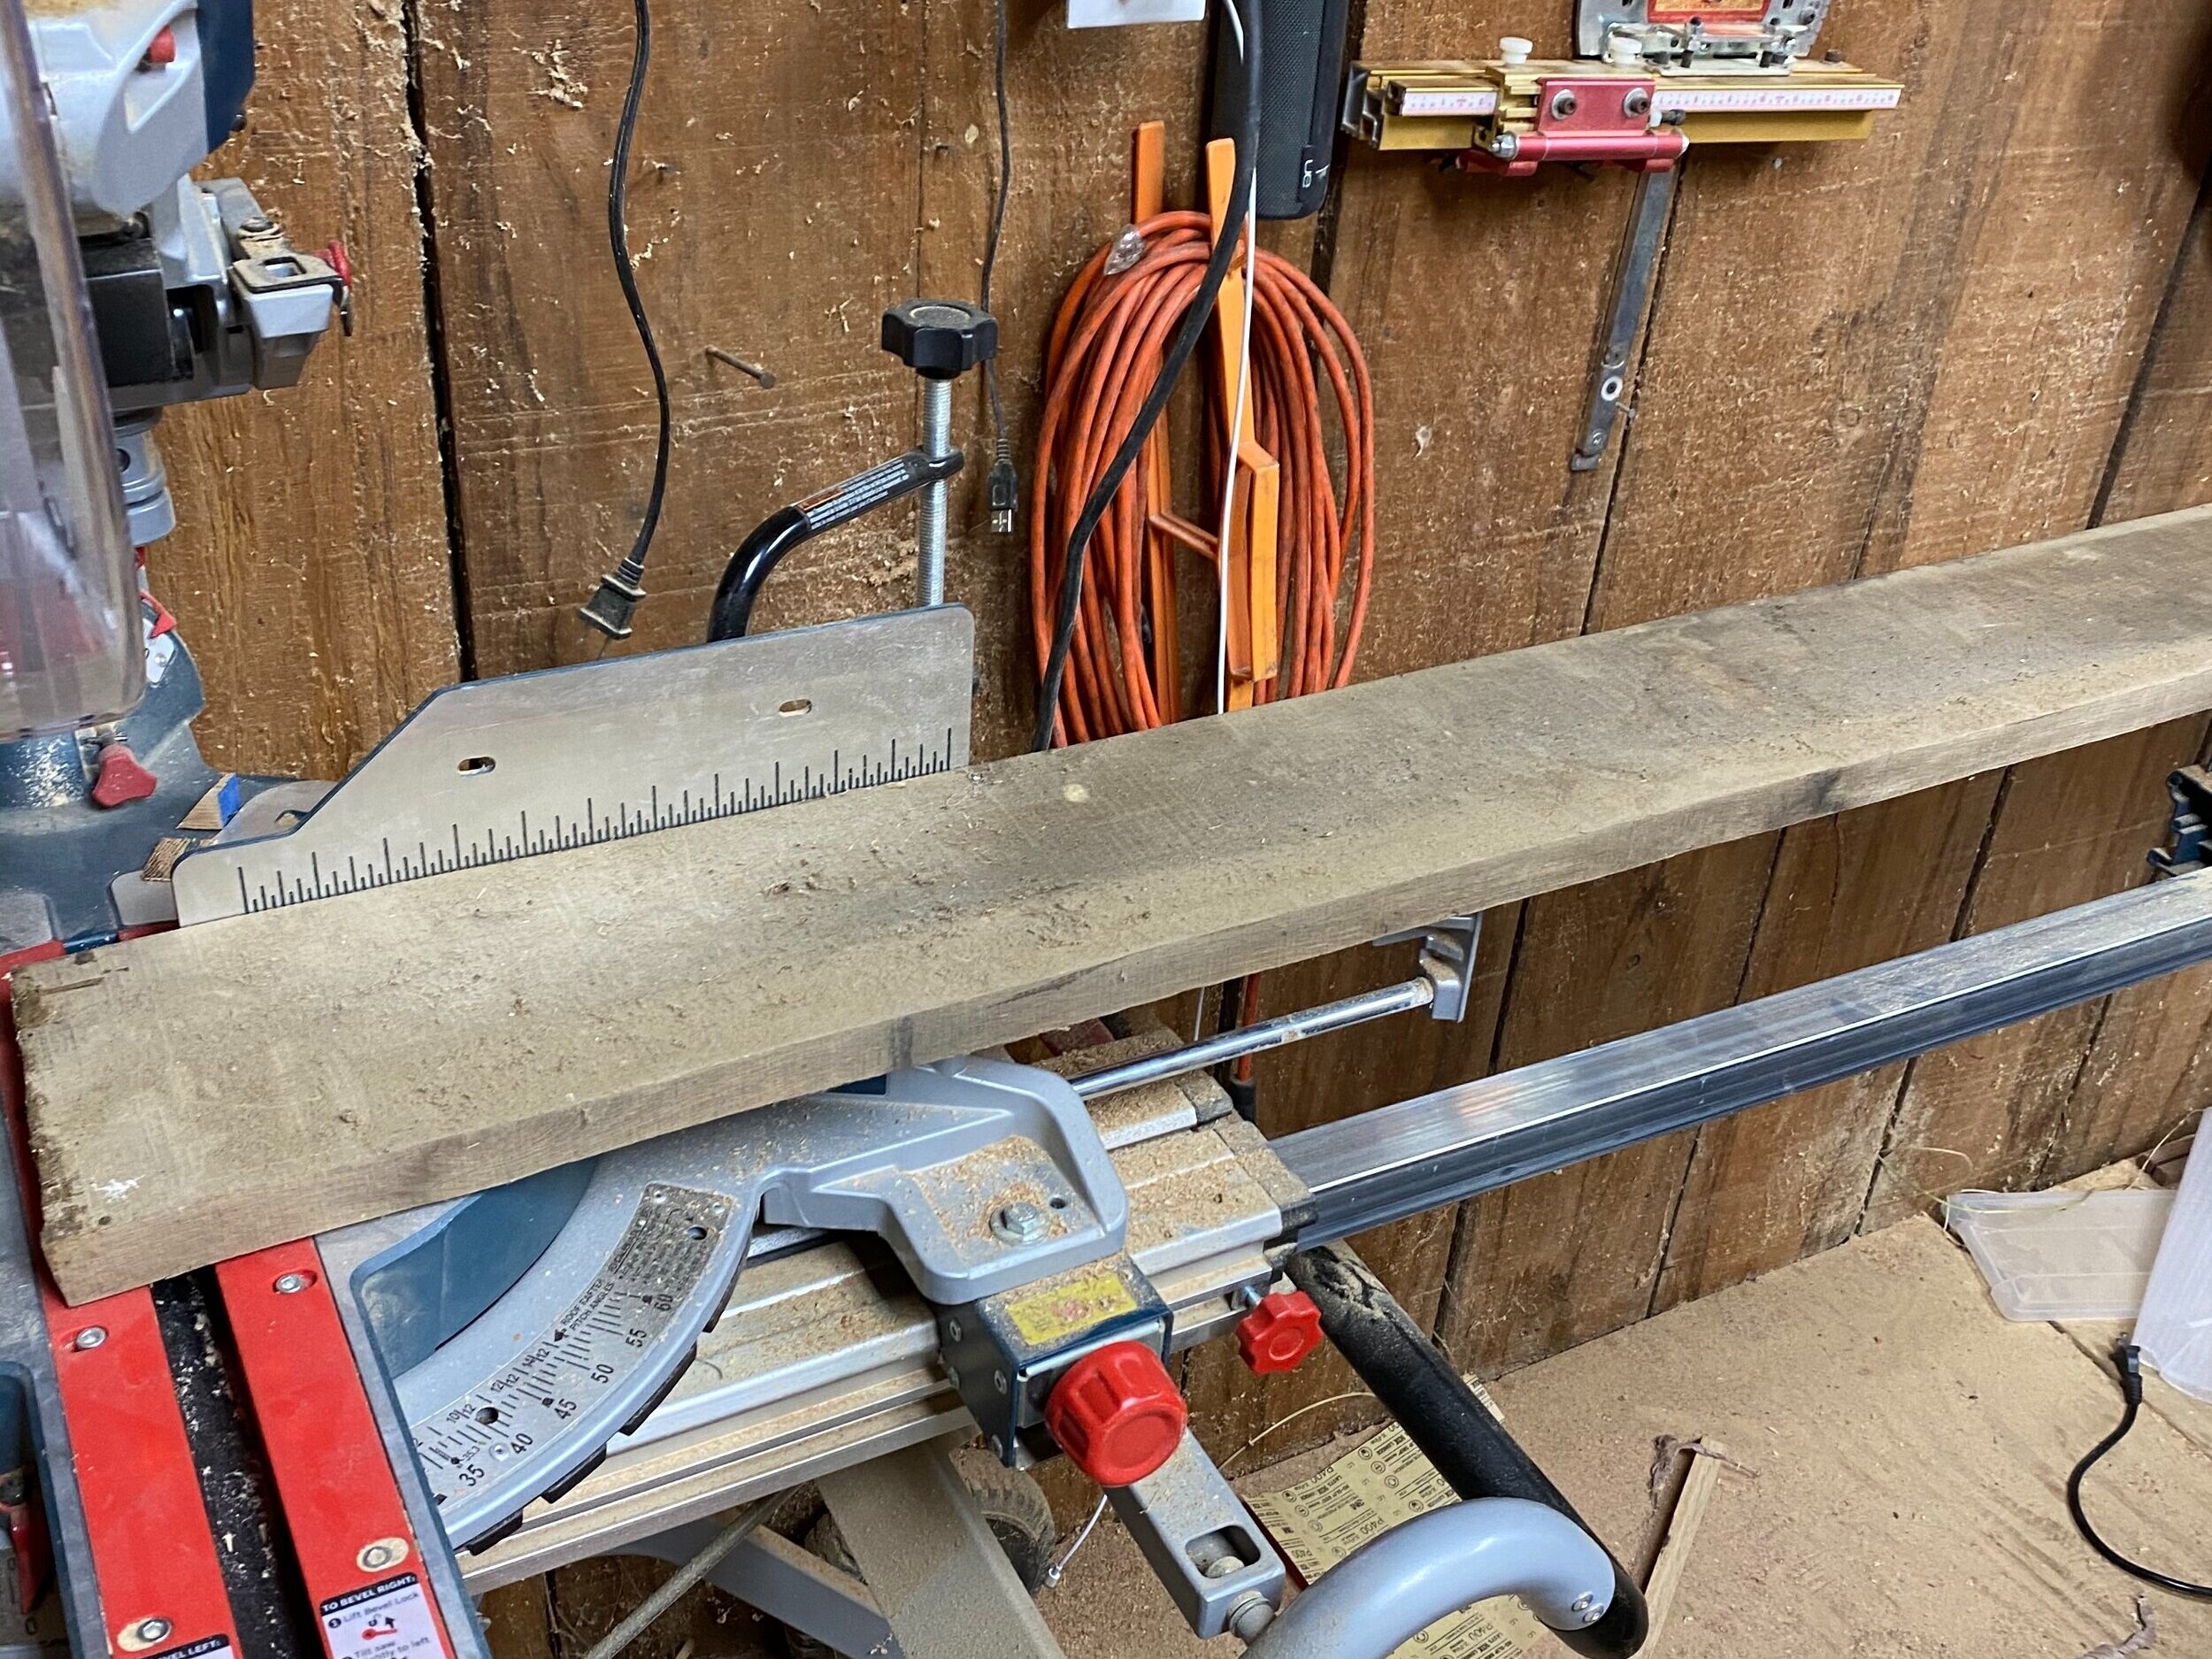
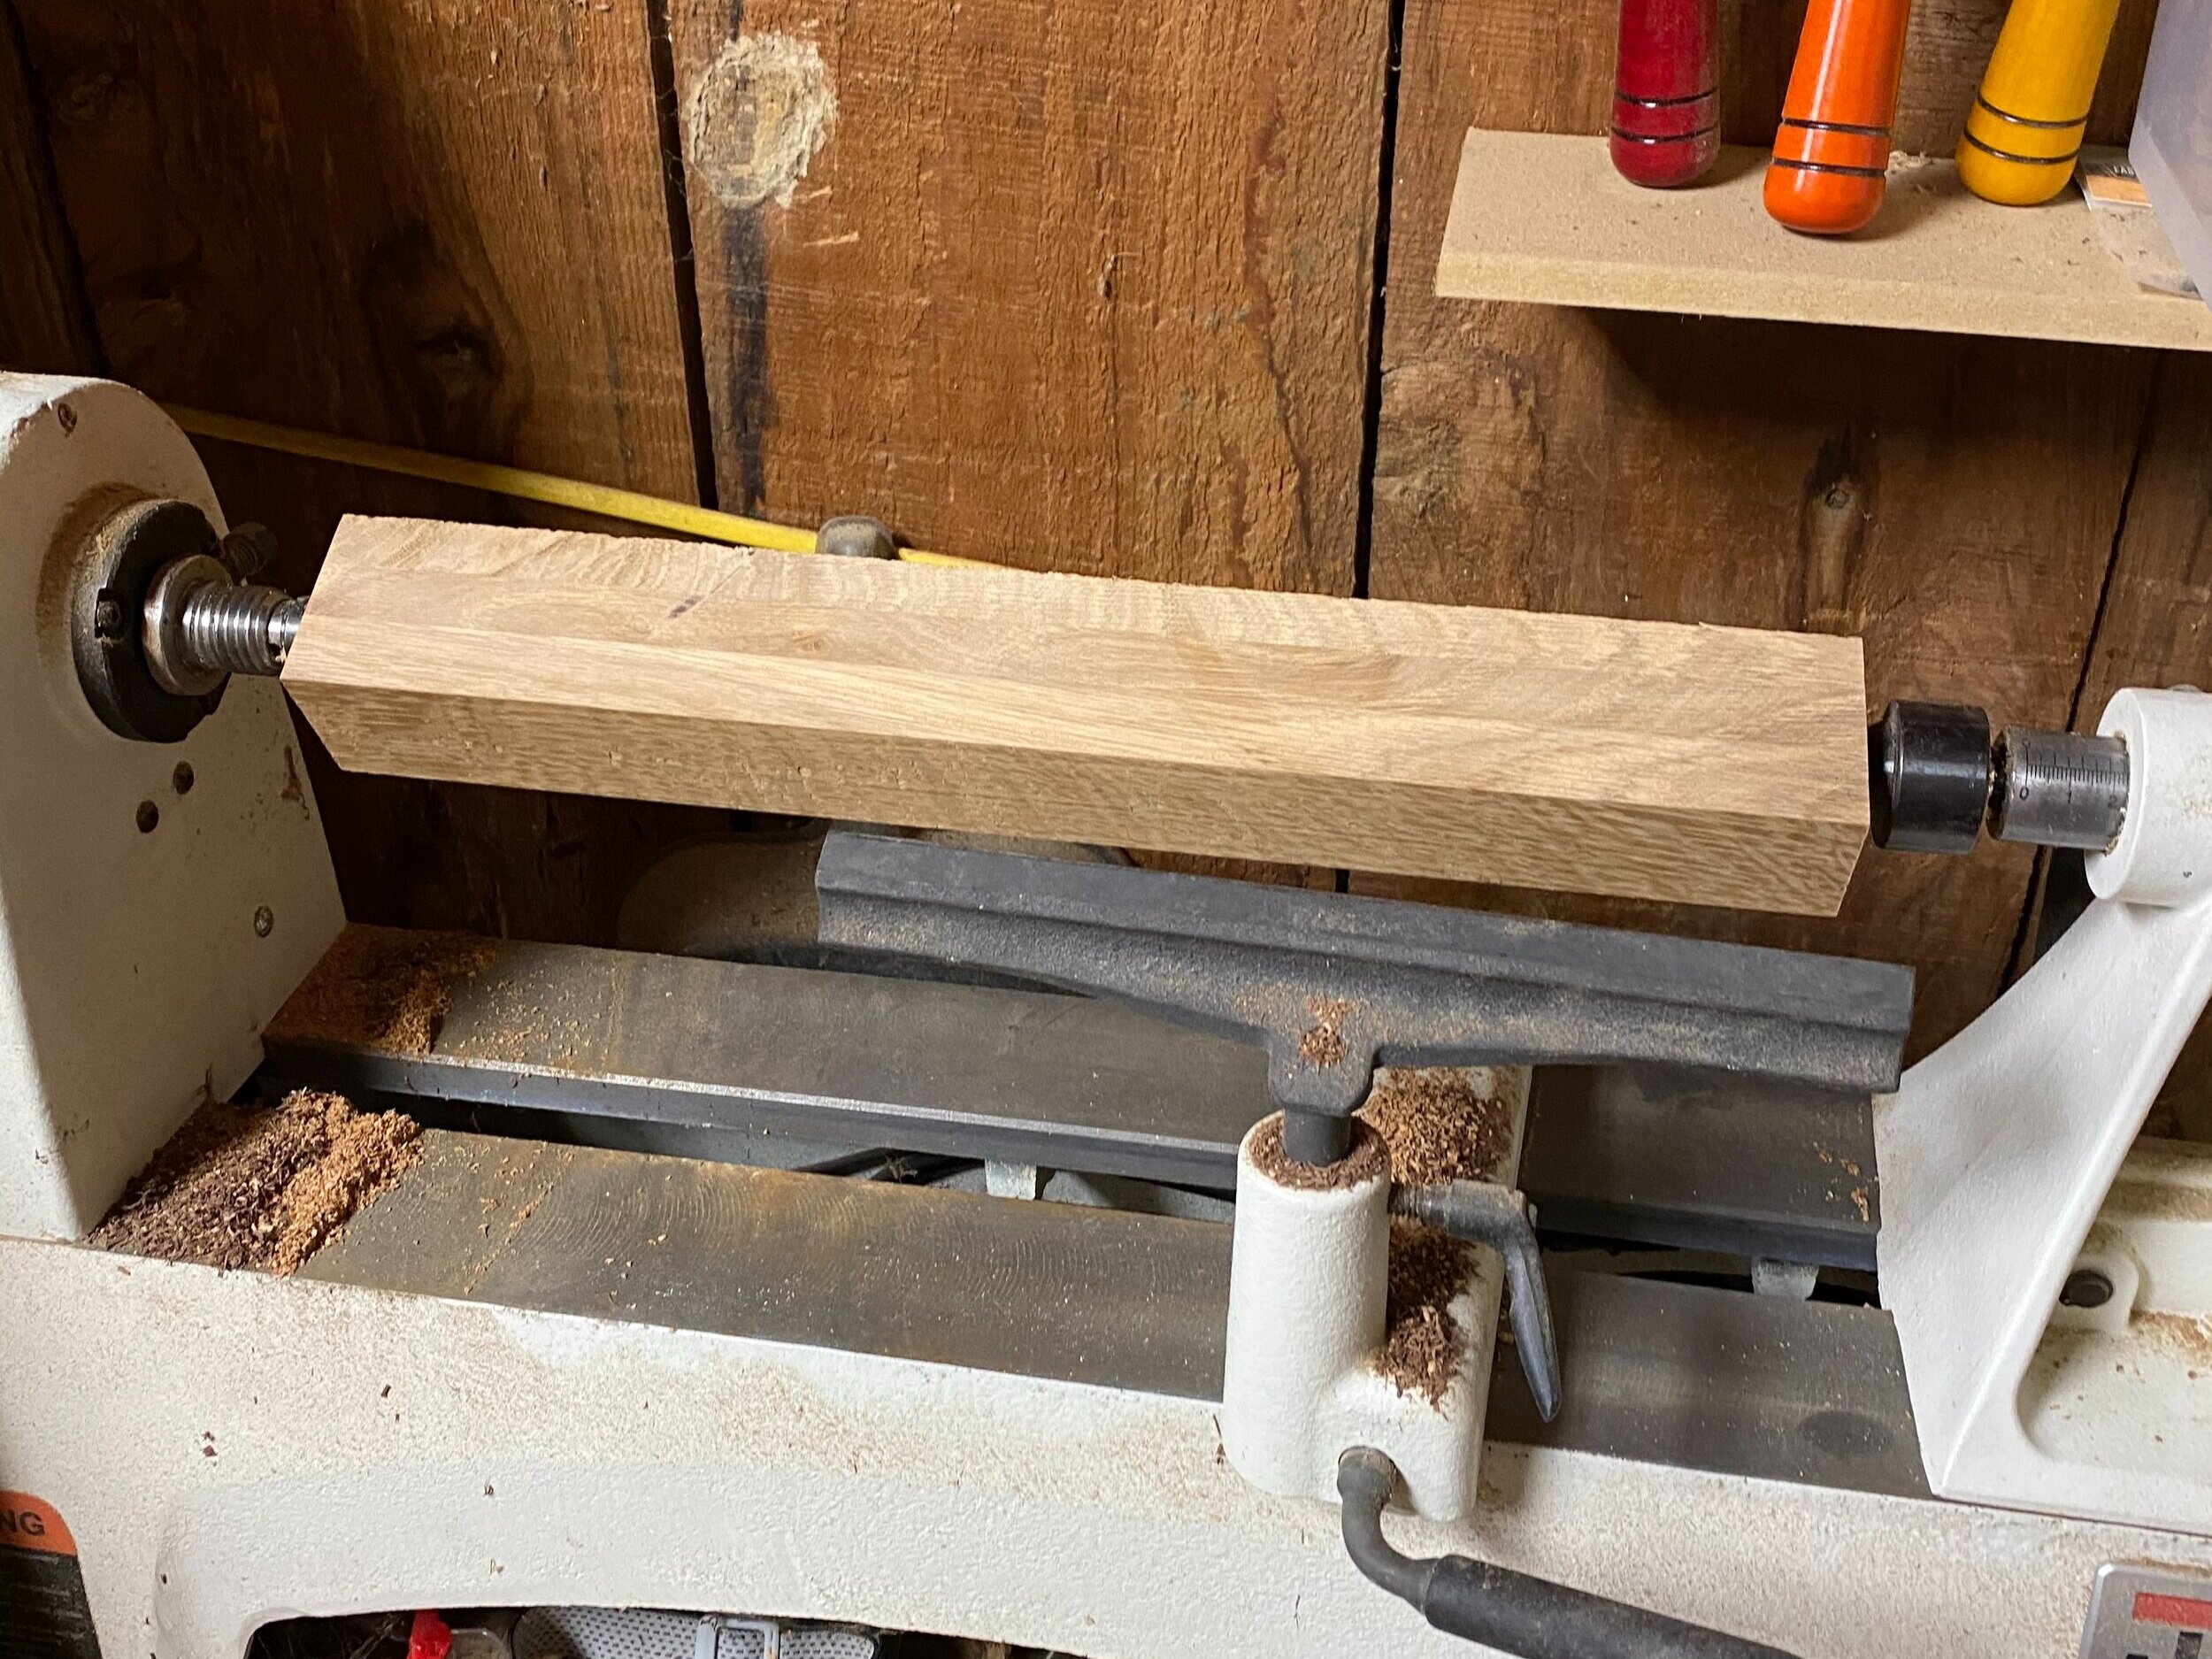
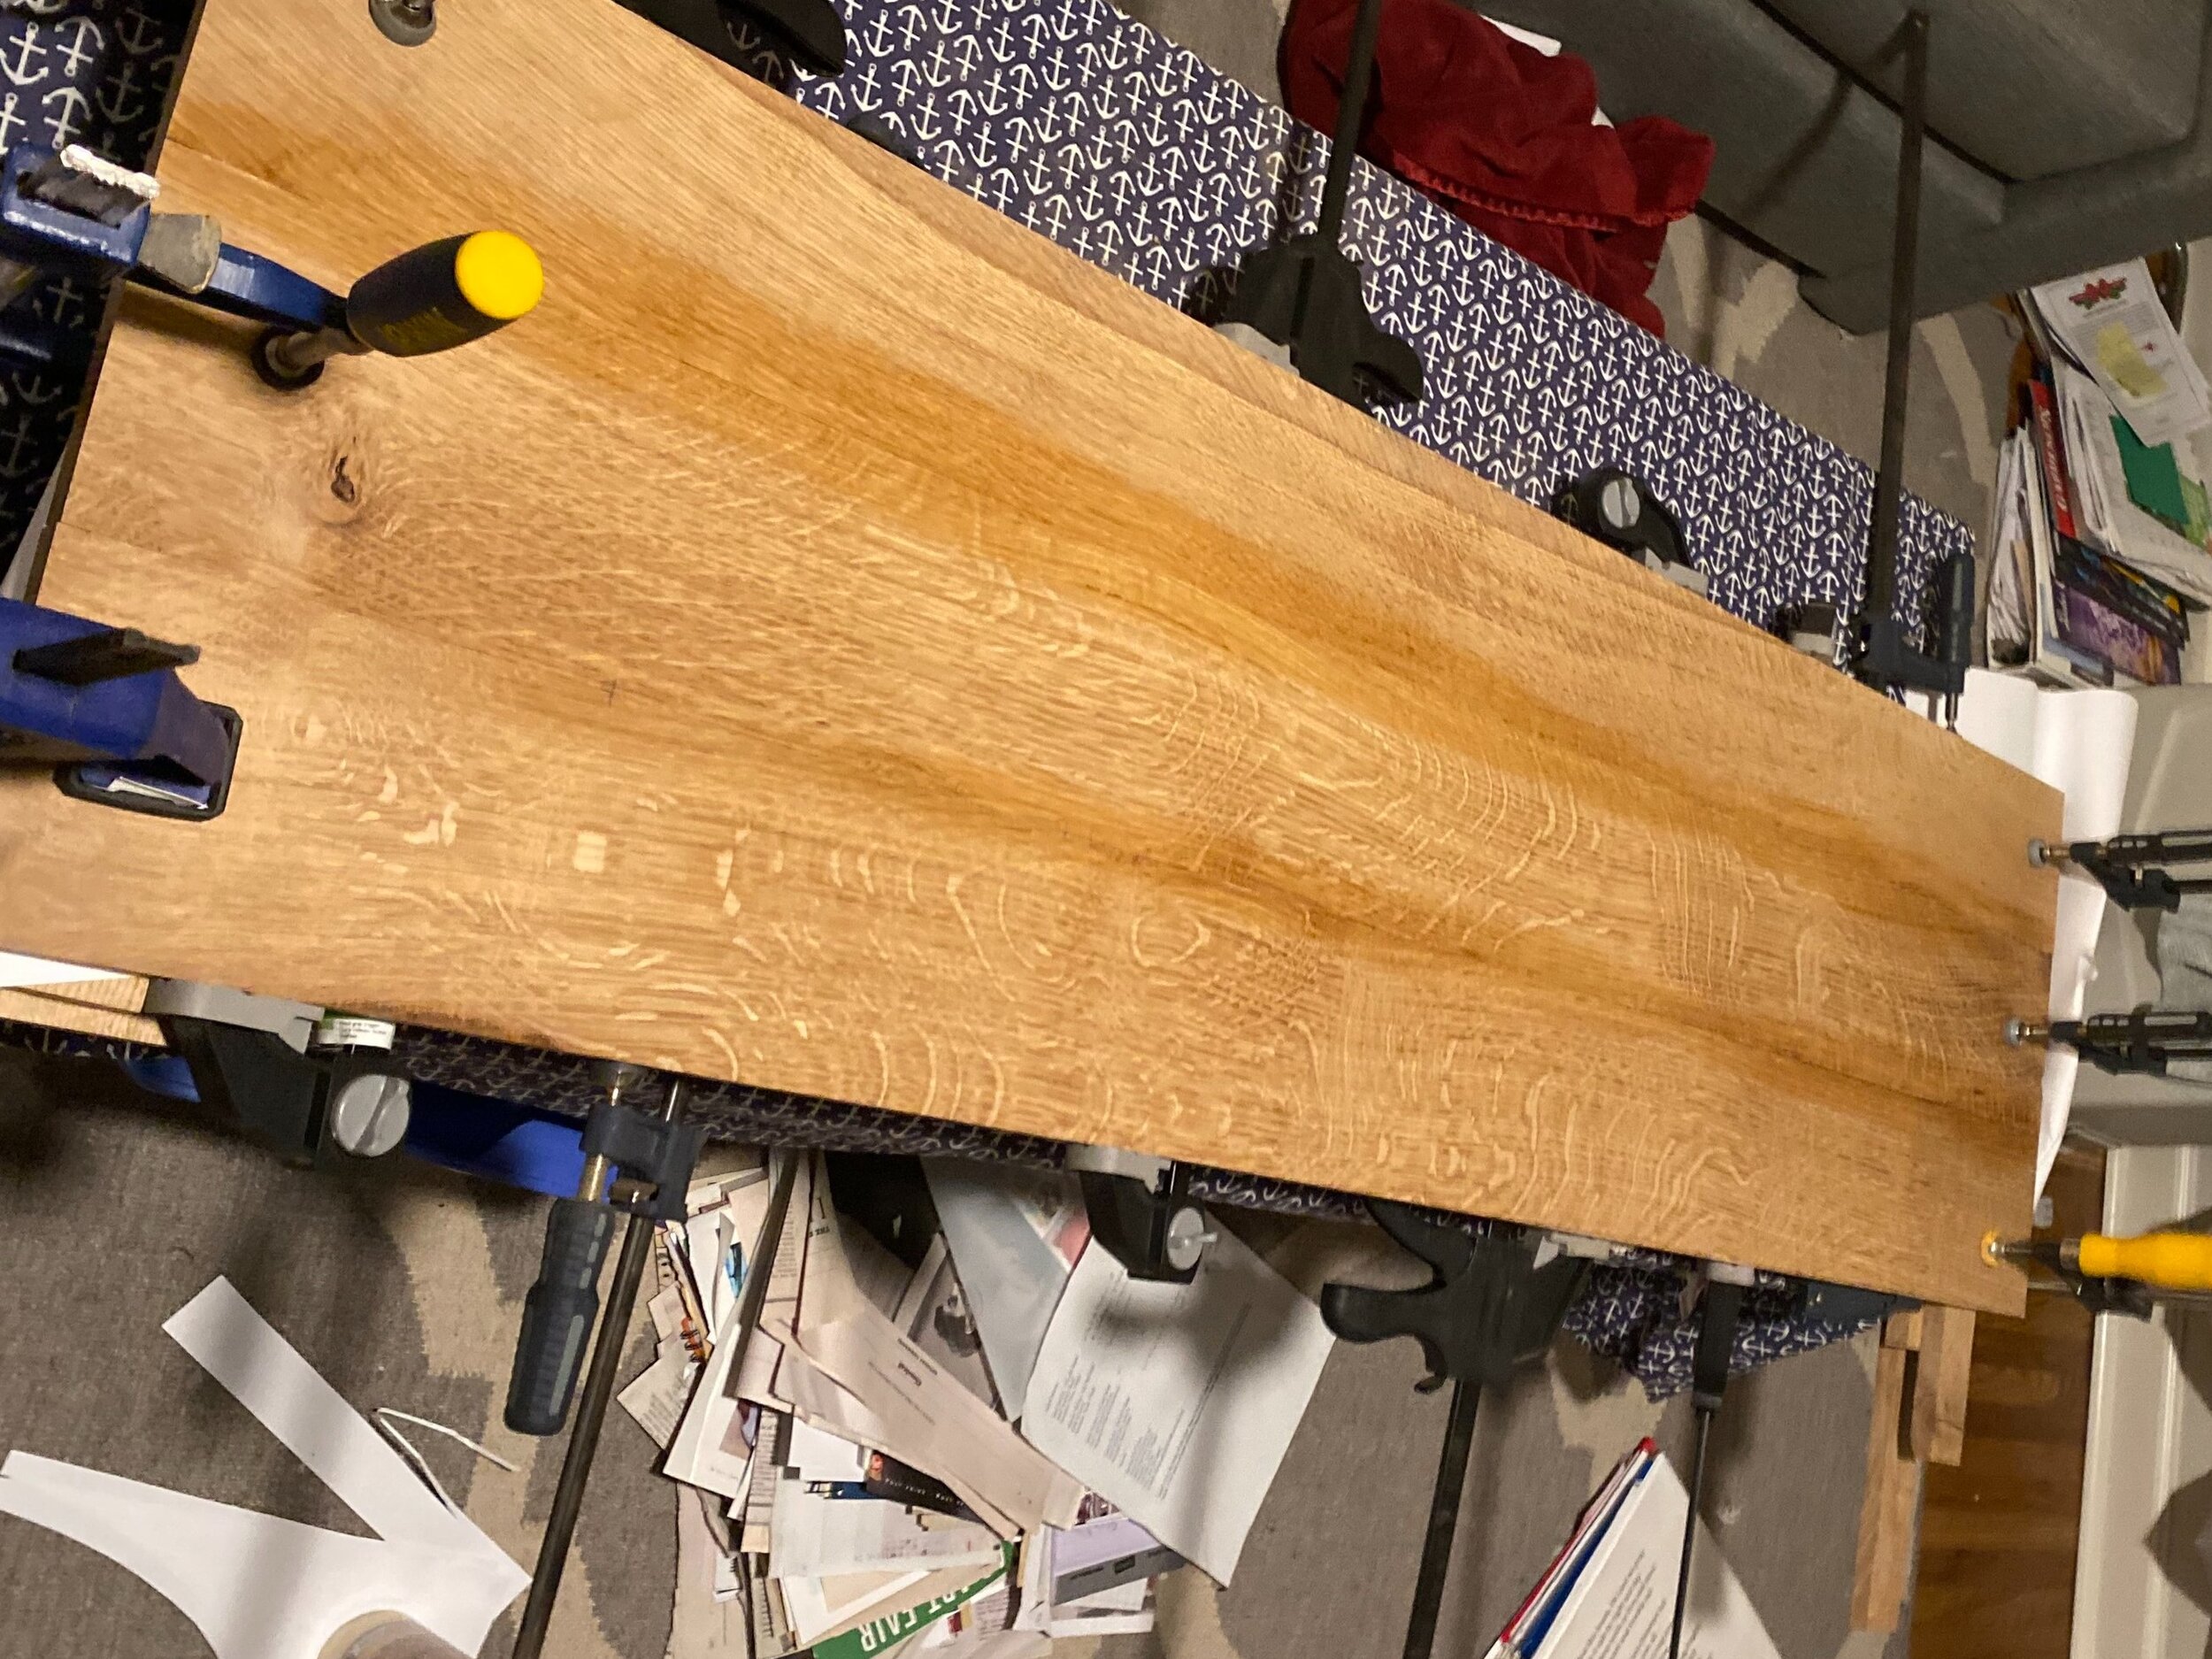
The Beginnings: Two more boards like this will make up the final shelf. Don’t let this barn wood deceive you.
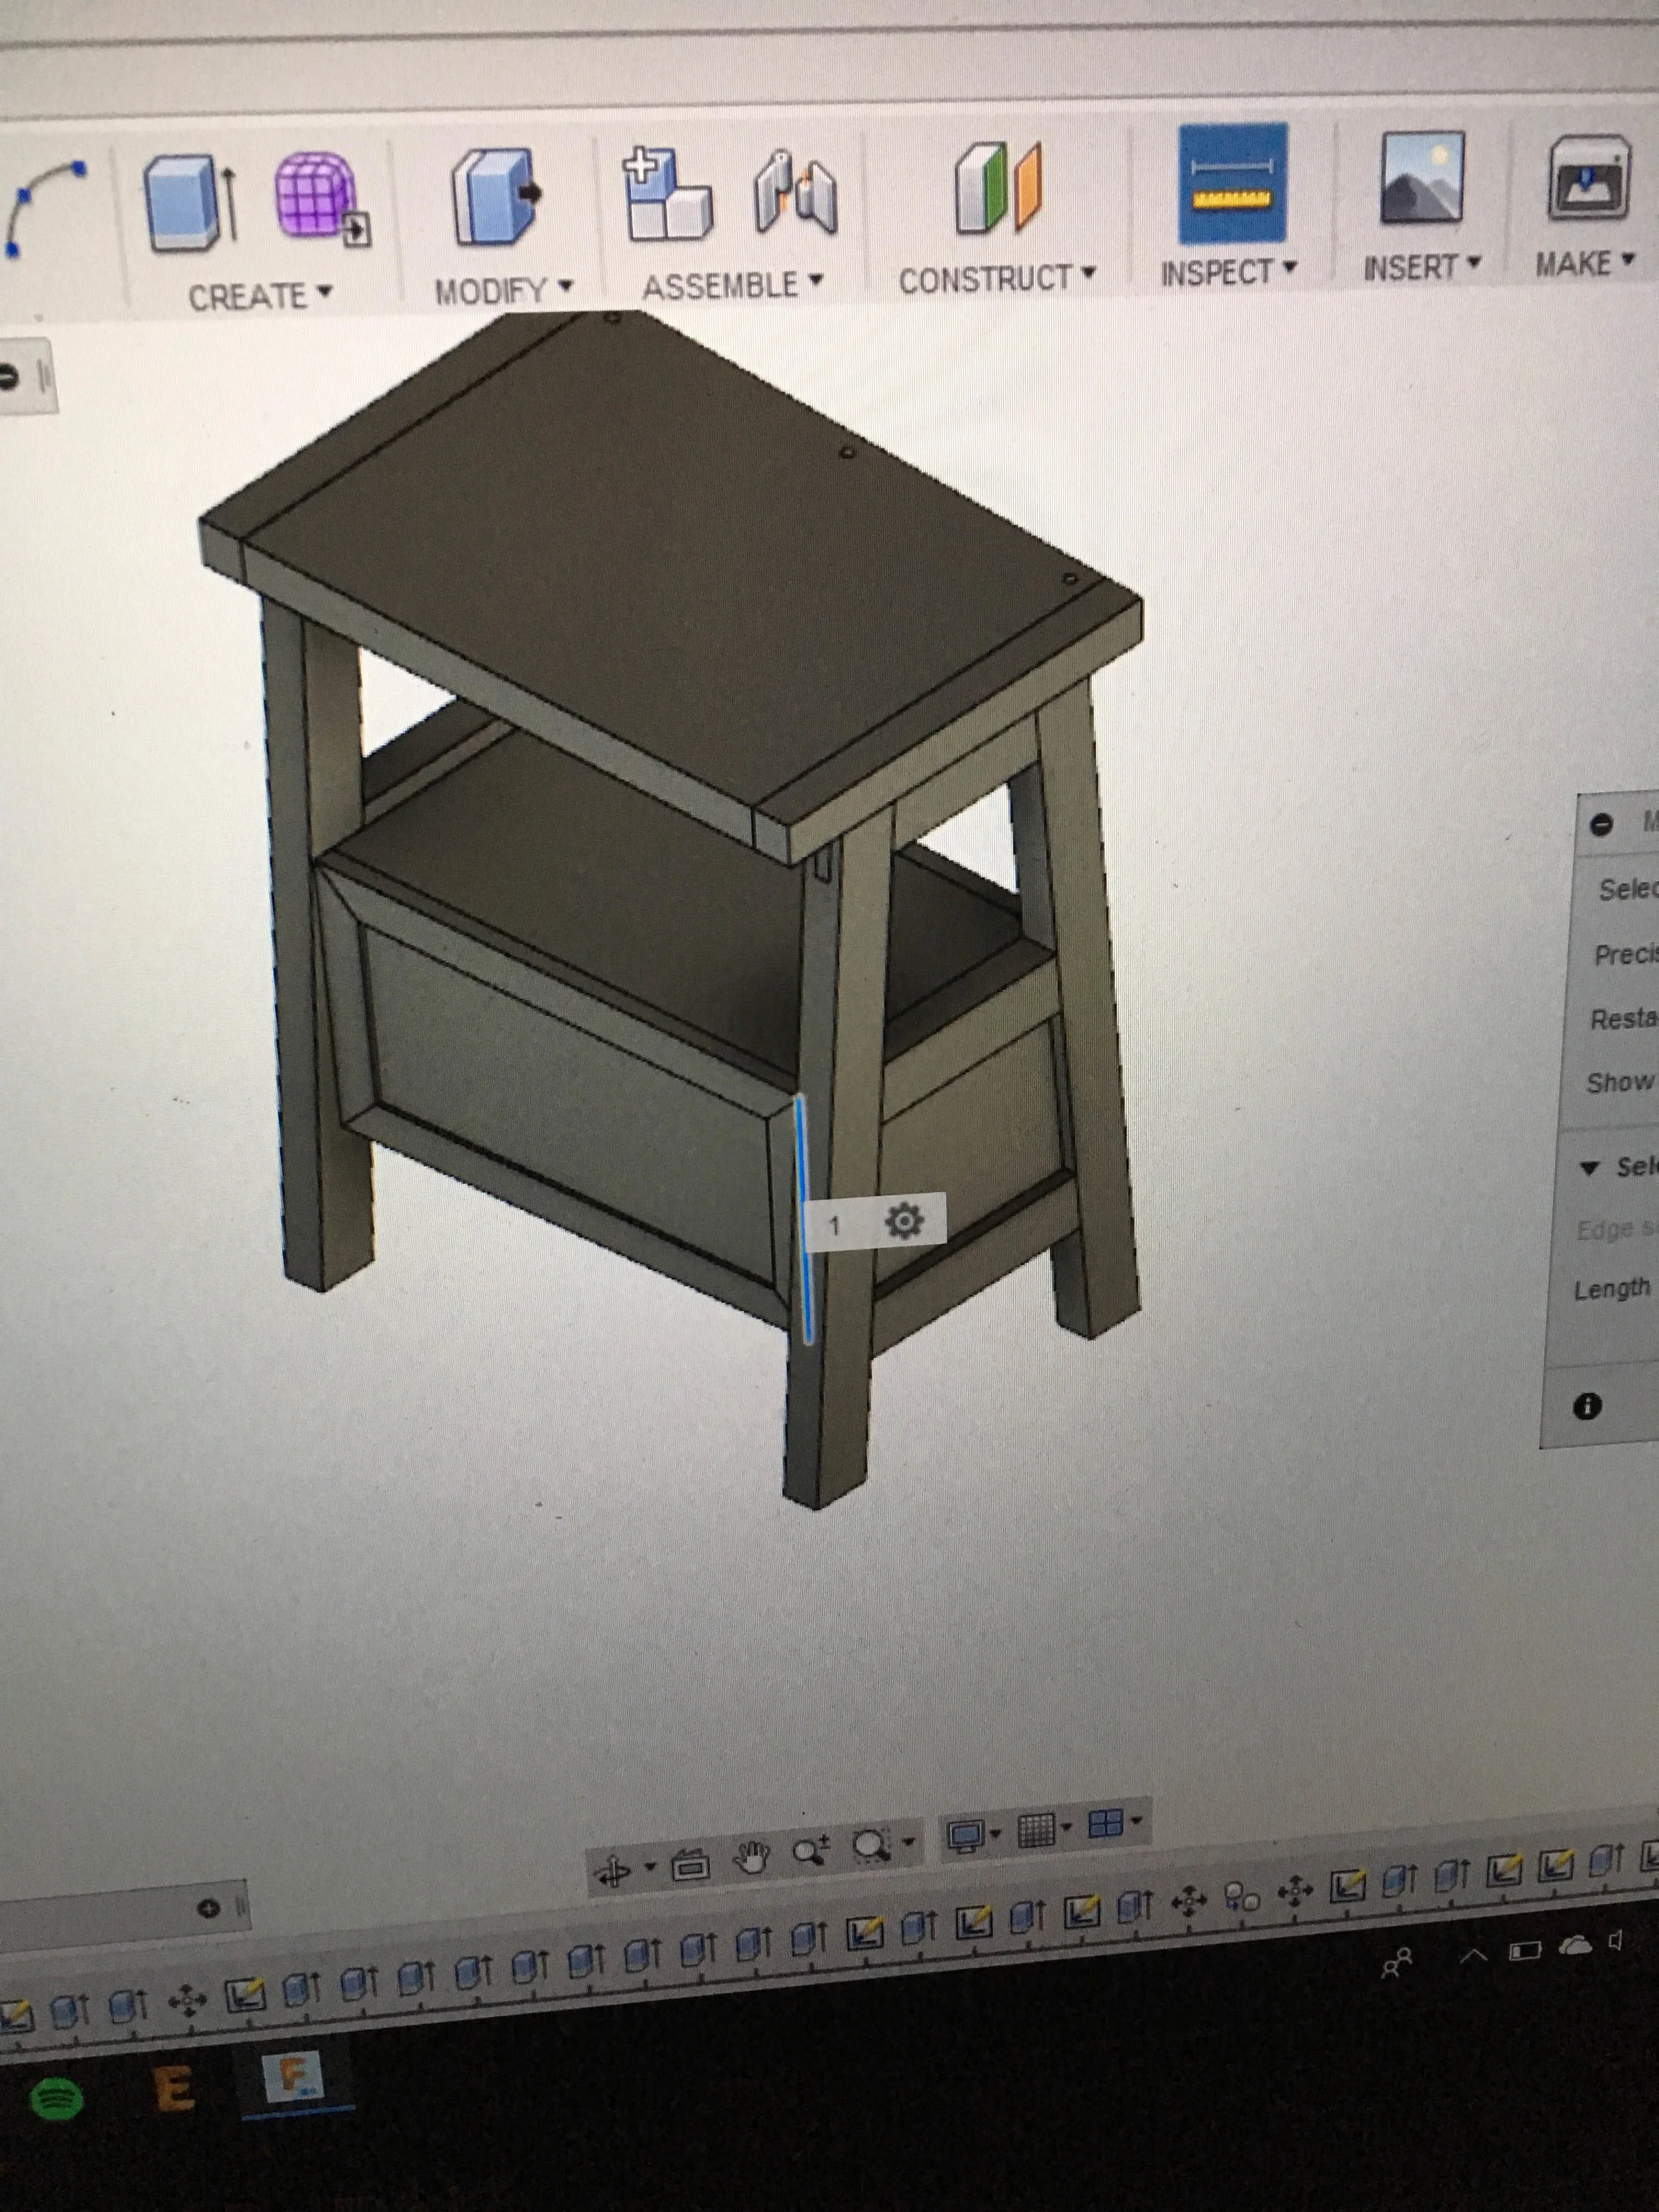
I walk in the door of my apartment and see a particle board shelf staring back. Don’t get me wrong, particle board has its purpose [Our spines and supply chains could not sustain a world full of solid-wood furniture). Regardless of the practicality, particle board didn’t feel right for displaying my most treasured memories, so I decided to create something new… with no plan.
I had no initial sketch because I wanted this piece to evolve organically. Surprises appear in every one of my objects, but I wanted to explore the concept of a piece built in the present, without pencil and paper. I began the process with a piece of lumber and a rough footprint (13.5 x 55 inches). This was my box, this time I couldn’t think outside the box, but that constraint, with no others, was oddly freeing. Over the next 5 days I worked from the bottom-up, arriving at my 36 inch max height with a piece I could never have conceived in one-sitting.

It began with a miter.
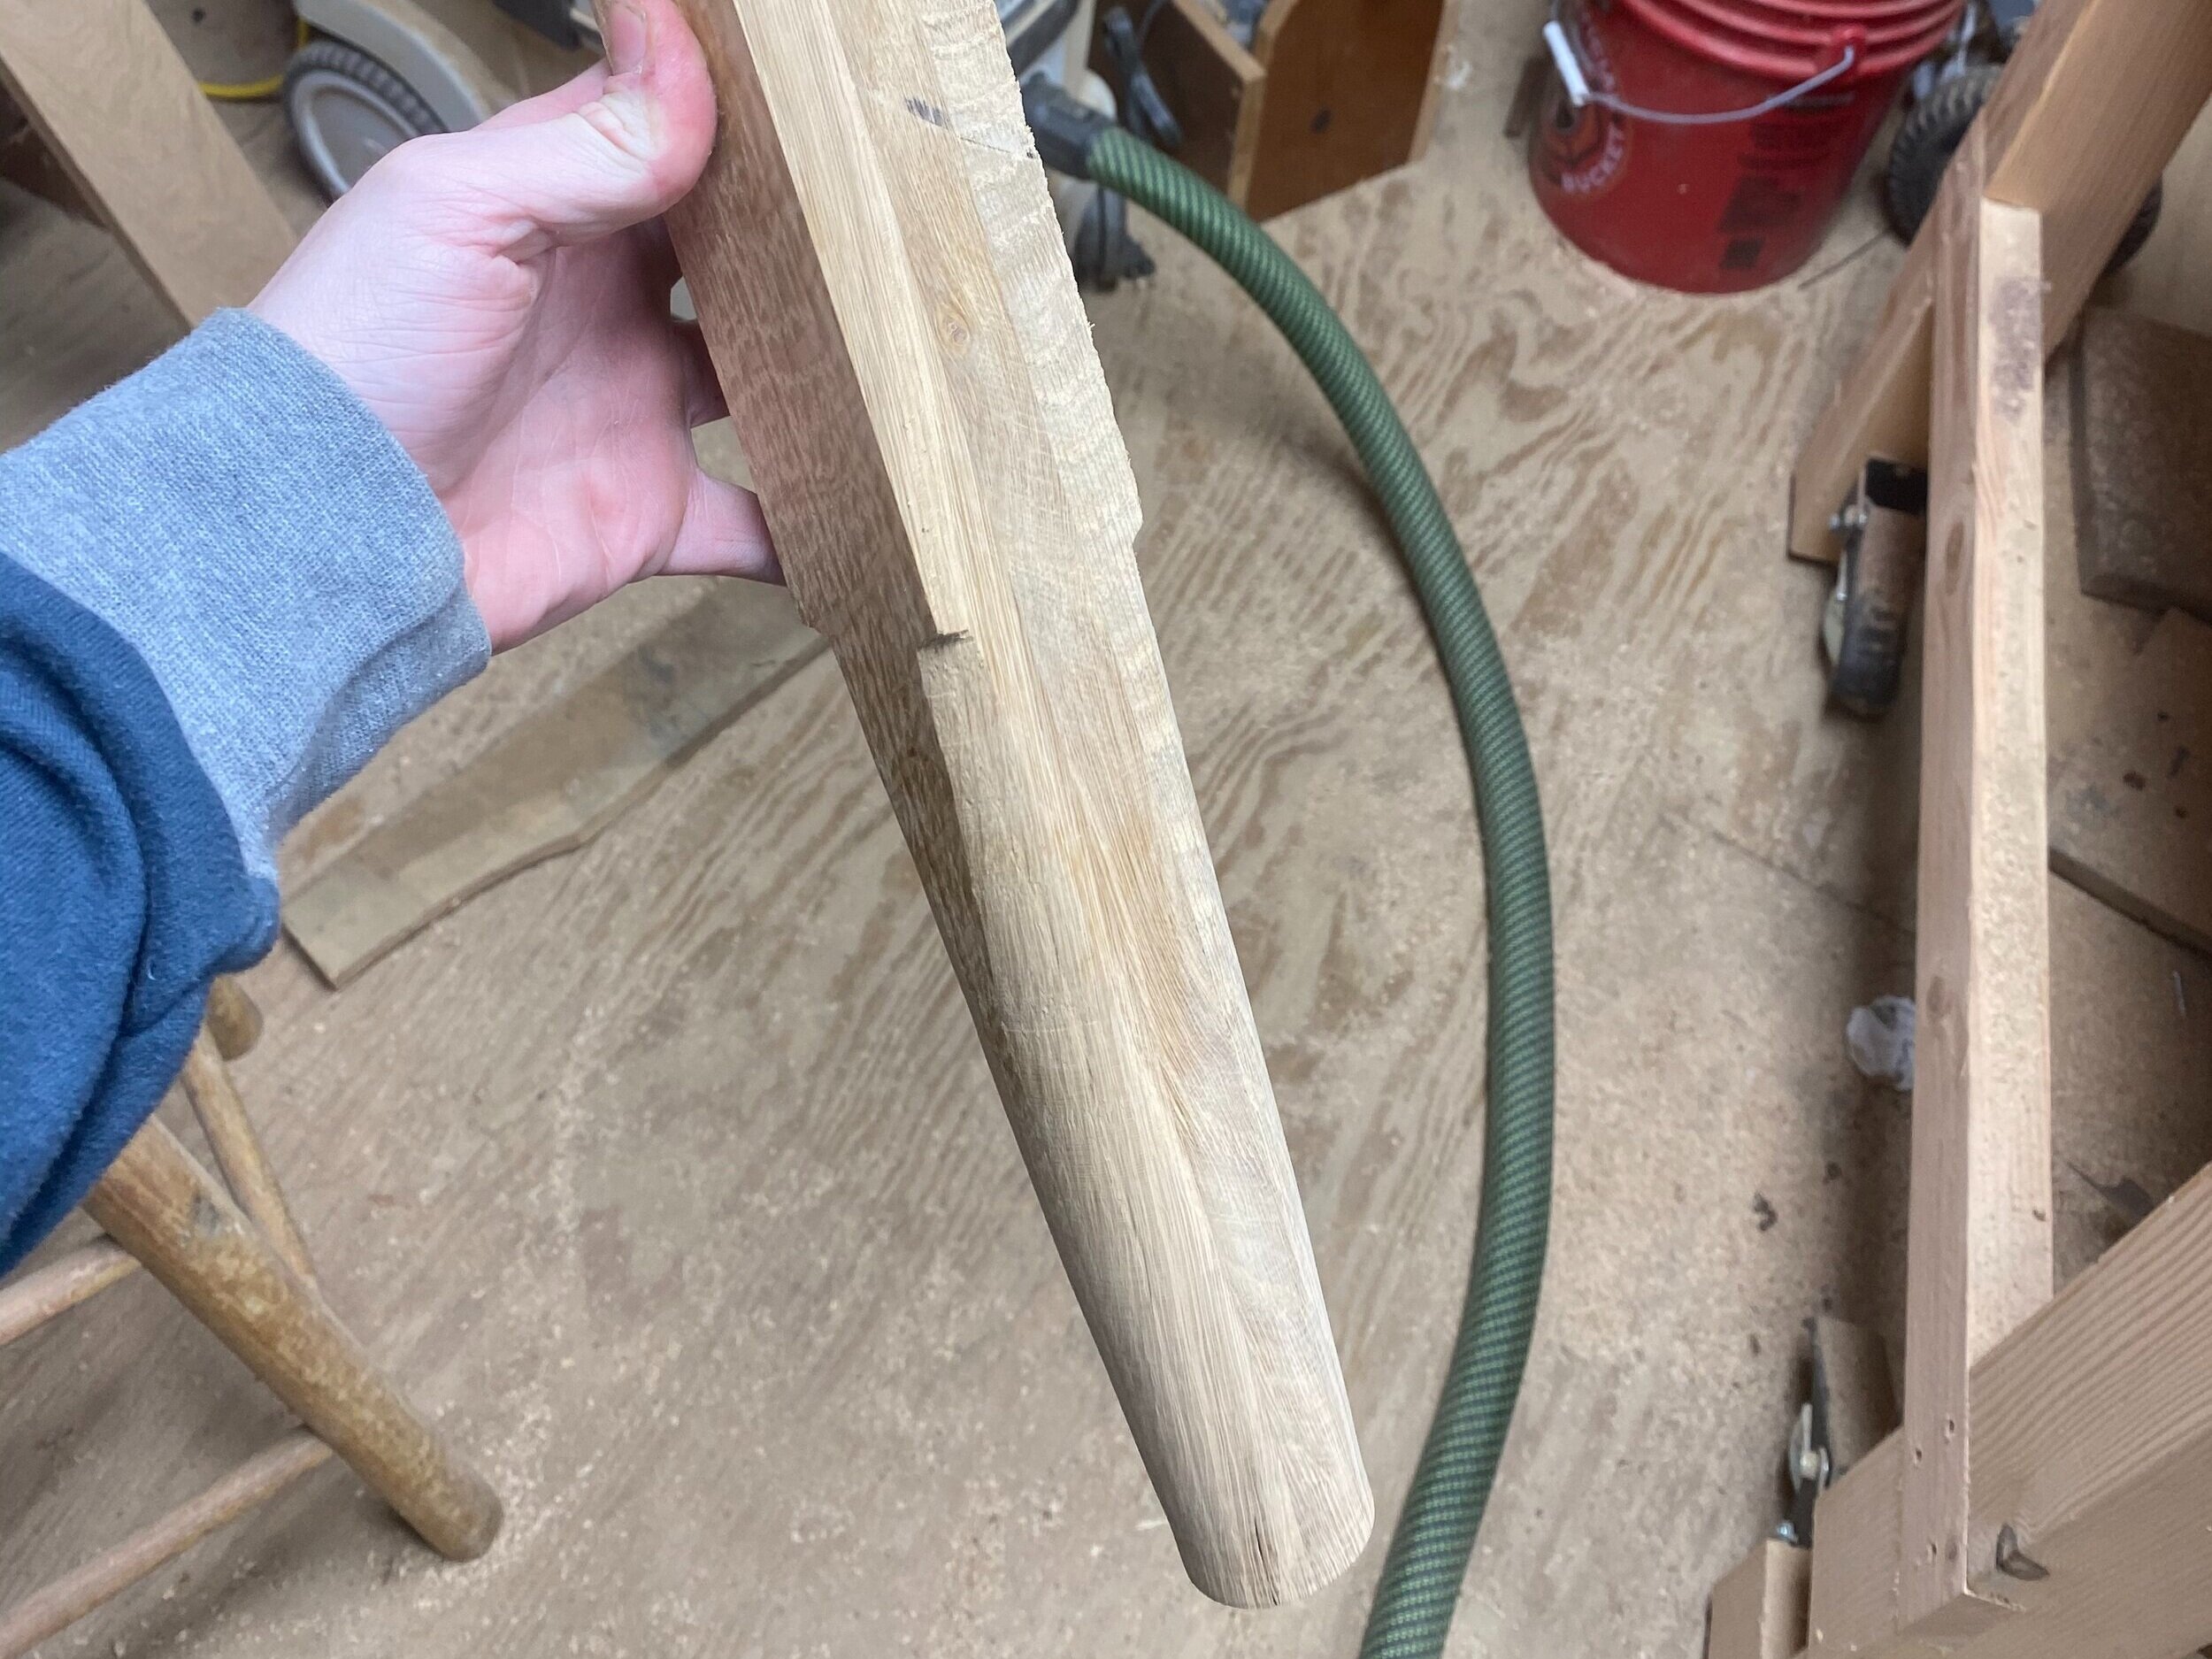
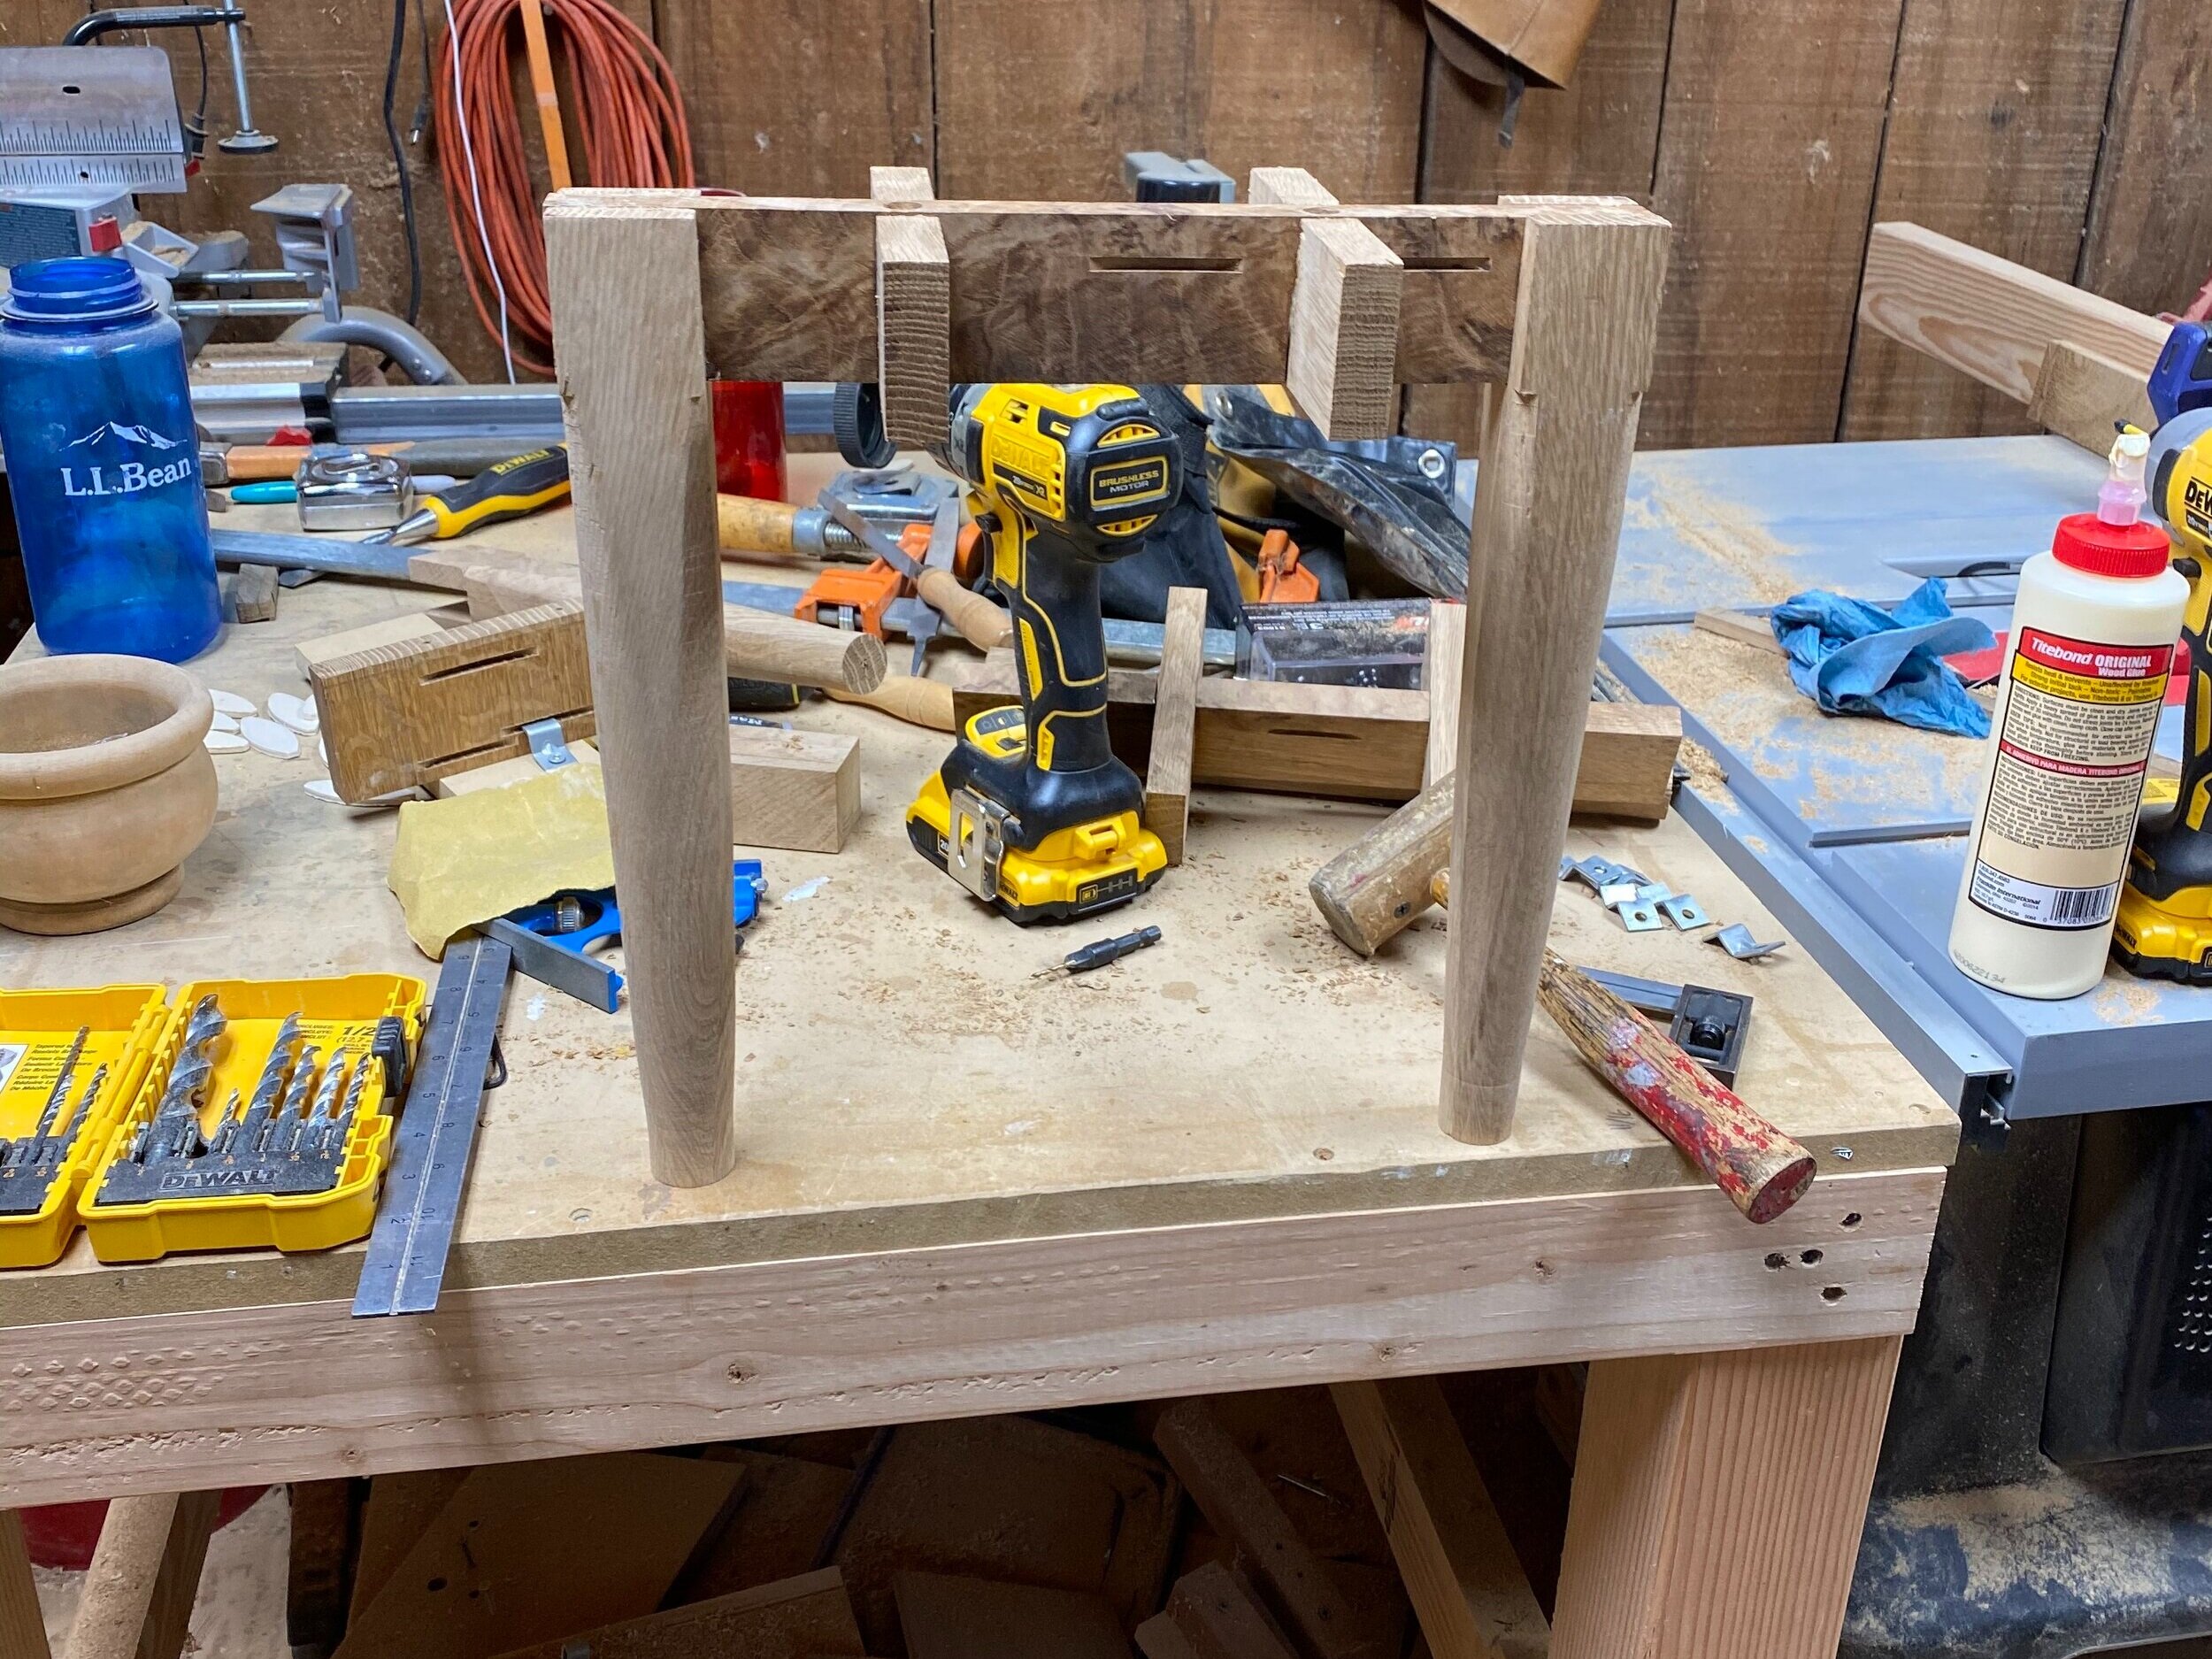
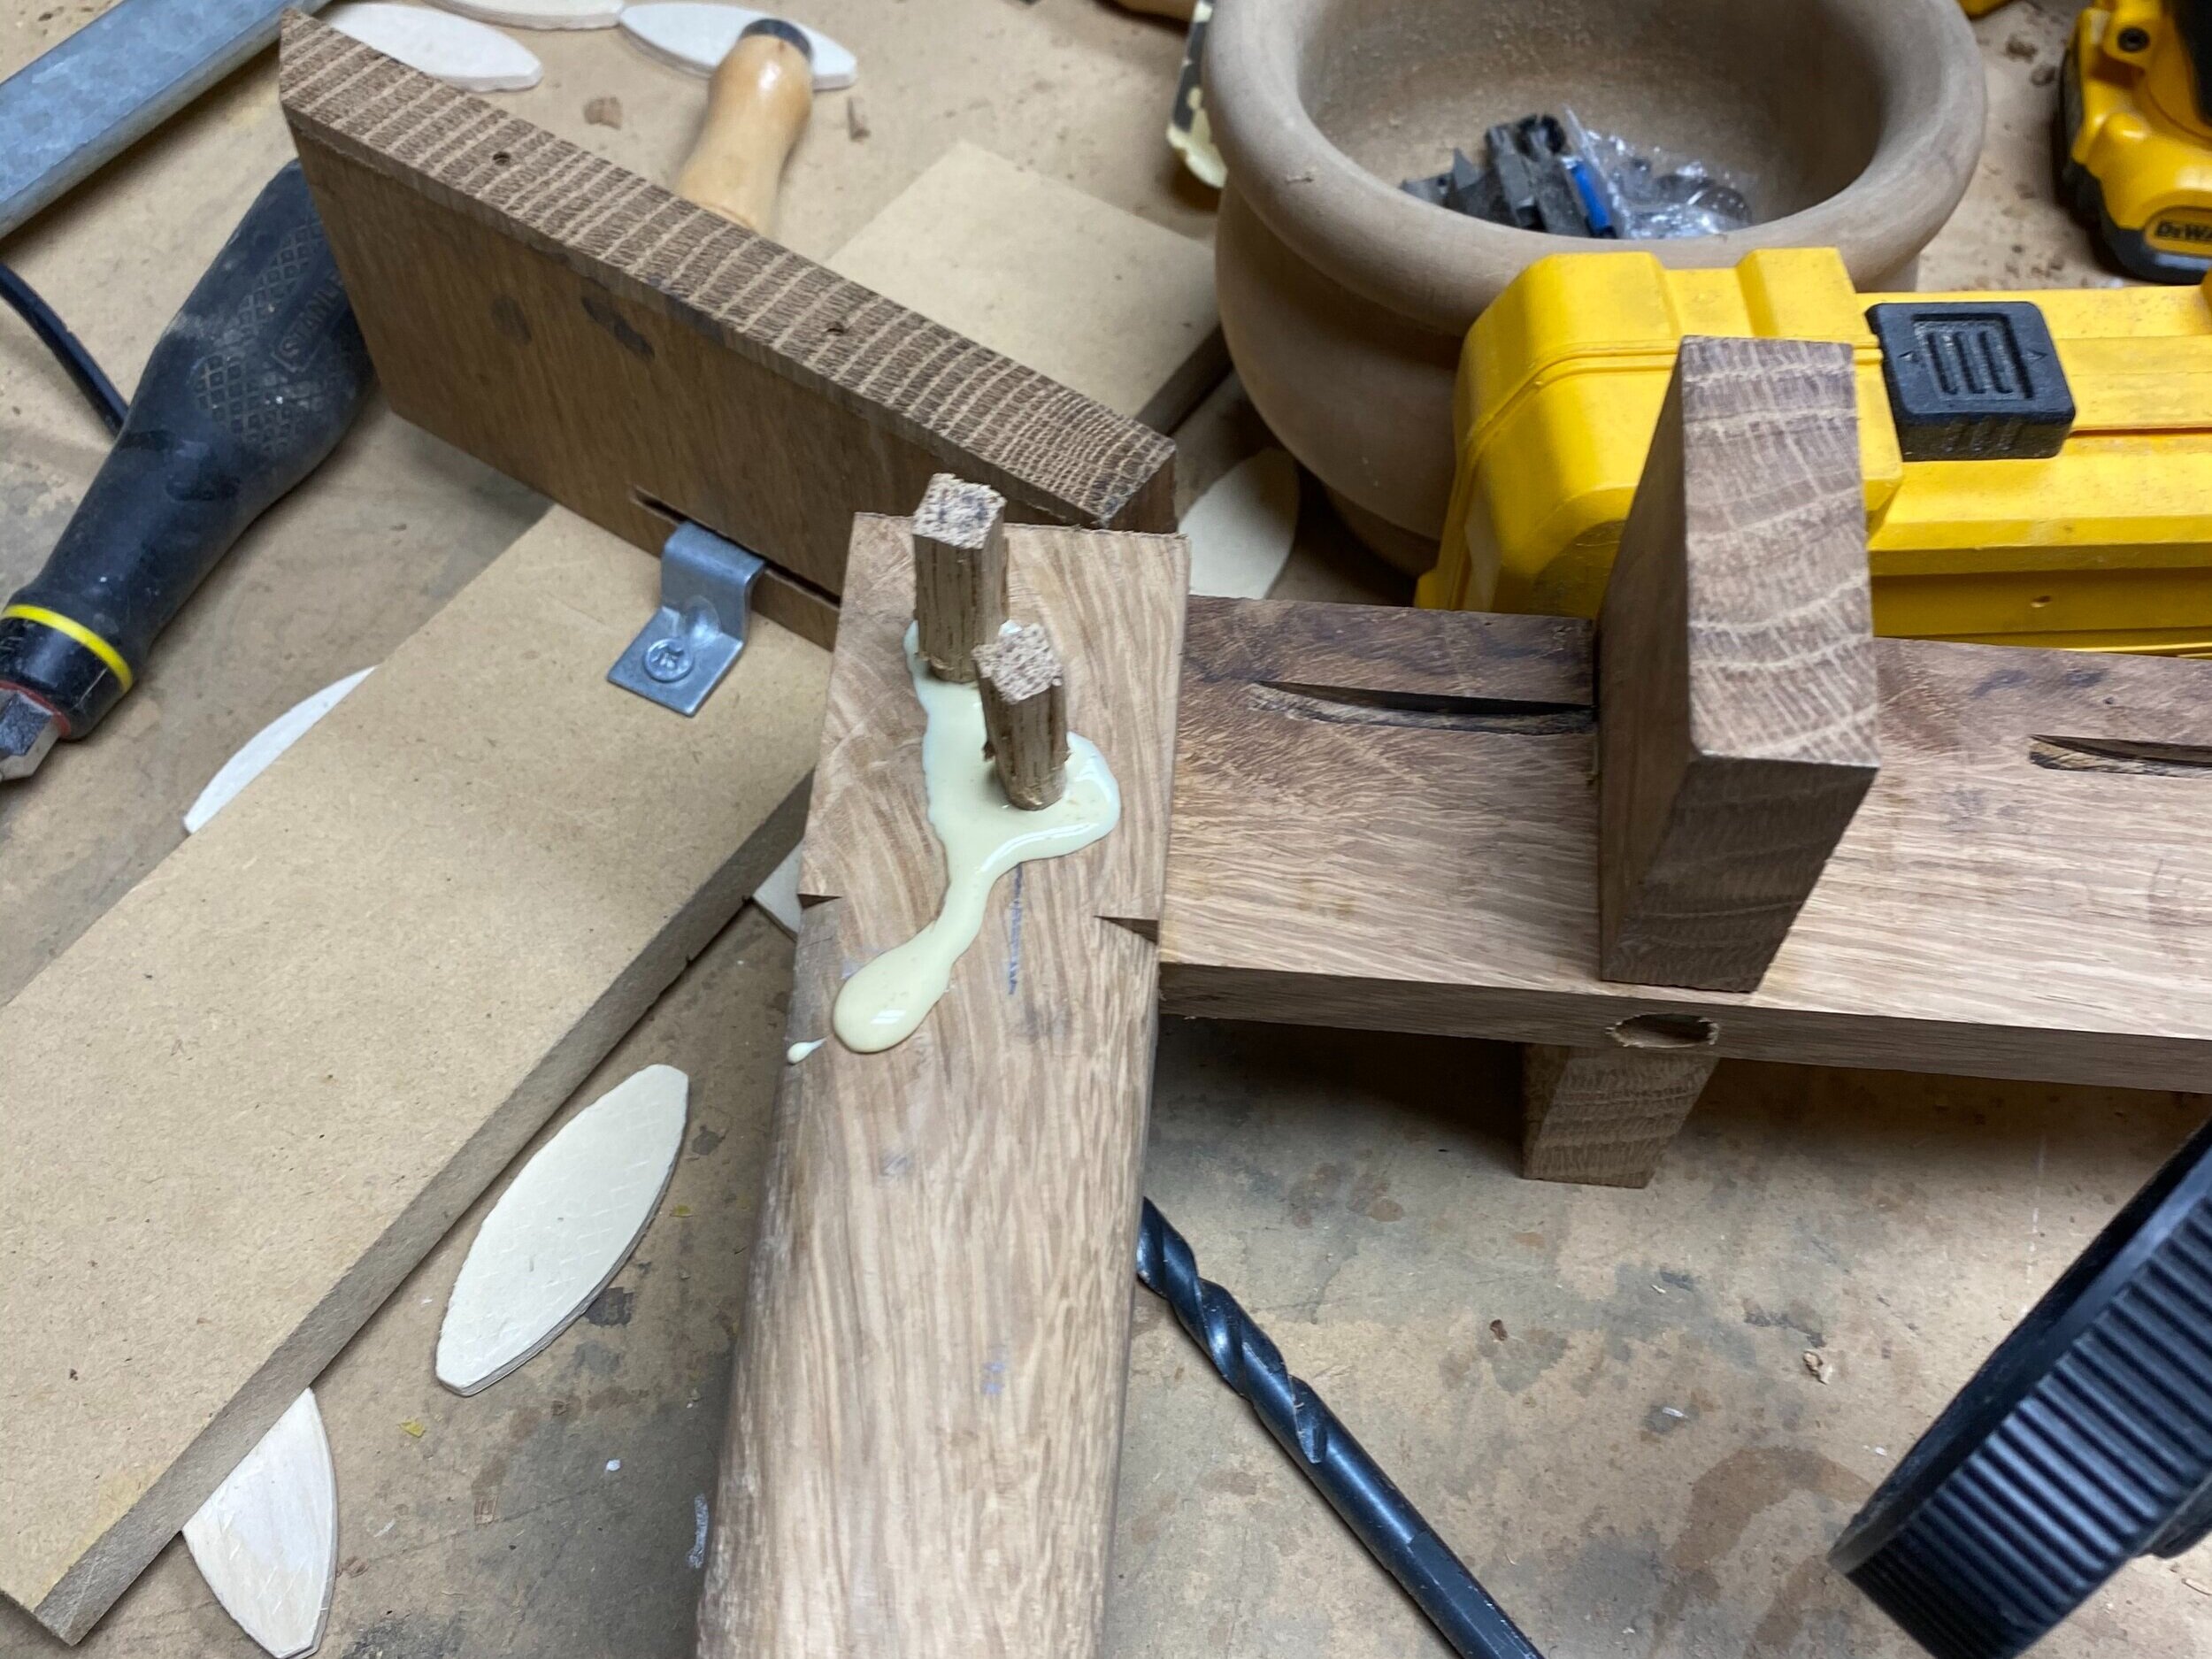
A miter joint would not be a woodworker’s first choice for a load-bearing shelf. These joints have much more surface area than a conventional 90˙ joint, but the slip plane poses a major problem since the wood fibers don’t need to fail for the piece to come crumbling down. If this furniture piece were for a client I would engineer it to sustain this design change, but because it was for me, I wanted to take a chance. I reinforced the joint with a biscuit to provide additional support but I chose fragility because I saw a chance to learn whether it stood or fell. After I practiced some 5th grade mental geometry and spent more time than I’d like to admit cutting angles on the miter saw, I found an angle and clamping mechanism I was satisfied with, and I glued the legs in the little time I had before the temperature dropped.
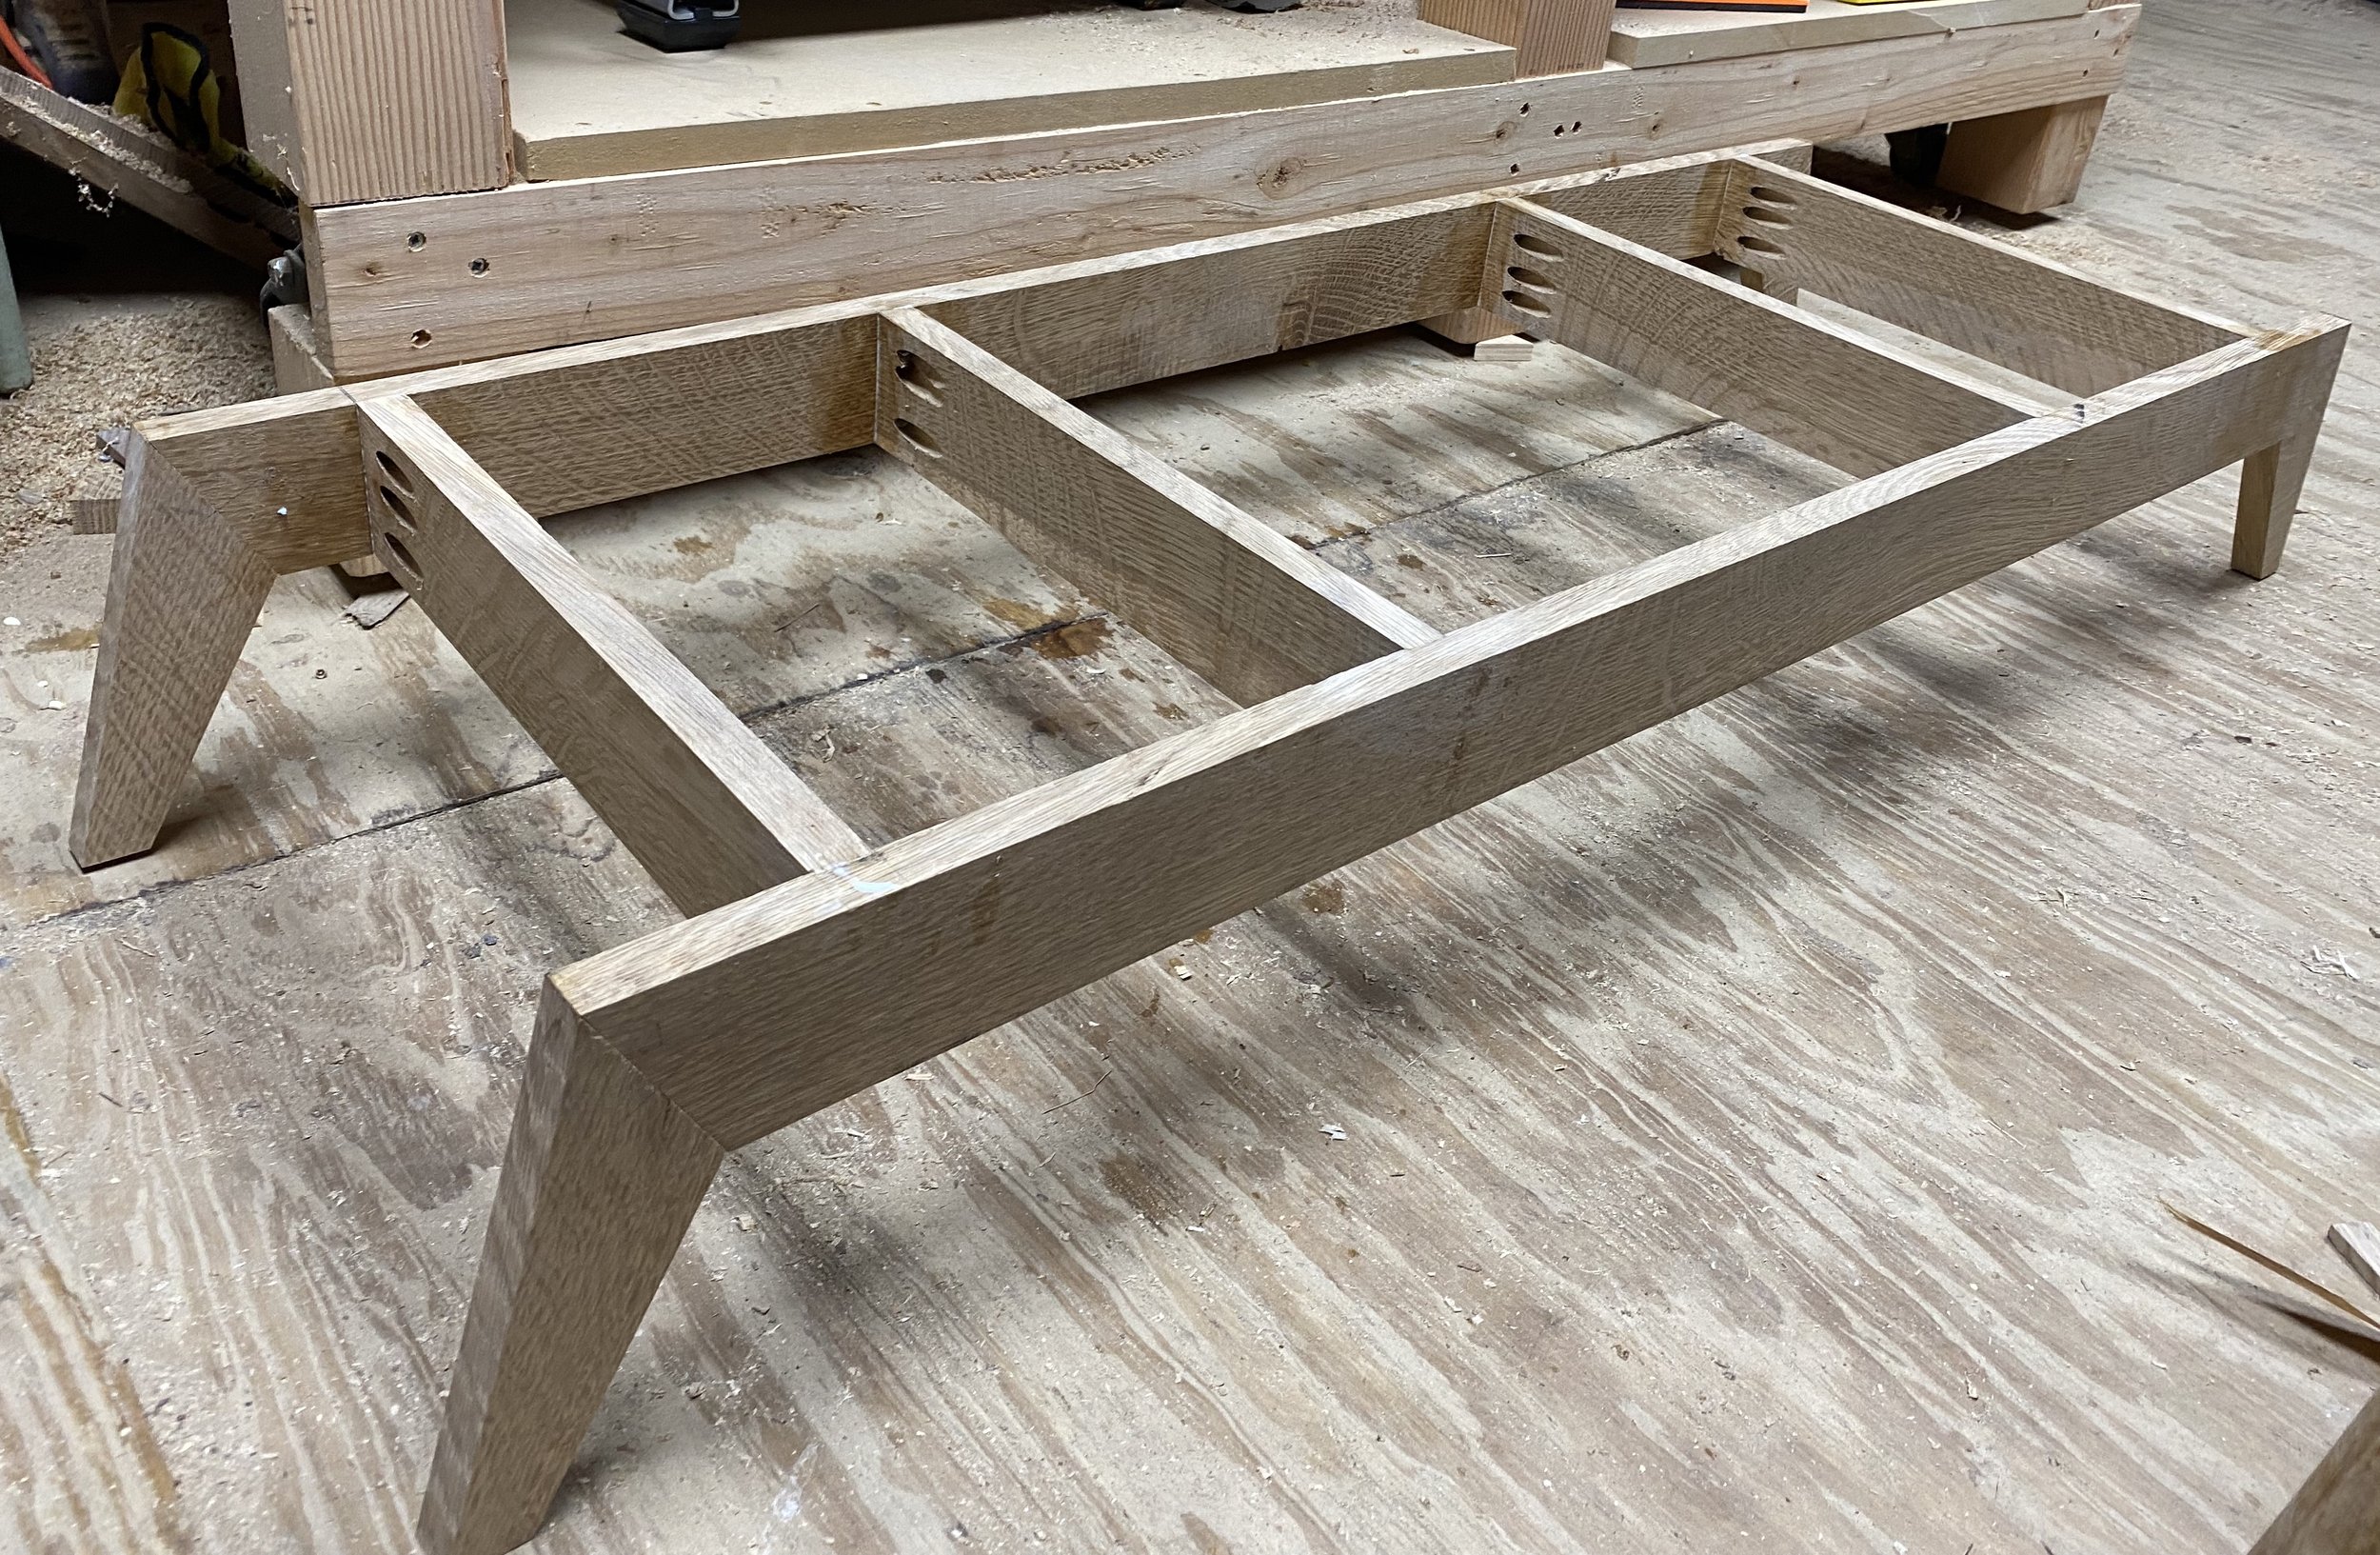
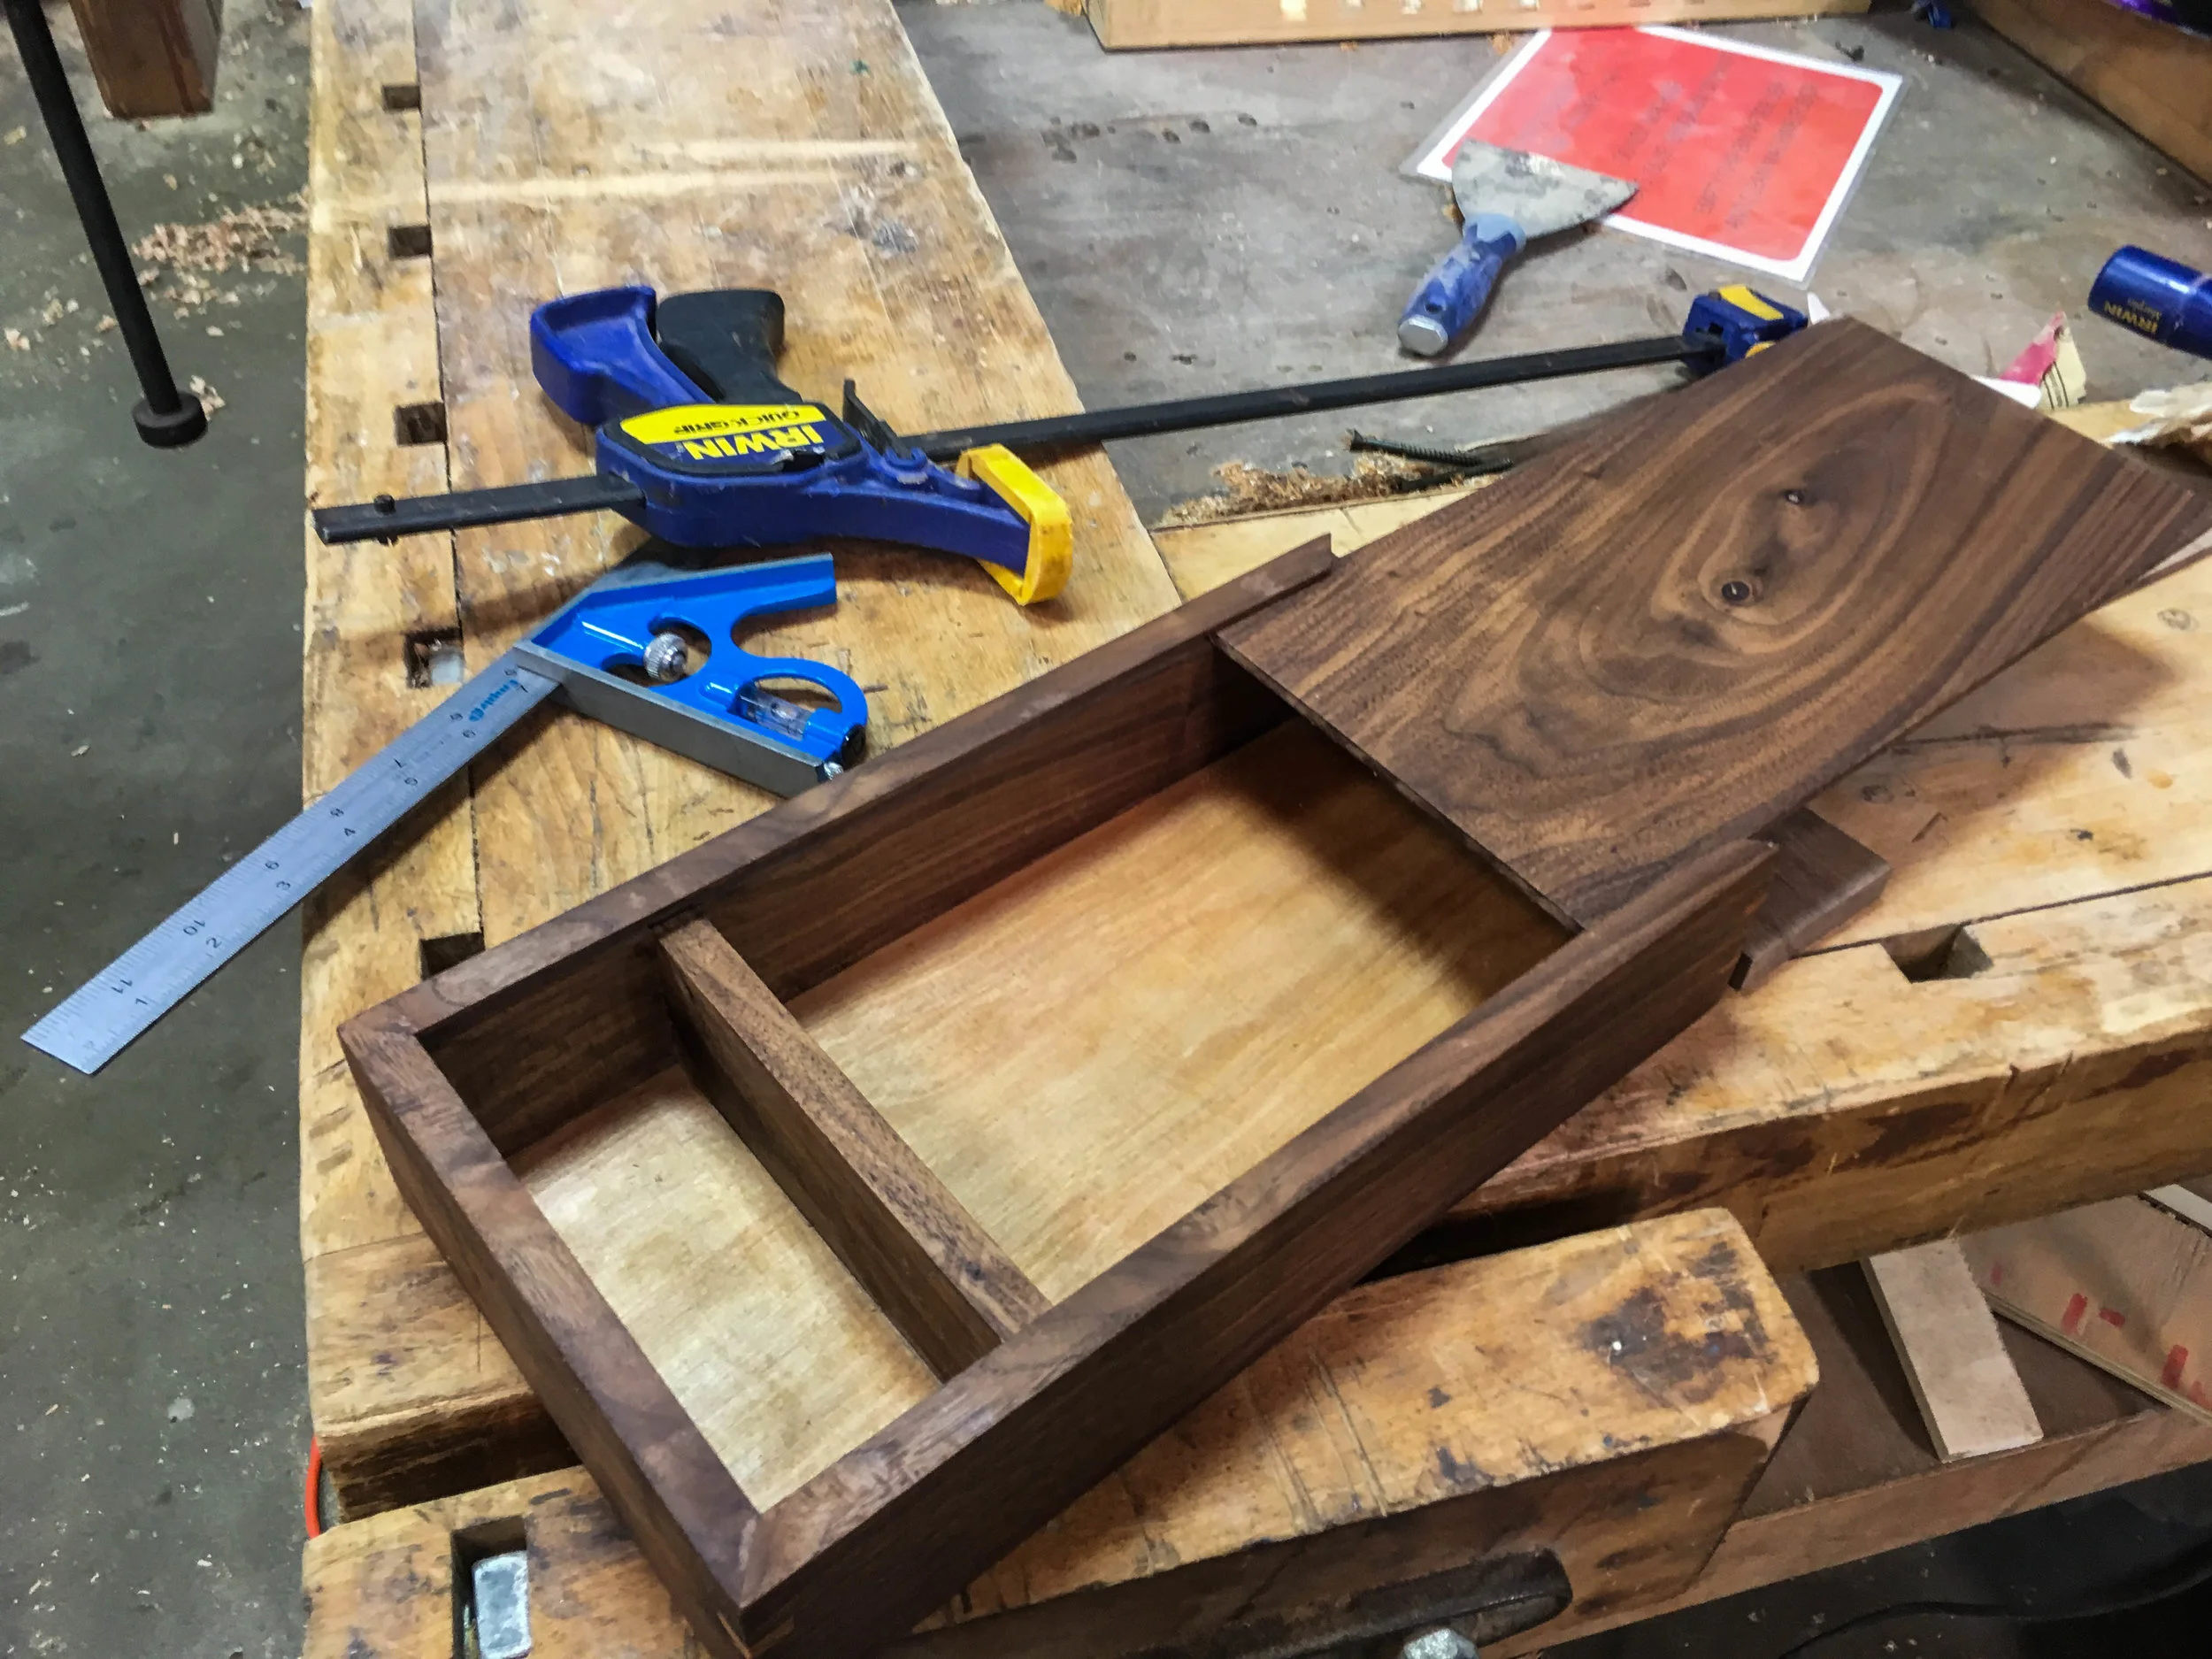
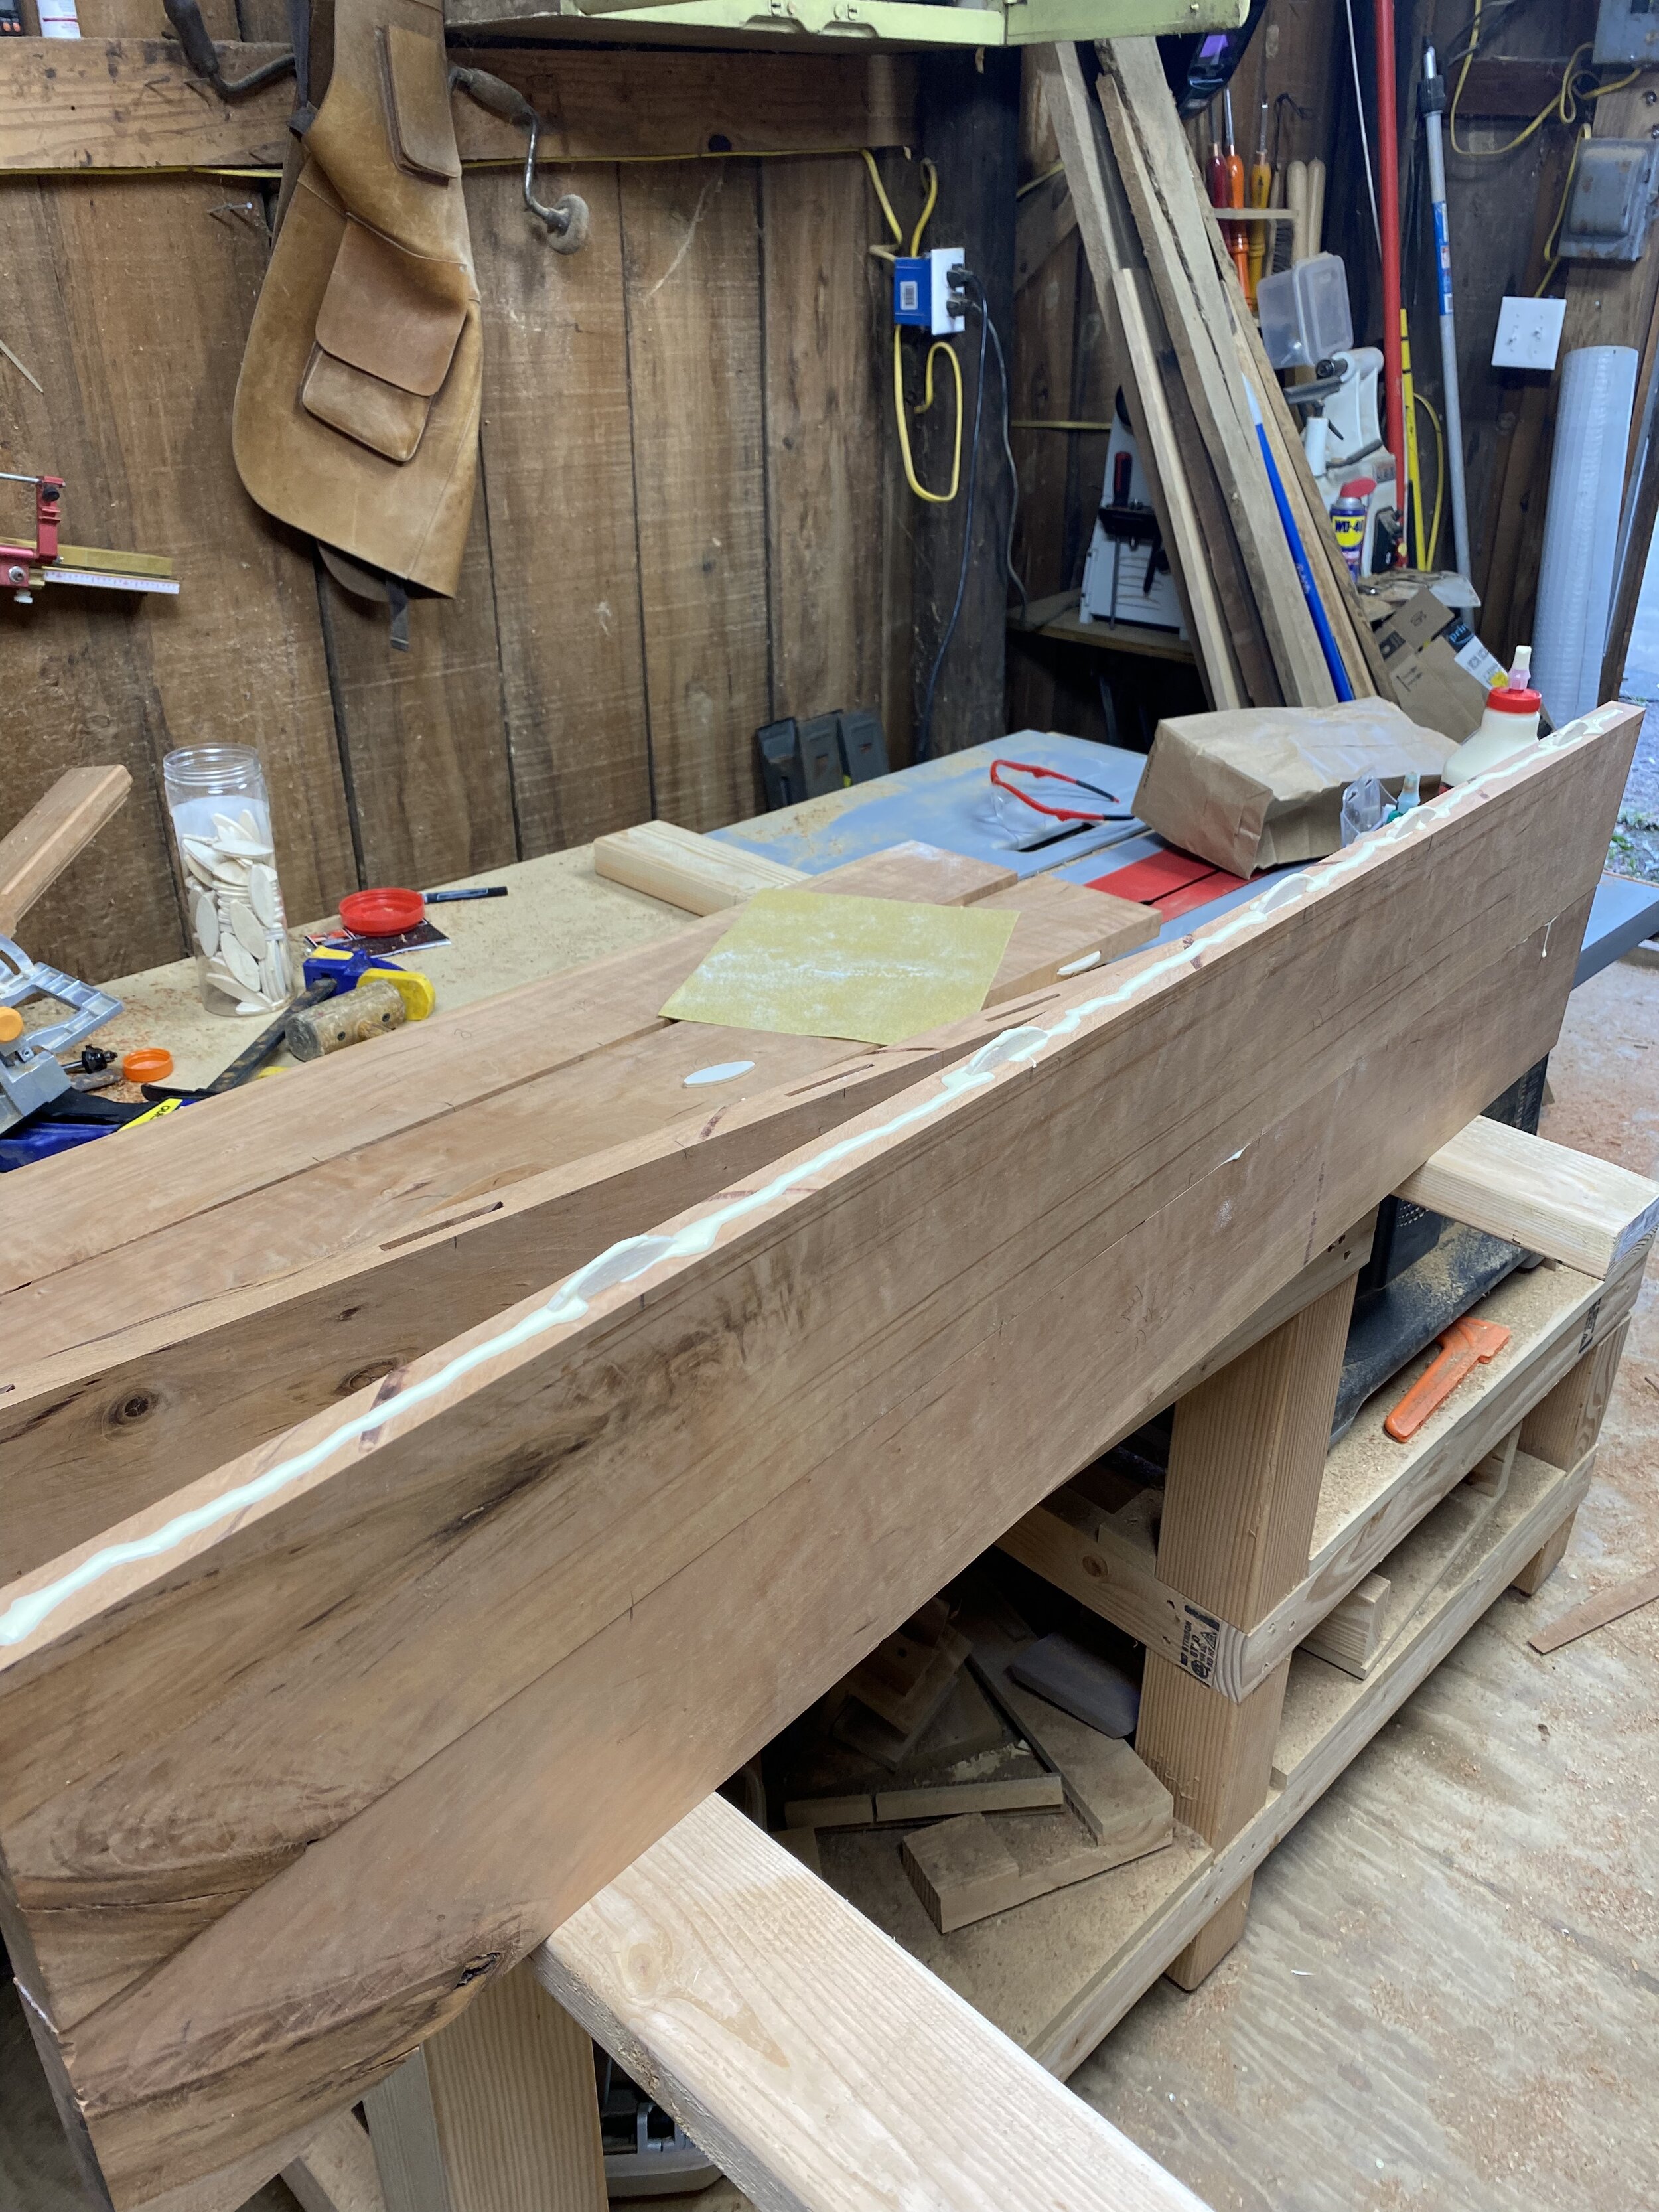
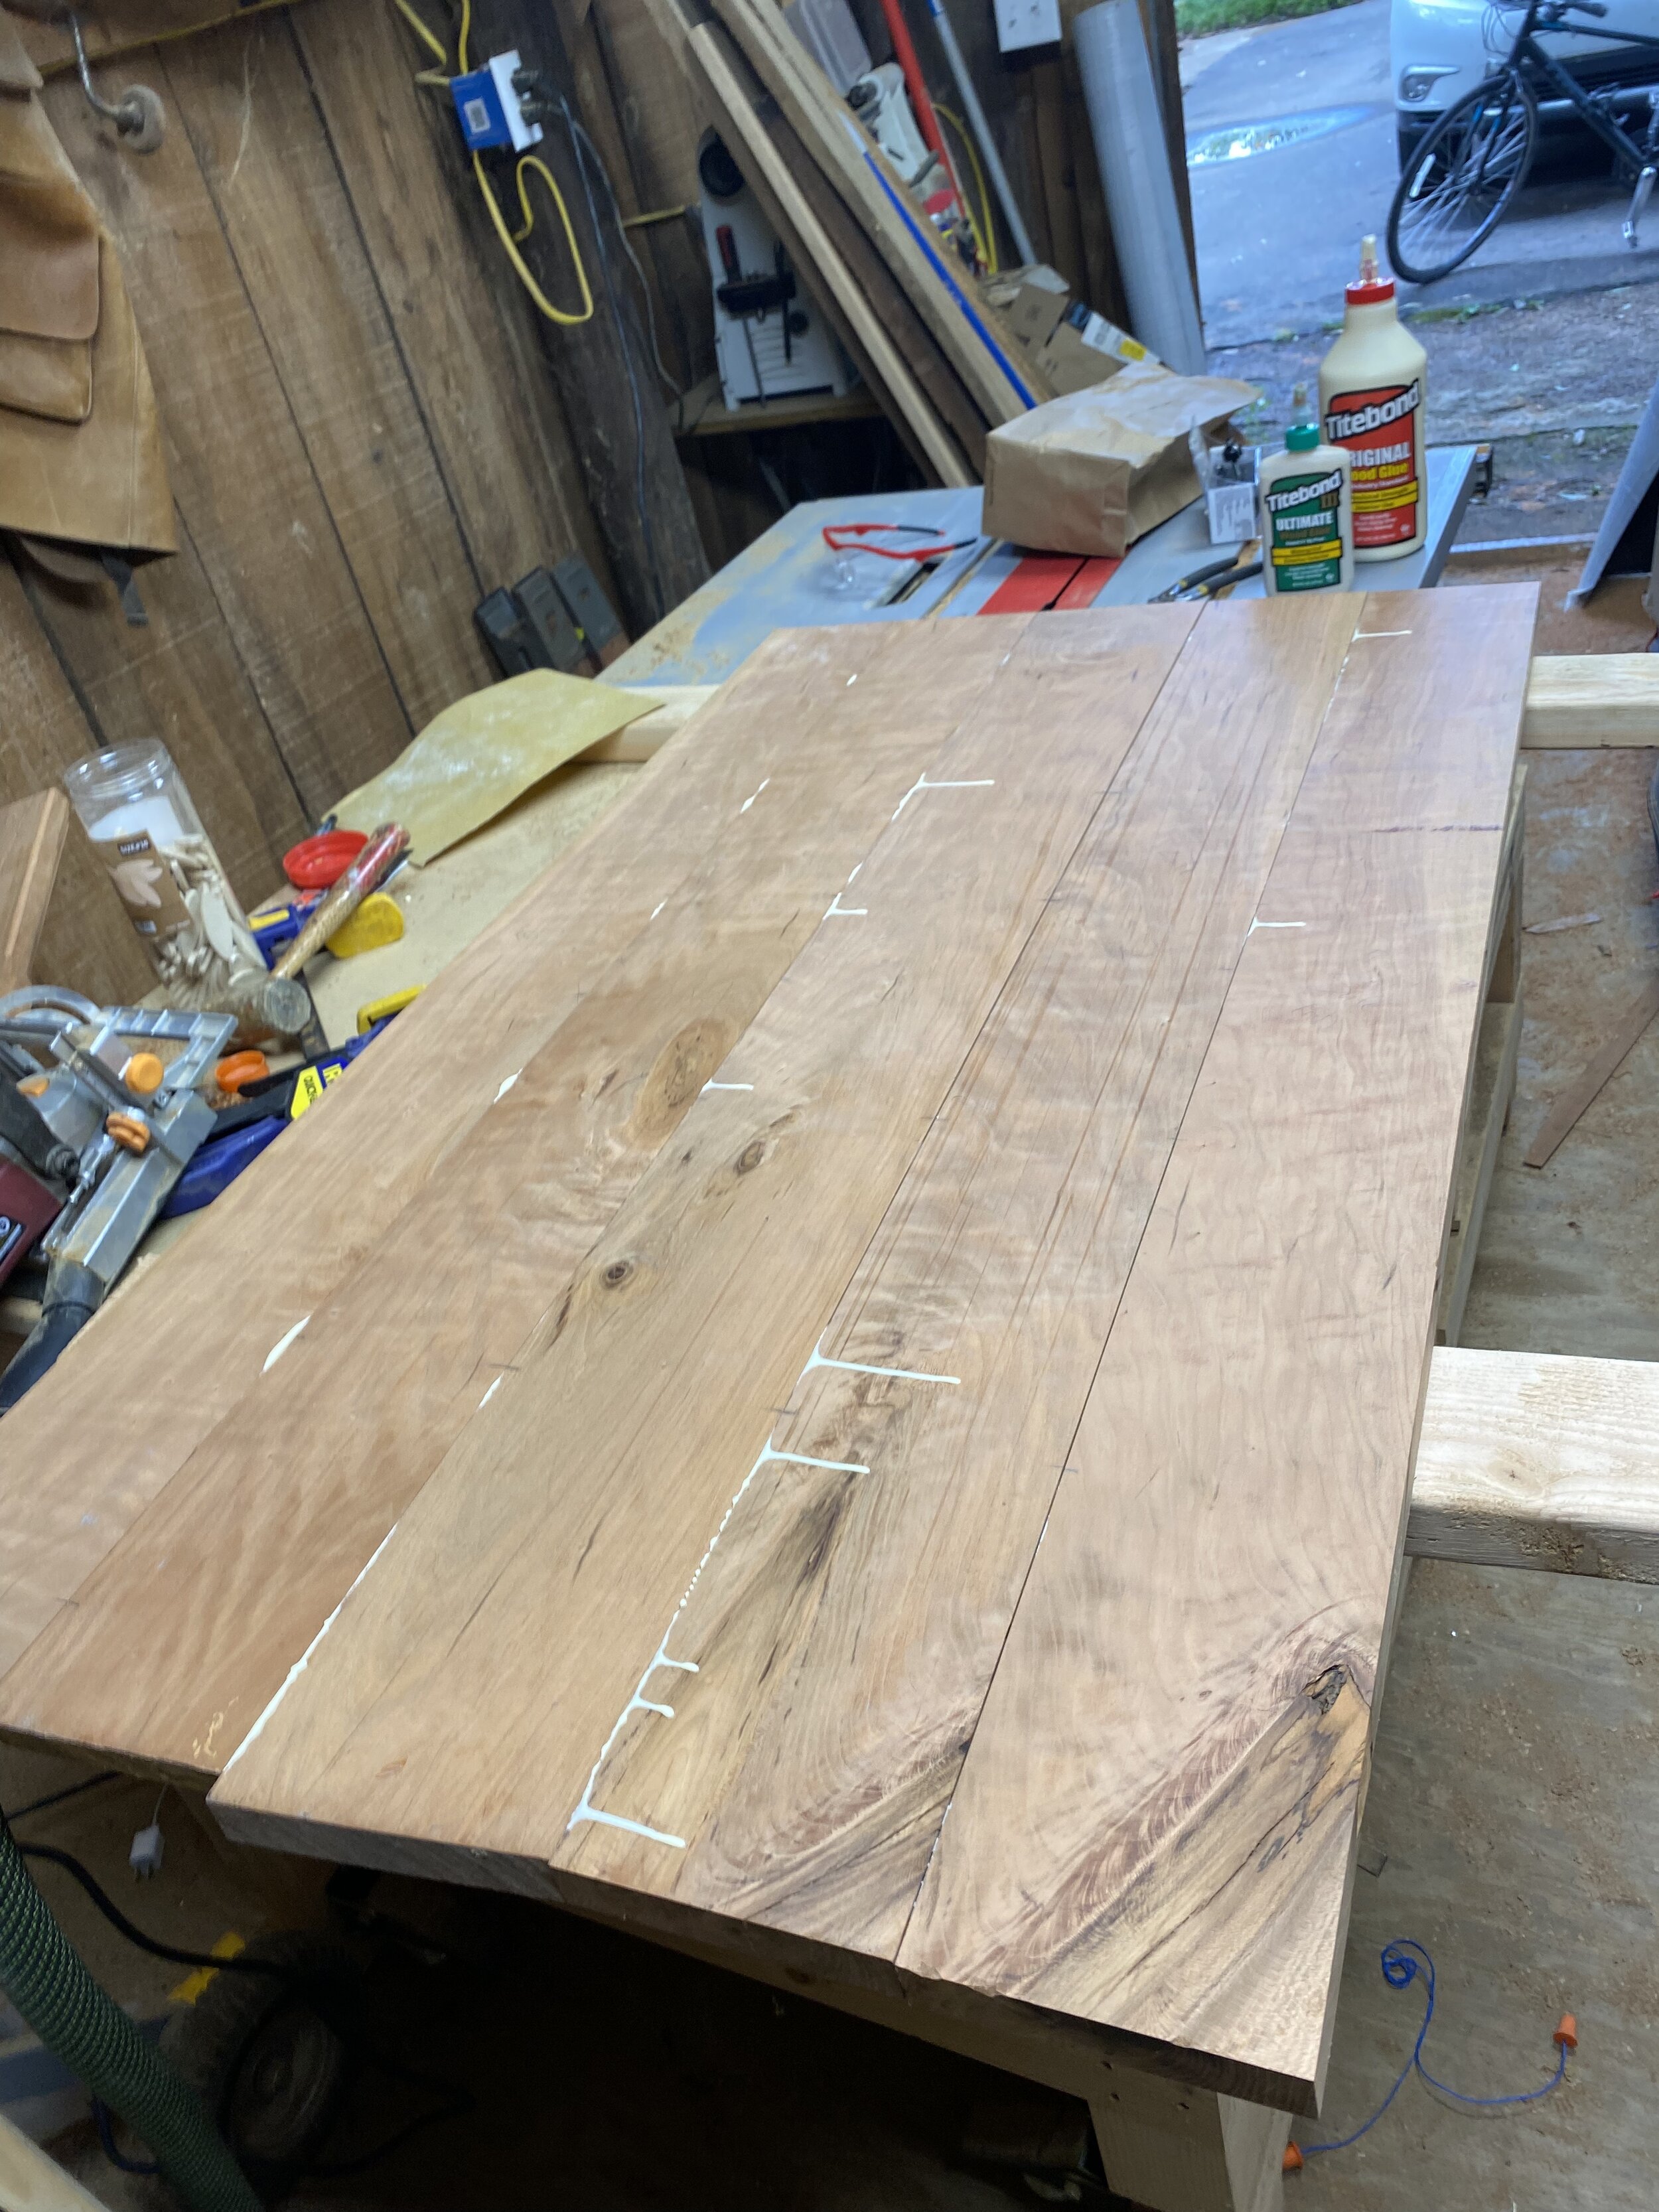
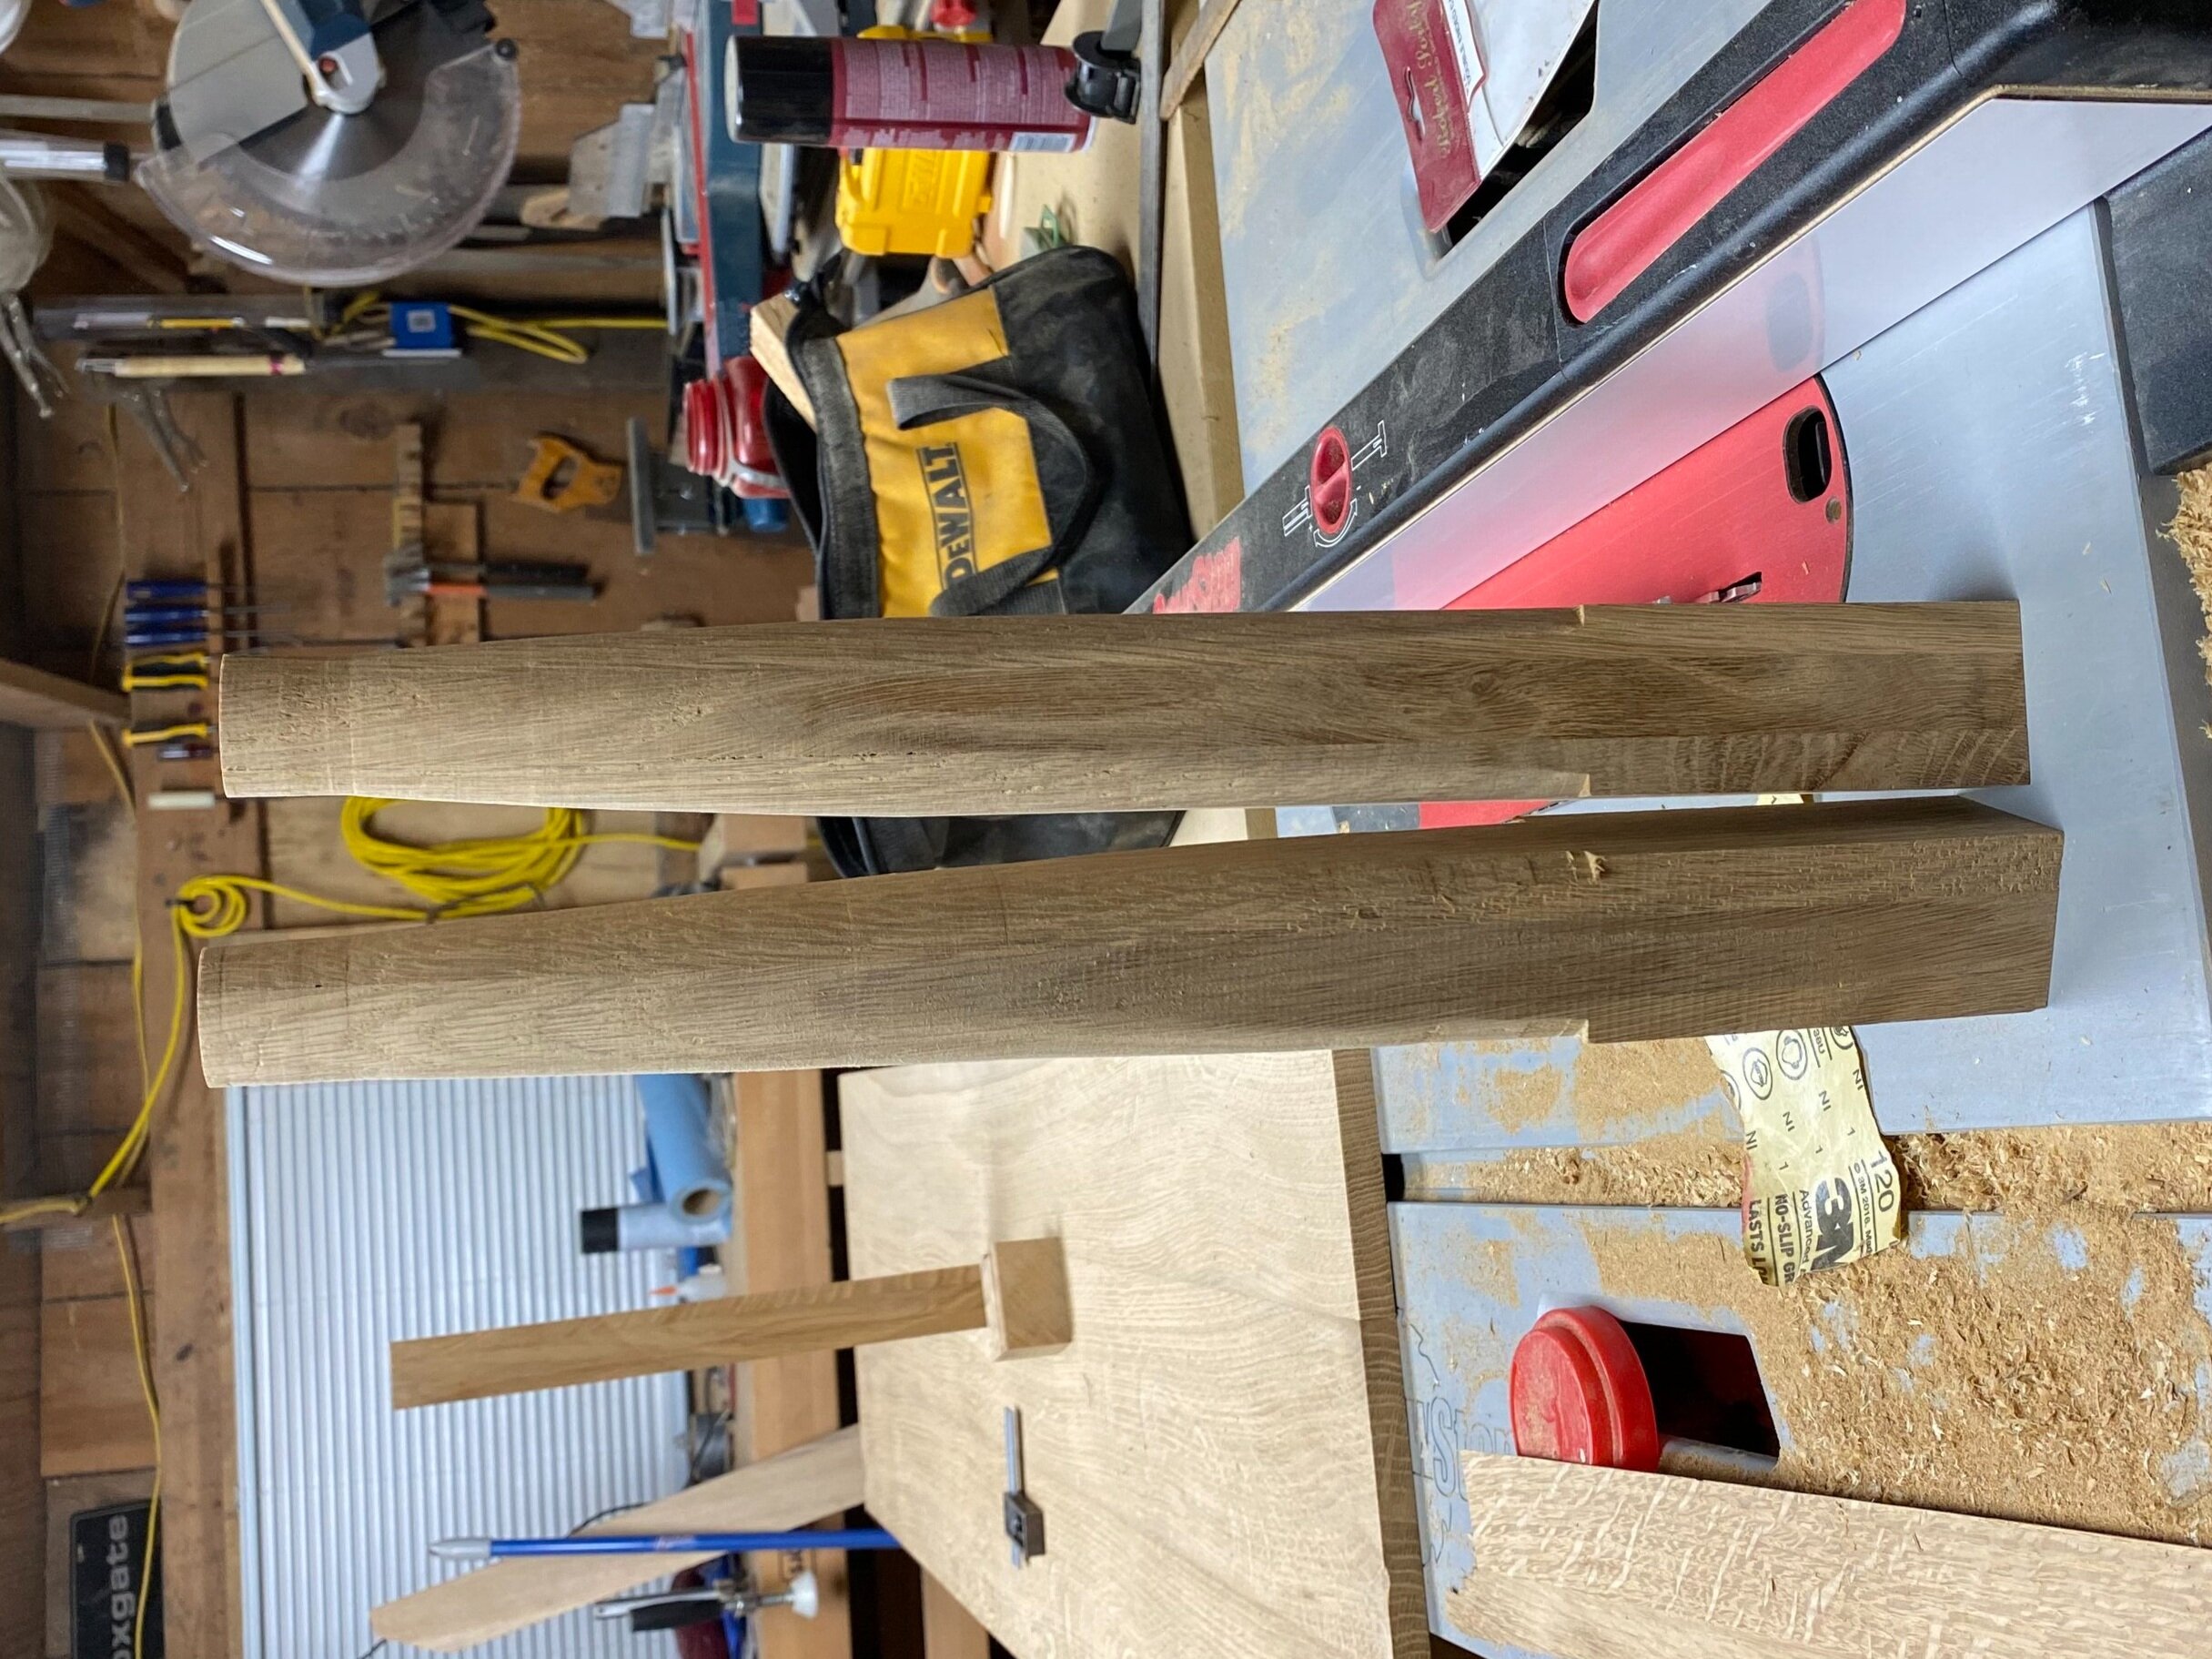
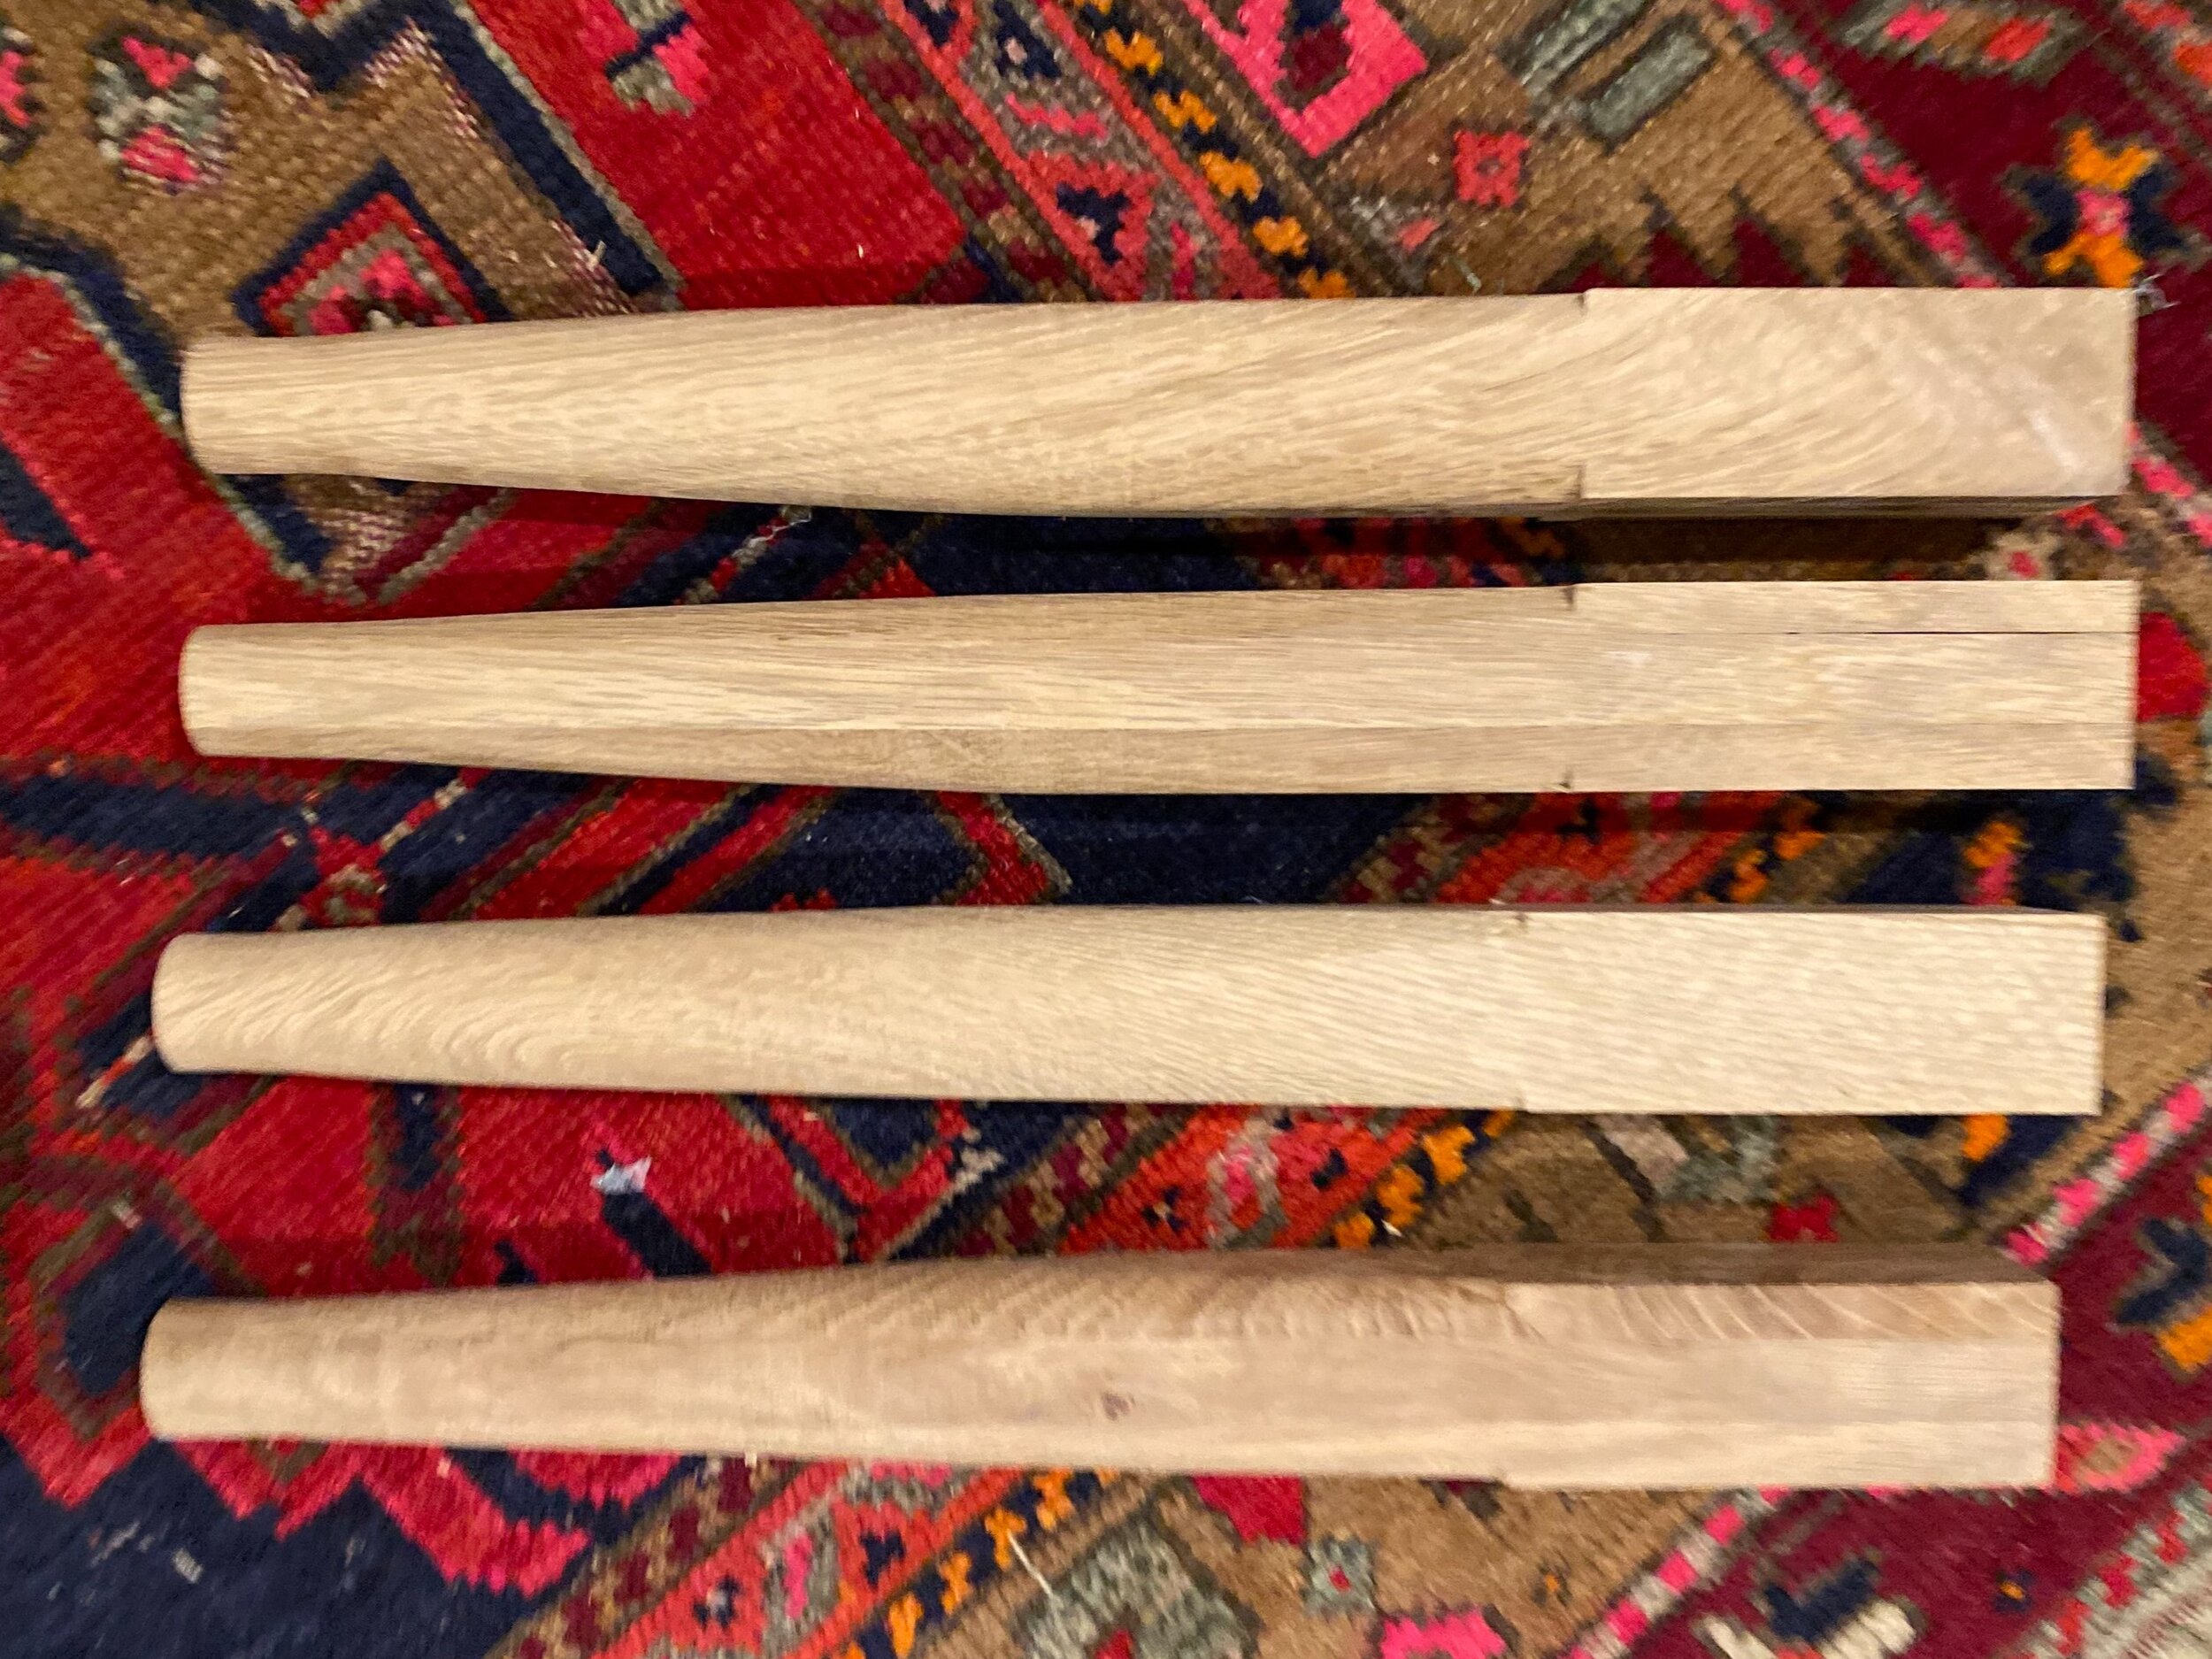
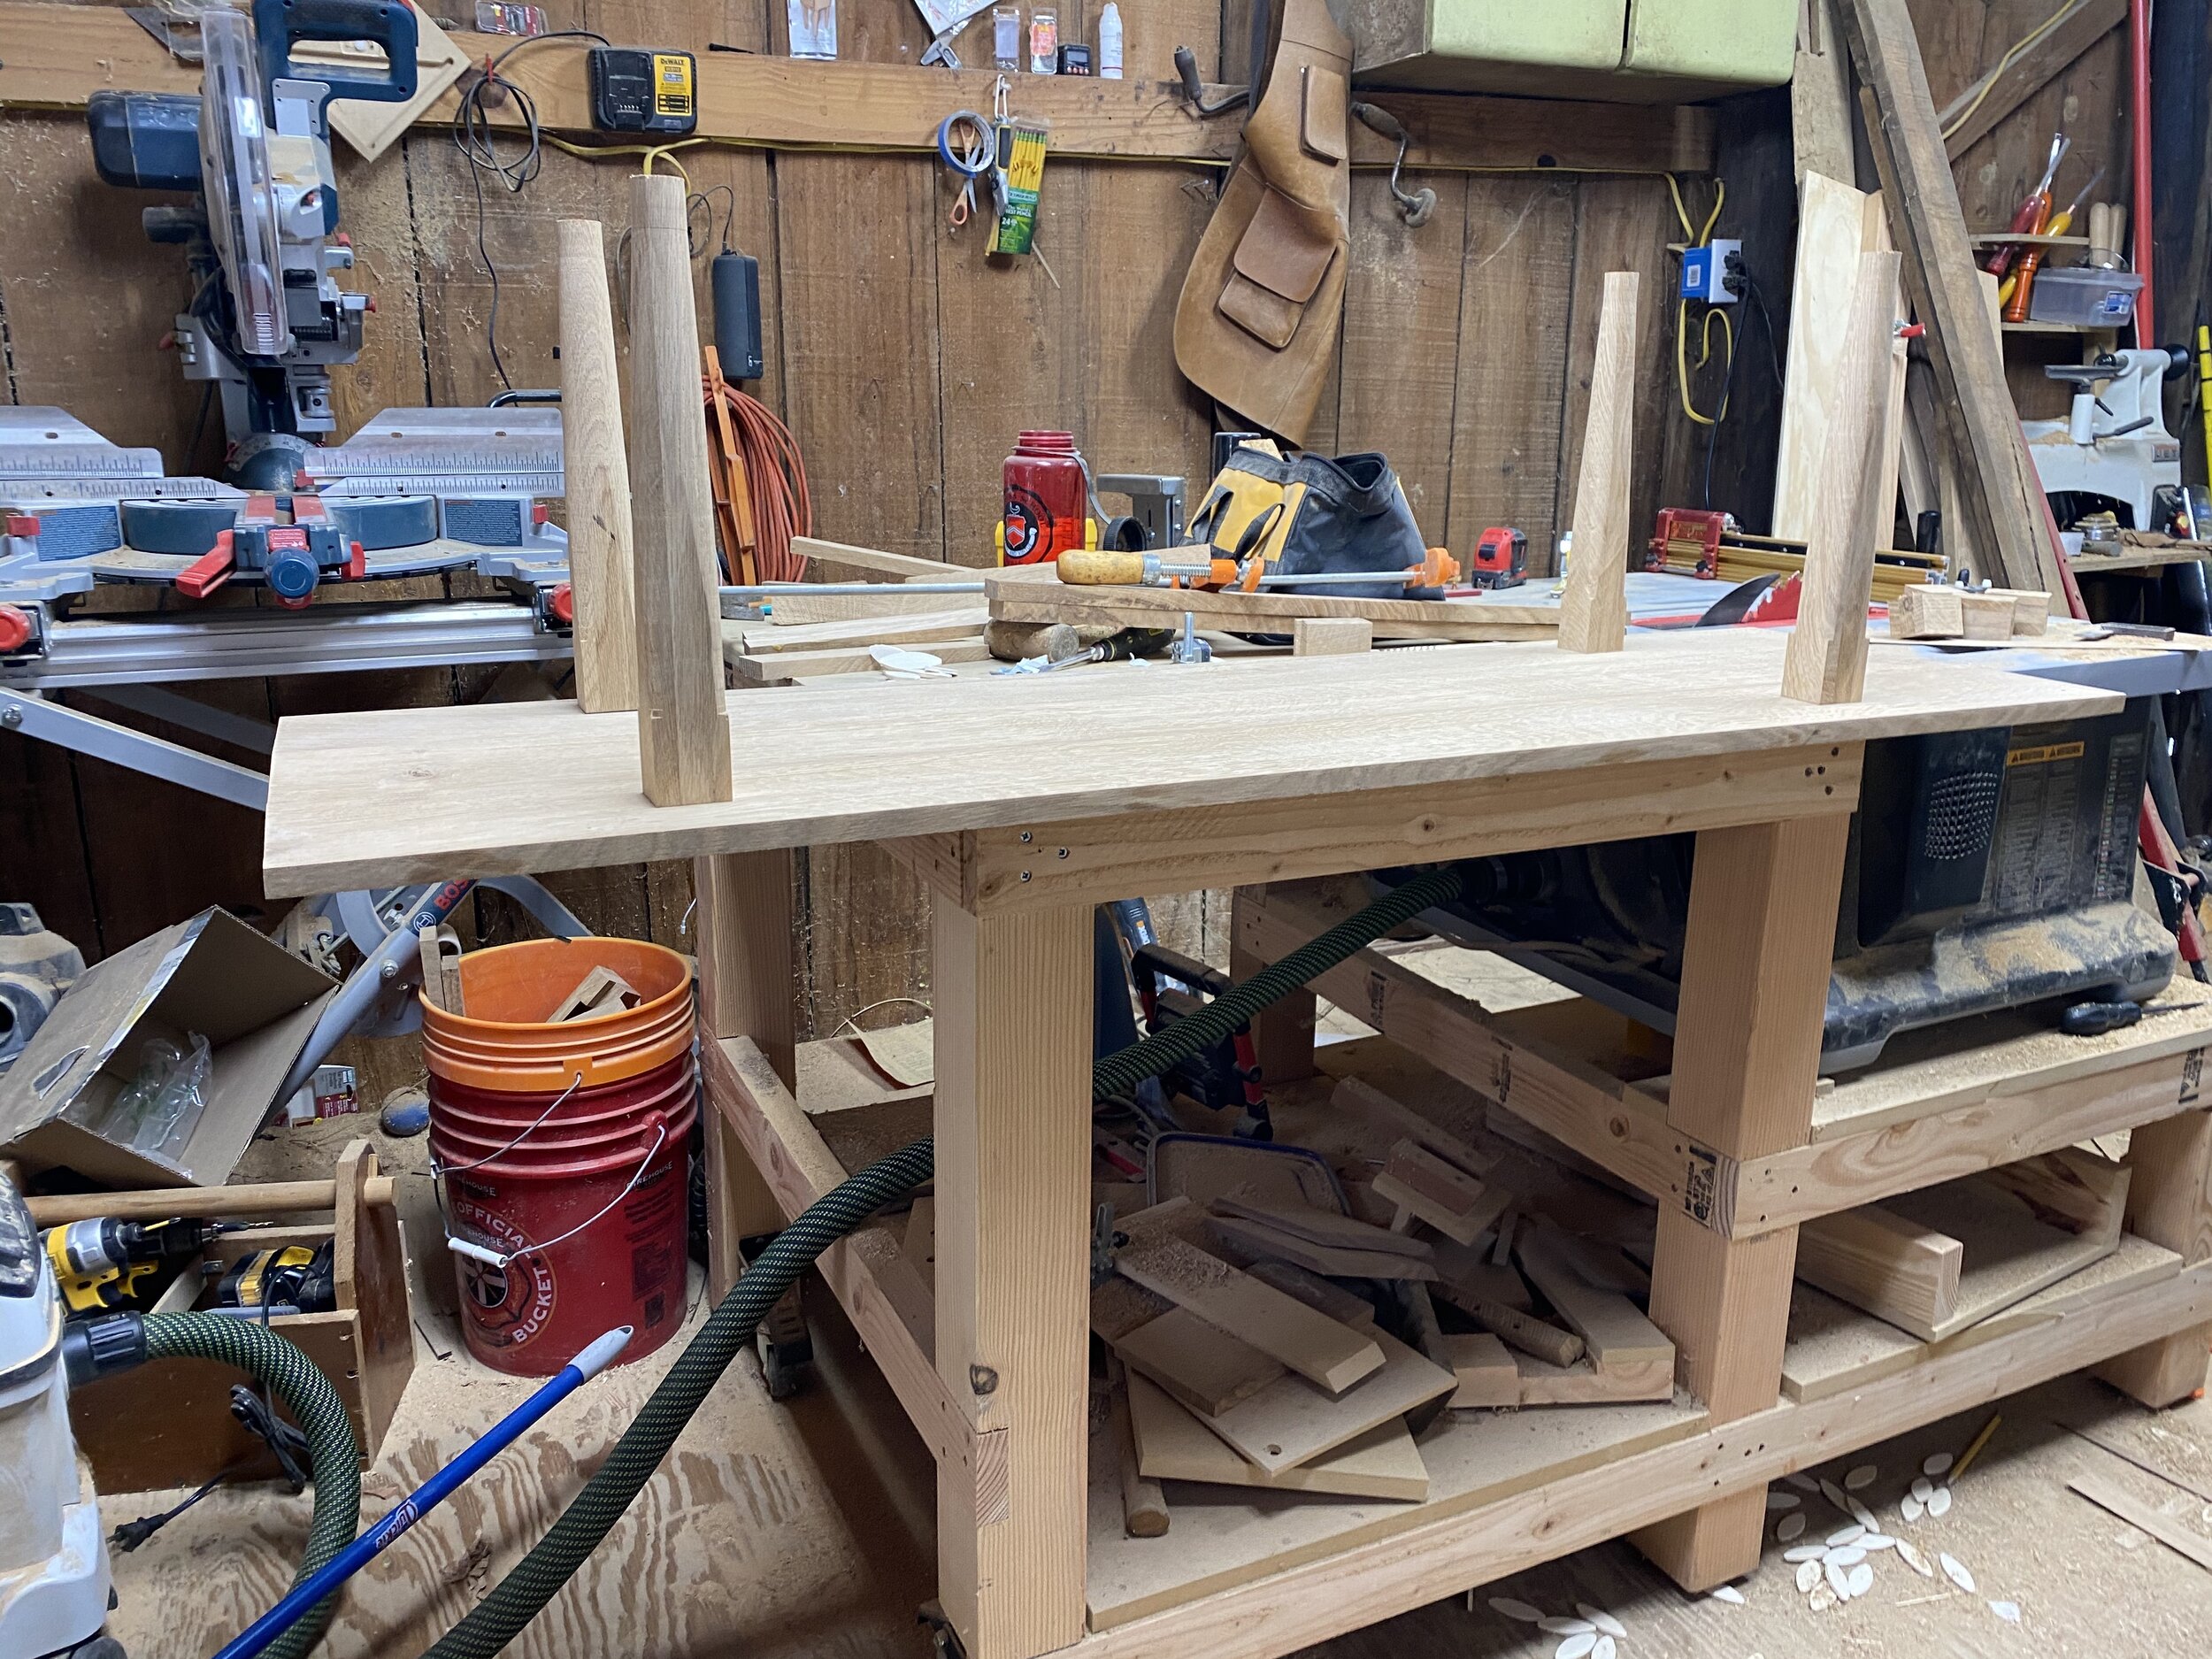
Following glue-up, both pieces line up perfectly and I drilled 24 pocket holes and chiseled 8 dados to align the cross members. Following a delicate glue-up, the screws were fastened and while I wish I had clamped them 90 degrees to the surface, the piece was rigid with a consistent width. This mistake would leave room for improvement but I was moving forward. After 24 hours I performed a standing and weighted test of the base and began work on the shelves. Several months prior I had begun building full-length mirror frames. A lack of wall space led me to reconsider the project, but the partially cut frames still sat in the corner, and my guilt surrounding the misused wood lingered from summer to fall. Since I had no plan for the shelf, what would be the harm in repurposing these pieces? Following some measurement I cut two more slivers of white oak to end with 6 long pieces, 12 short pieces, and a plan to link them all. I used tongues cut in the ends of all 12 pieces and a groove down each shelf length to create 3 frames to support whatever shelf substrate I choose.

After this day of work, I had a pit in my stomach. The following day would require me to fix all the shelves together and the freedom I once felt was usurped by a host of viable methods with no clear candidate. Luckily the shelves did not warp overnight and I was able to lay the shelves out at the proper height. I used a test piece to determine the proper width and depth for the dado in the uprights where the shelves would sit. Some light chiseling brought all uprights into tolerance and a glue-up inside wrapped up the day.

A careful glue-up in the guest room with screws used instead of clamps (shoutout to my parents for tolerating me). I had some concerns surrounding the squareness of the entire enclosure, so I used screws to seat the shelves in the columns and provide extra sheer strength.

45˚ chamfer
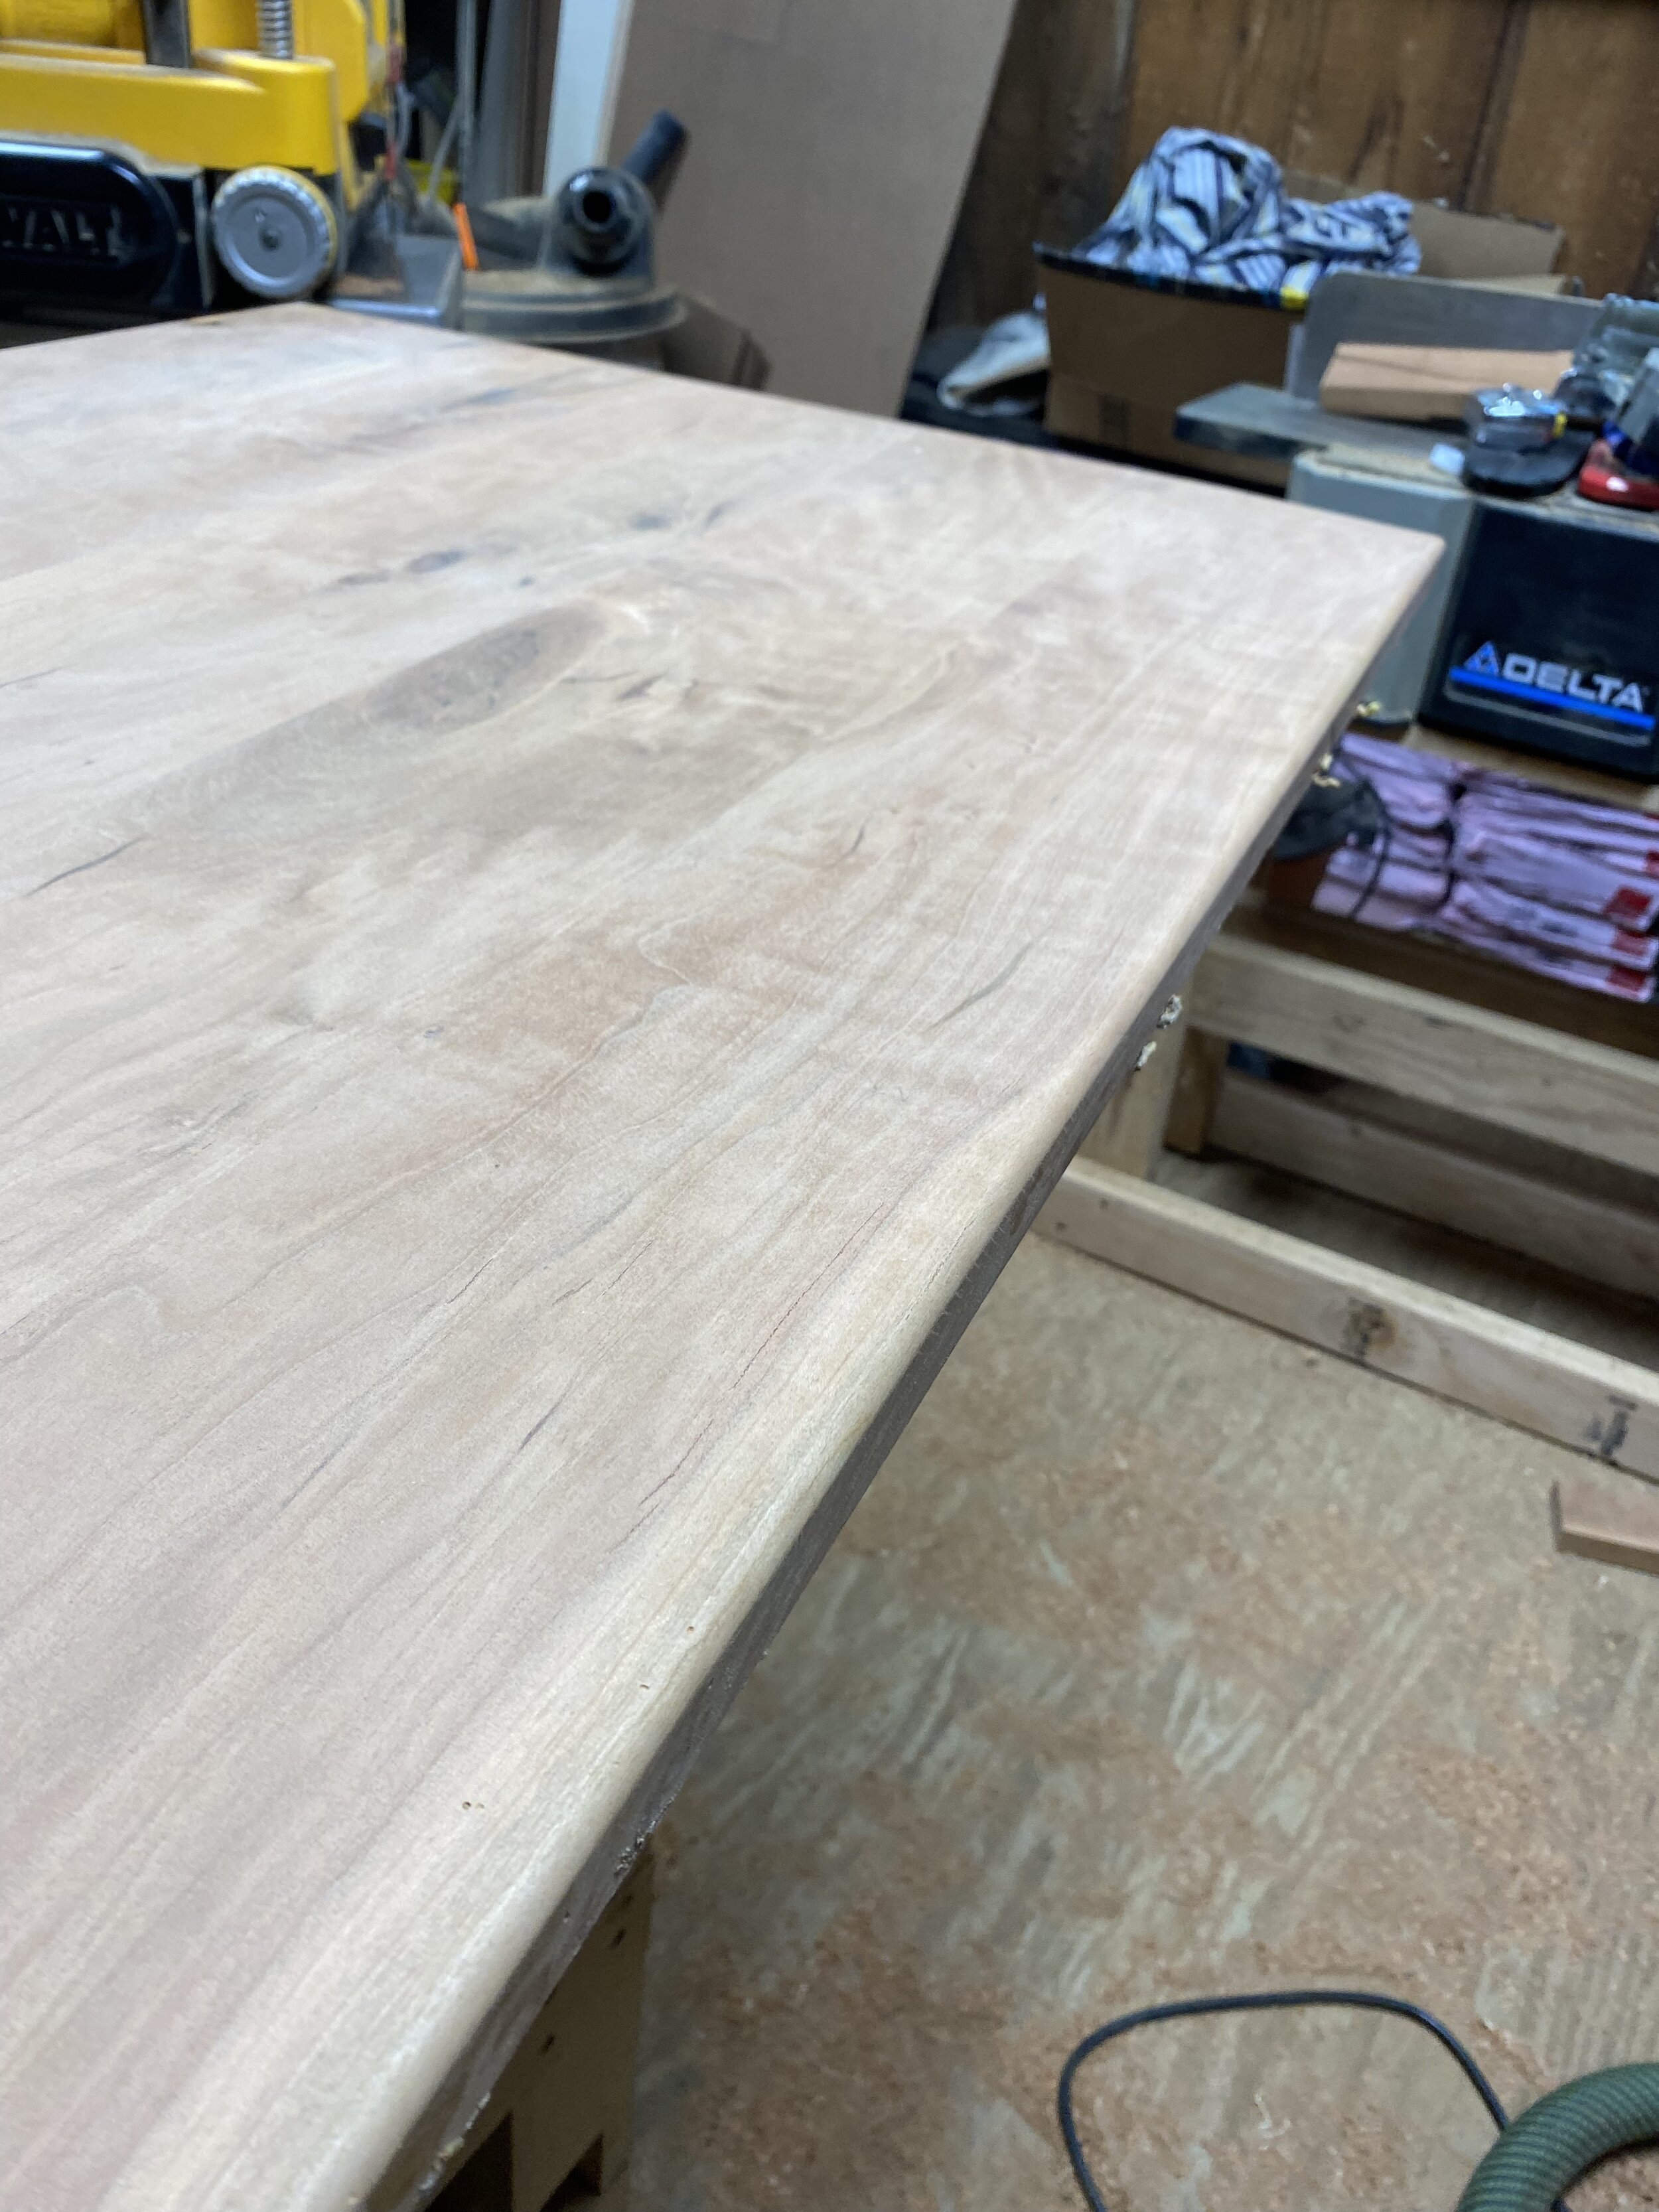
Used to soften the rectangular edges and provide a smoother profile when the light shines on the edge.
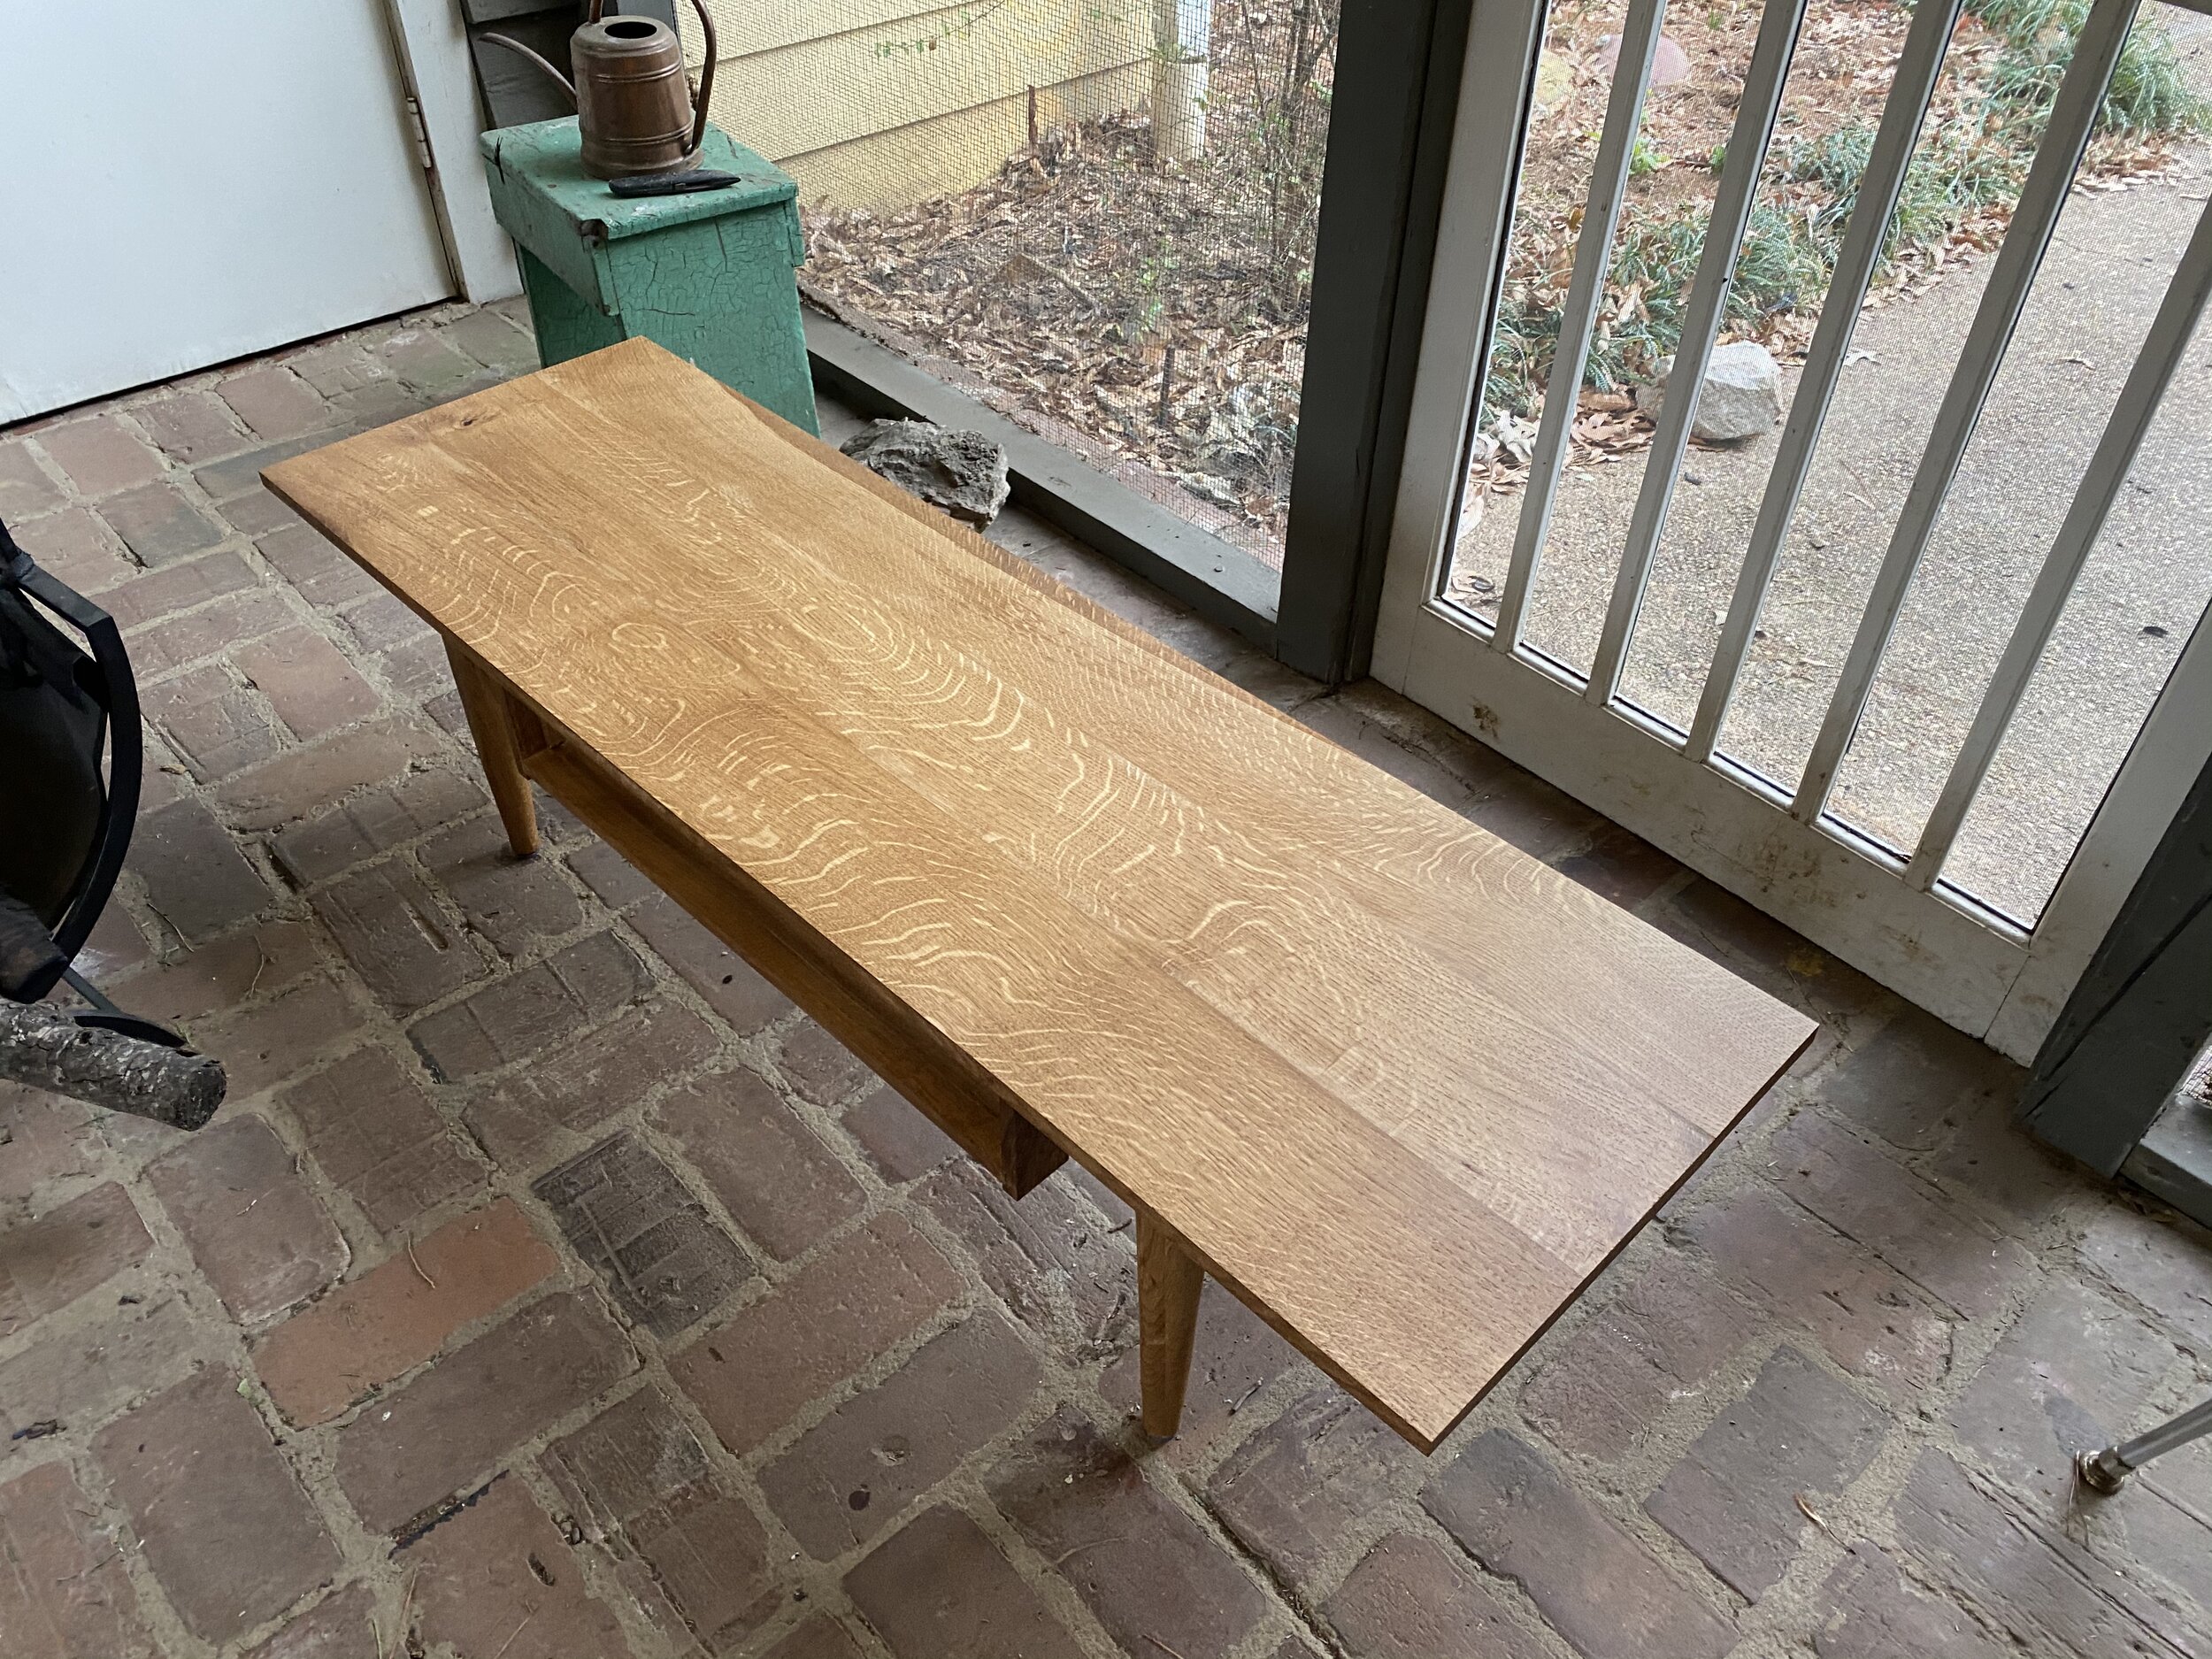
After mounting the base to the shelf with additional pocket holes, all that was left was to stabilize the three planes. I used a diagonal member along the back with 3 35˚ dados to seat the planes and prevent shelf torsion. Three pieces of 1/4” glass completed the project and now I have an expanded home for the memories I hold dear.

This project, like many others, had little direction, and at this point of the year, I needed a chance to dream. I have to admit that I’m fortunate that the piece turned out so well, and I feel this piece represents where I am in this moment. The objects around me have plentiful embedded meaning and I enjoy both the respect and transparency that this piece imbues in the living room. The impetus for this project was in part a thought experiment and proof of concept, but it was also intended as a project to portend the memories I will make in the years to come. I’m in no rush to fill the shelves and find that this creation is more meaningful if I choose what to place on it. As more memories develop, objects will find their resting place, but in the meantime, I enjoy the piece, the story that brought the vision to fruition, and all the ideas and objects it represents.
Lamp: A Multimedium Project
I wanted to design a pair of matching light fixtures that were unobtrusive, neutral toned, and dimmable.

I wanted the lamps to bring dimension to the wall framed by the concrete. My solution, a pair of light tubes, modeled from a garden tunnel. My first challenge was the light source. LED bulbs can be made up of hundreds of individual diodes, thus to achieve a diffused fluorescent substitute, special films or acrylics often cover the light source to homogenize the brilliant sources of light dots. To bypass the diffusion issue, I found a 5m length of LEDs that already had the light diffuser affixed. This meant that all I had to do was create the metal frame, mount the LEDs with power supply, and sew the cover.

The Frame
I cut the rings off of a 3-tiered dessert tray and welded rods and stabilizing bars together to complete the frame. I repeated the process to create the second metal frame and I ripped particle board to the appropriate length and width to begin assembly. I drilled holes through the metal and wood and attached the two structures with Chicago screw-rivets. This saved me from having to tap into the steel and simplified assembly. Once the board was mounted I placed the light source and dimmable power-supply on the wood, all that was left was the cover. After determining that one layer of canvas was insufficient to diffuse the light-strip but two layers was too much, I lined a piece of cotton with the canvas and sewed the fabric together, leaving space for the velcro strip I would use to affix the shade to the frame.
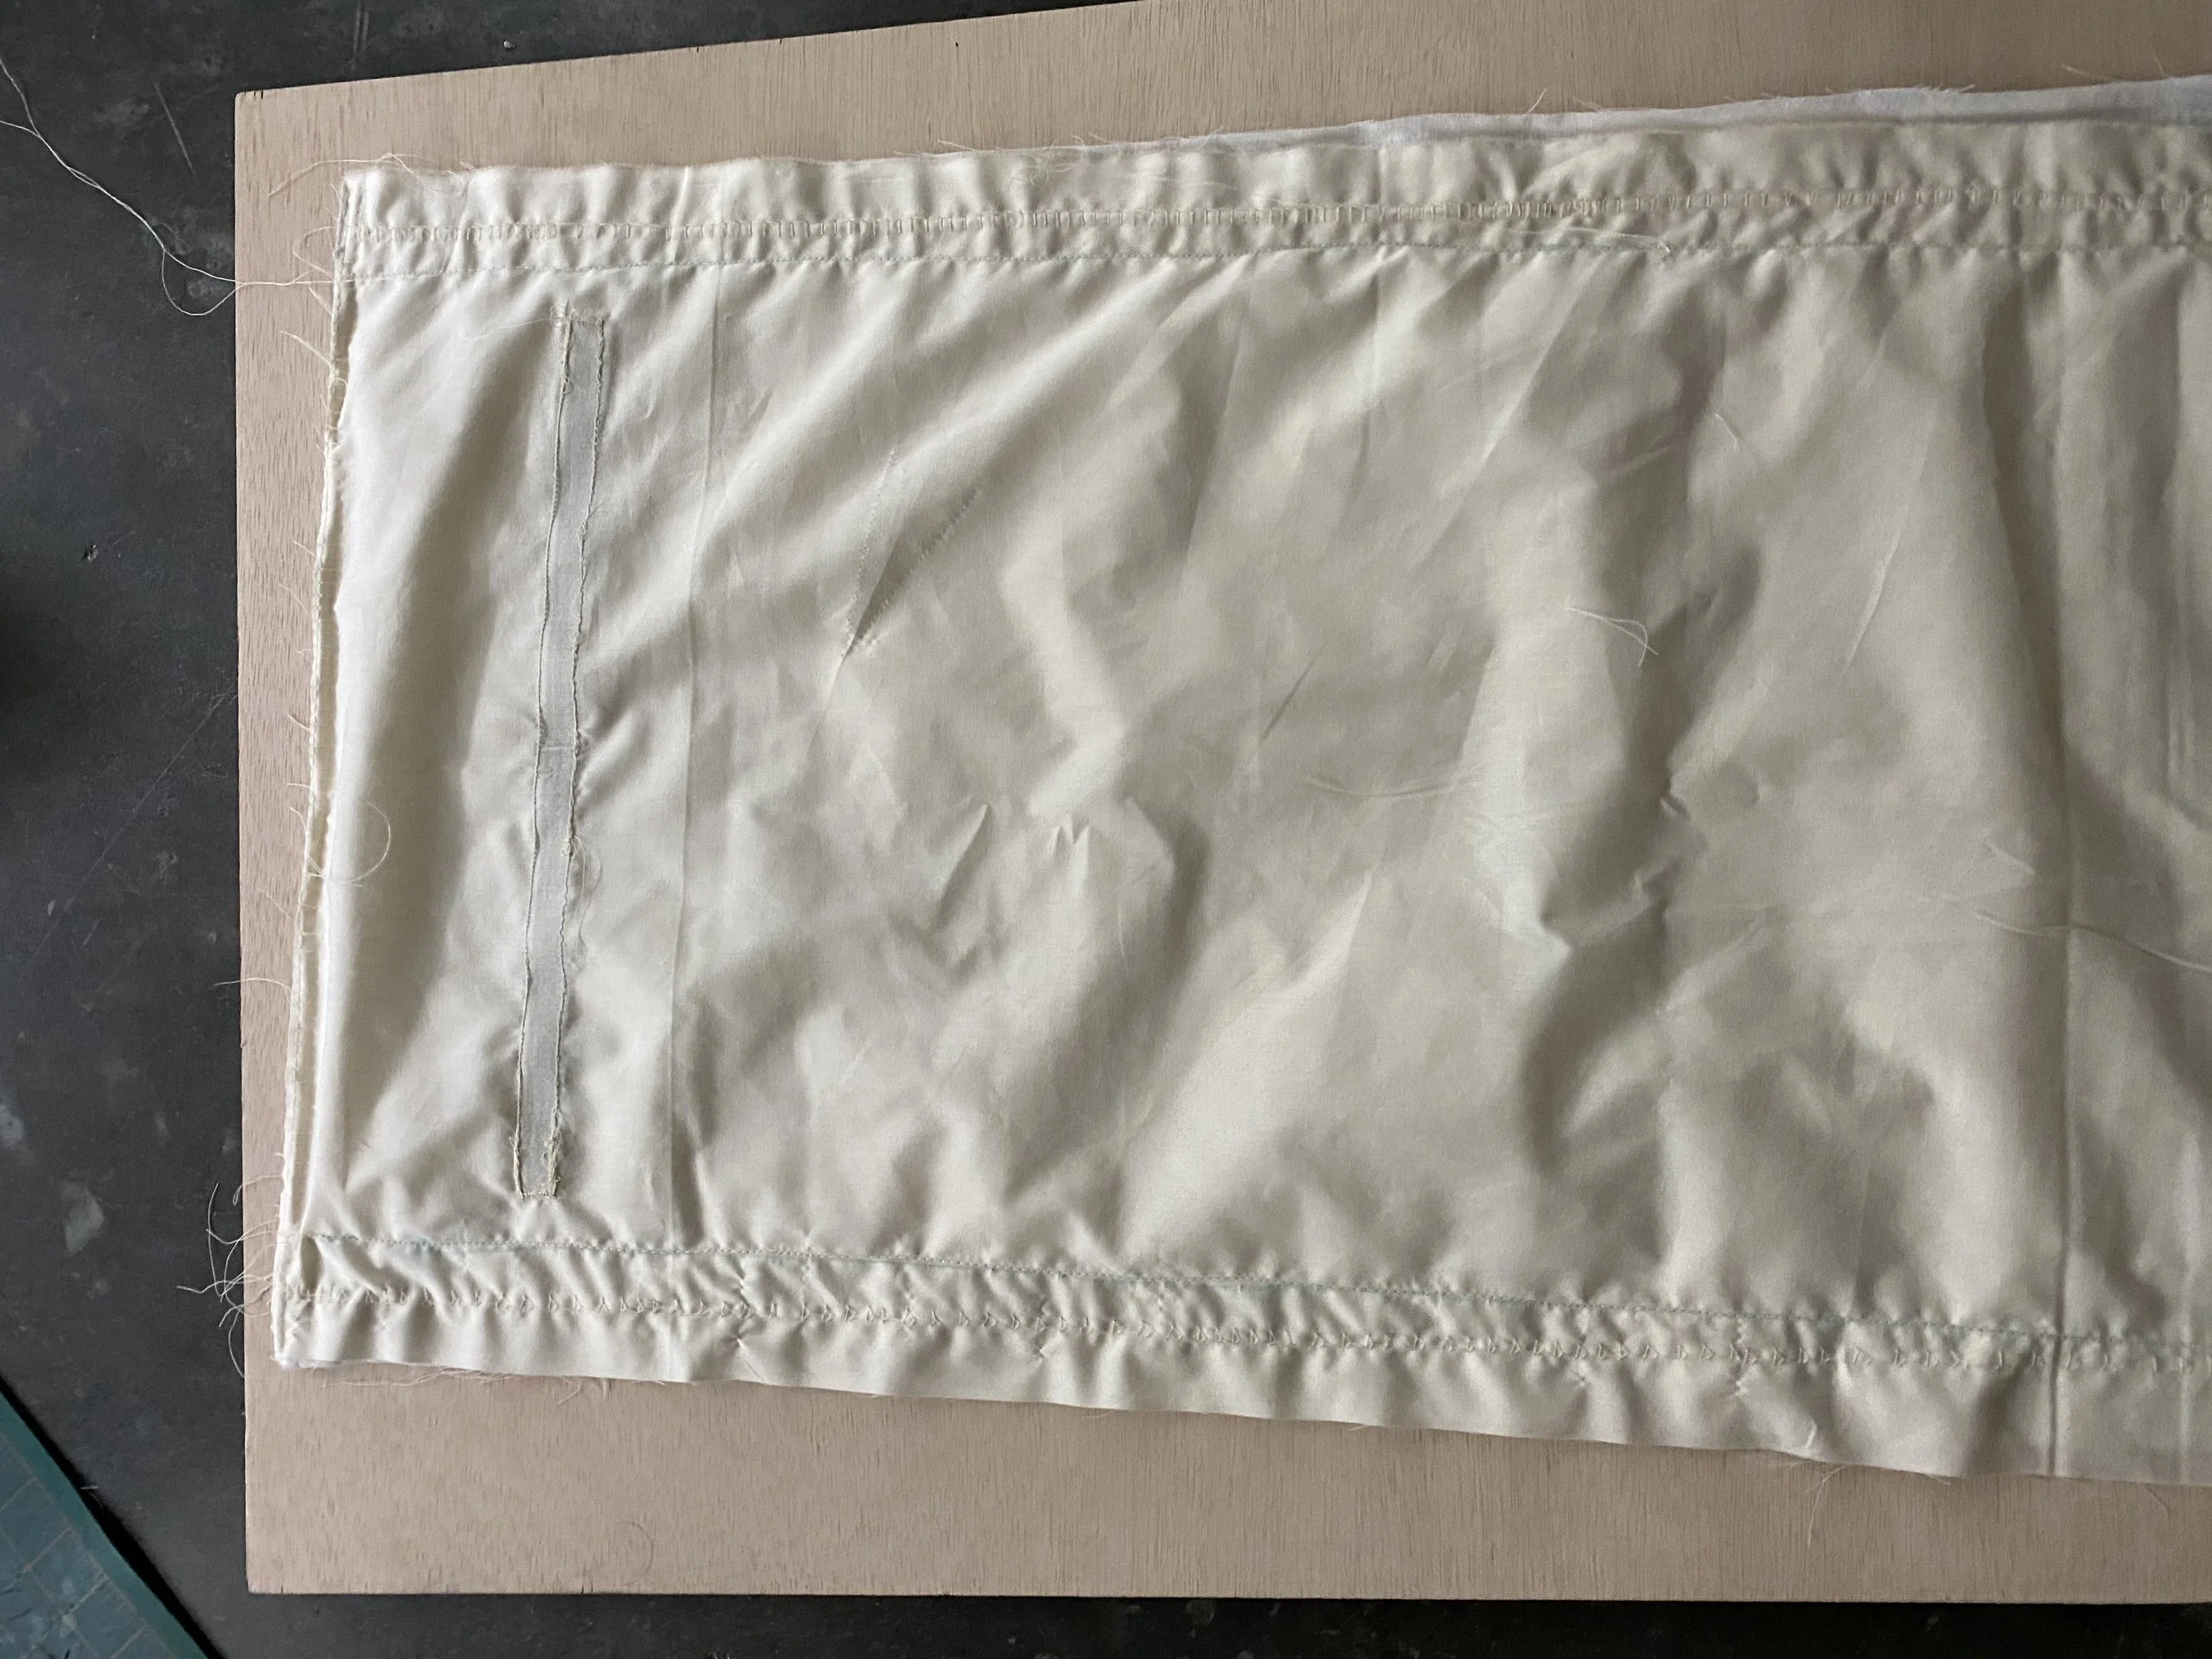
The canvas, sewn
The sewn inside is never as pretty as the outside, I’m continually amazed by how you can transform a project by turning it inside out
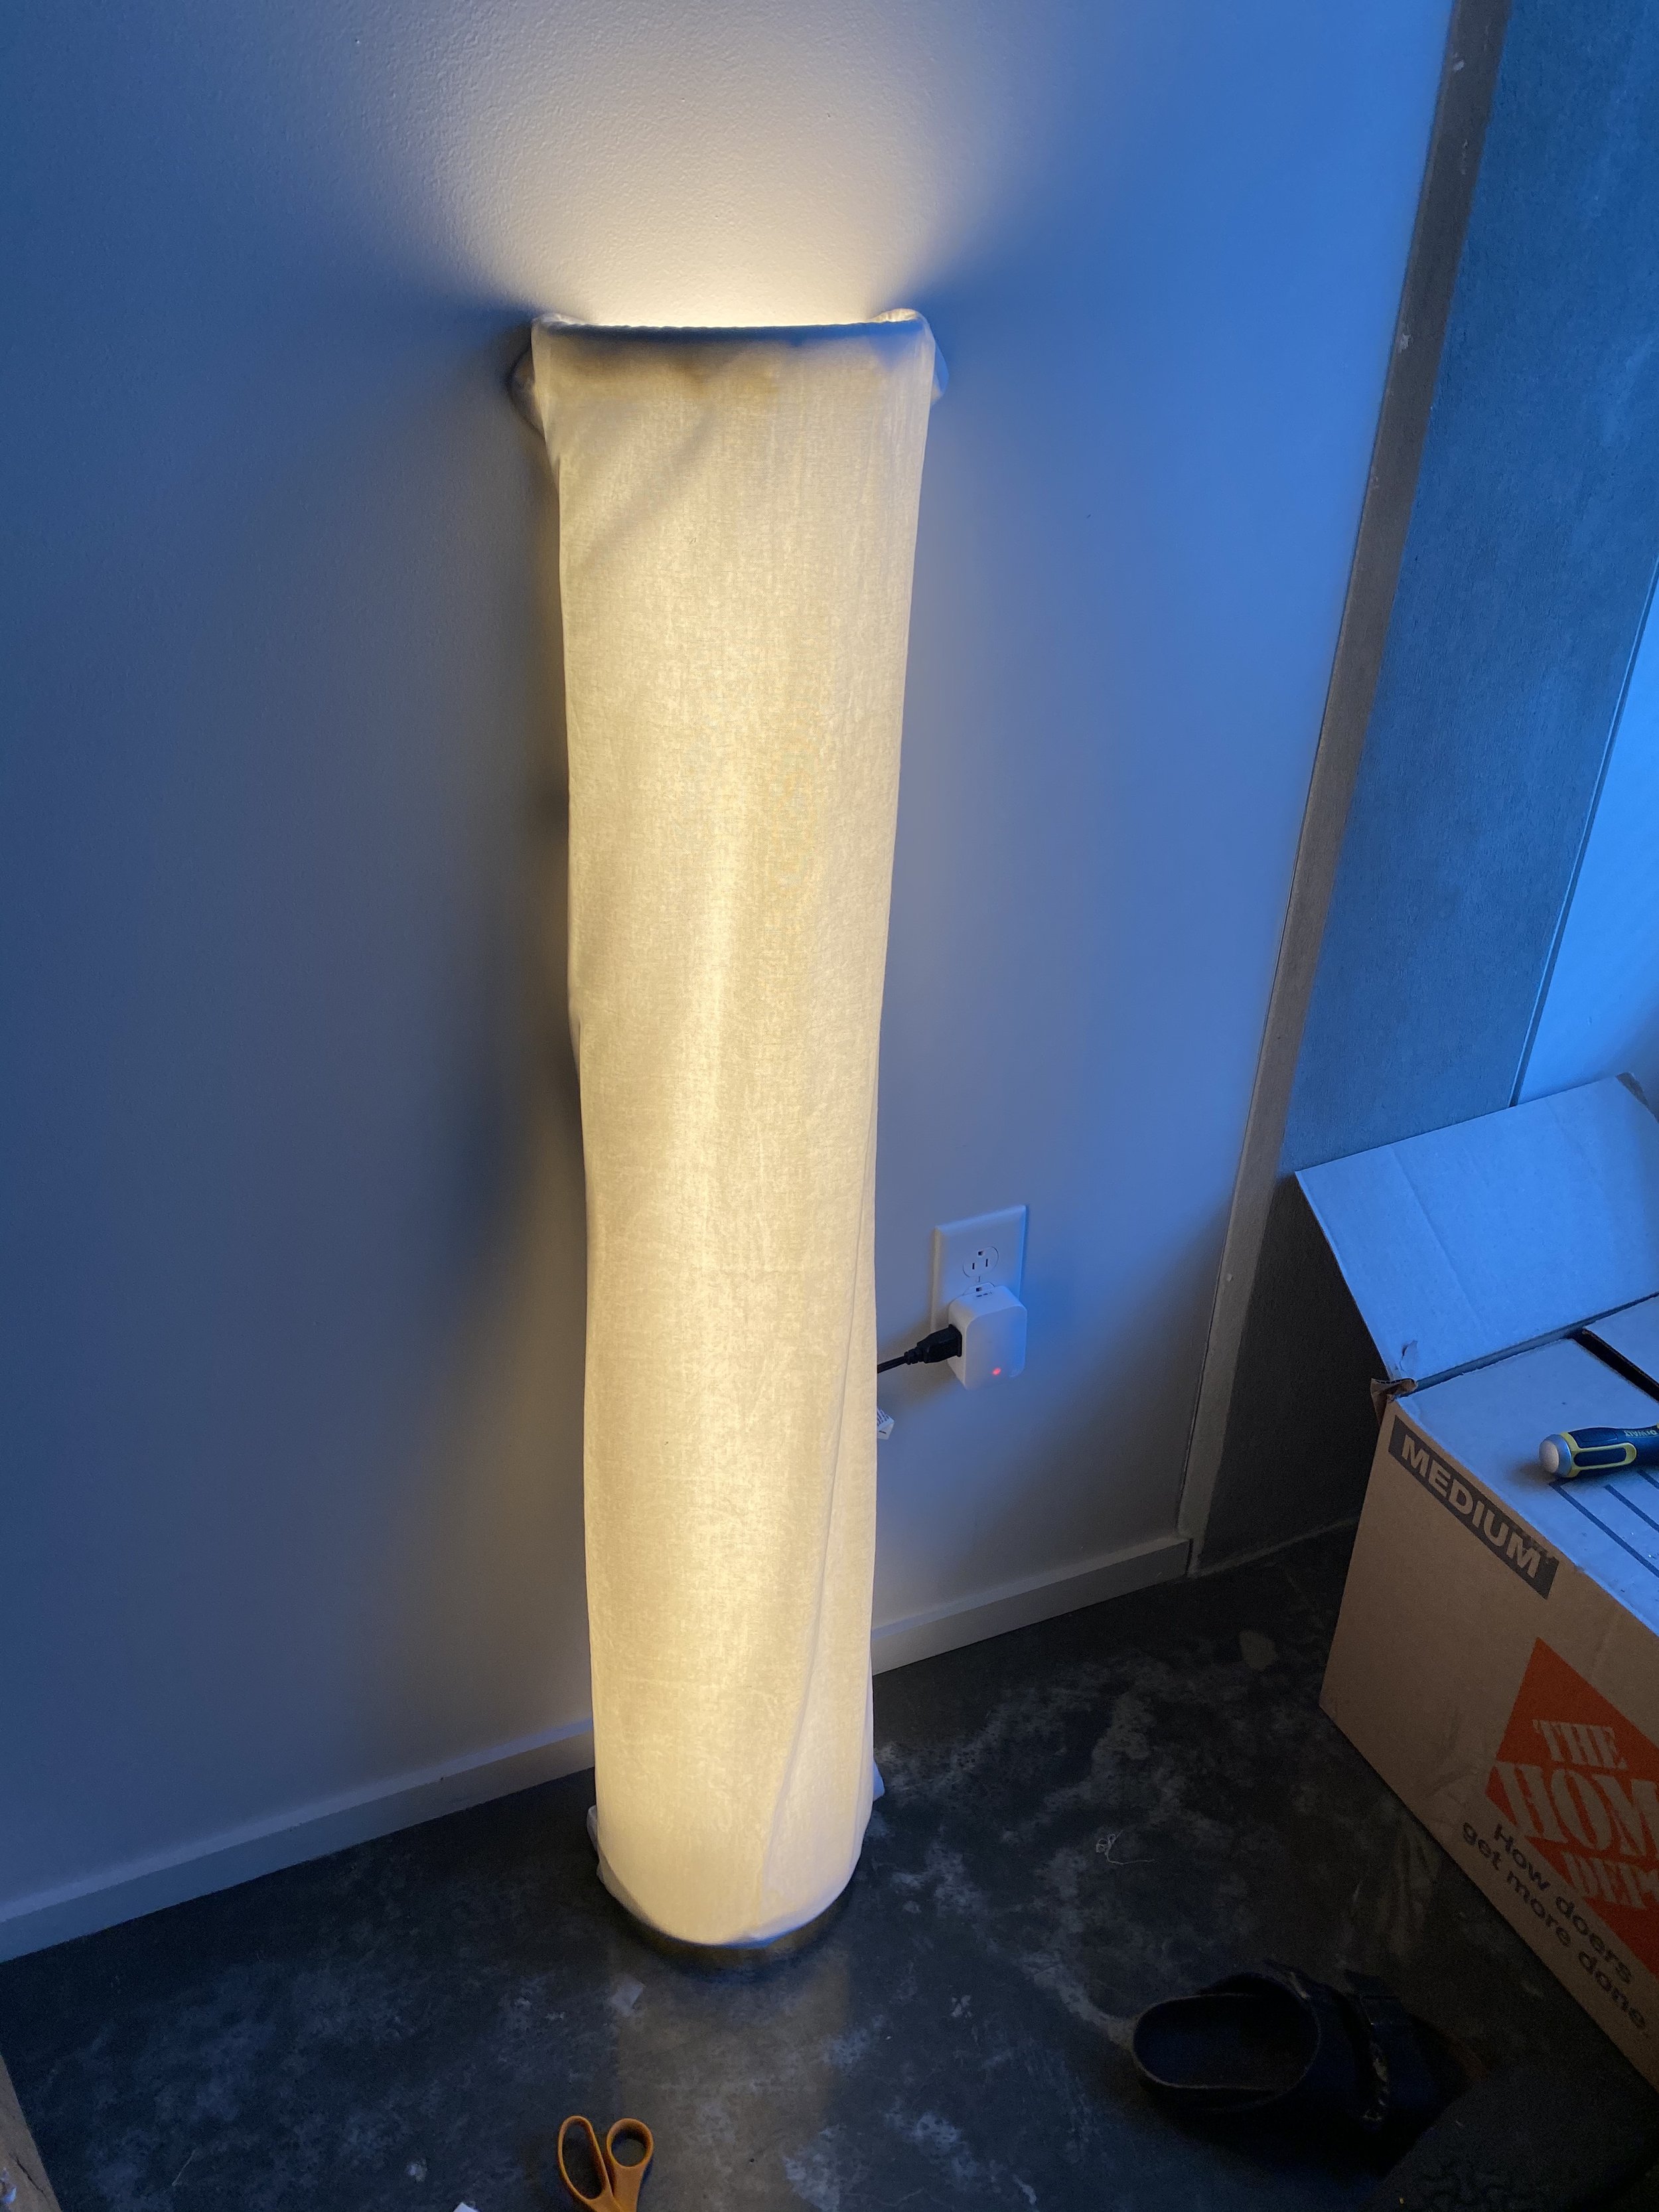
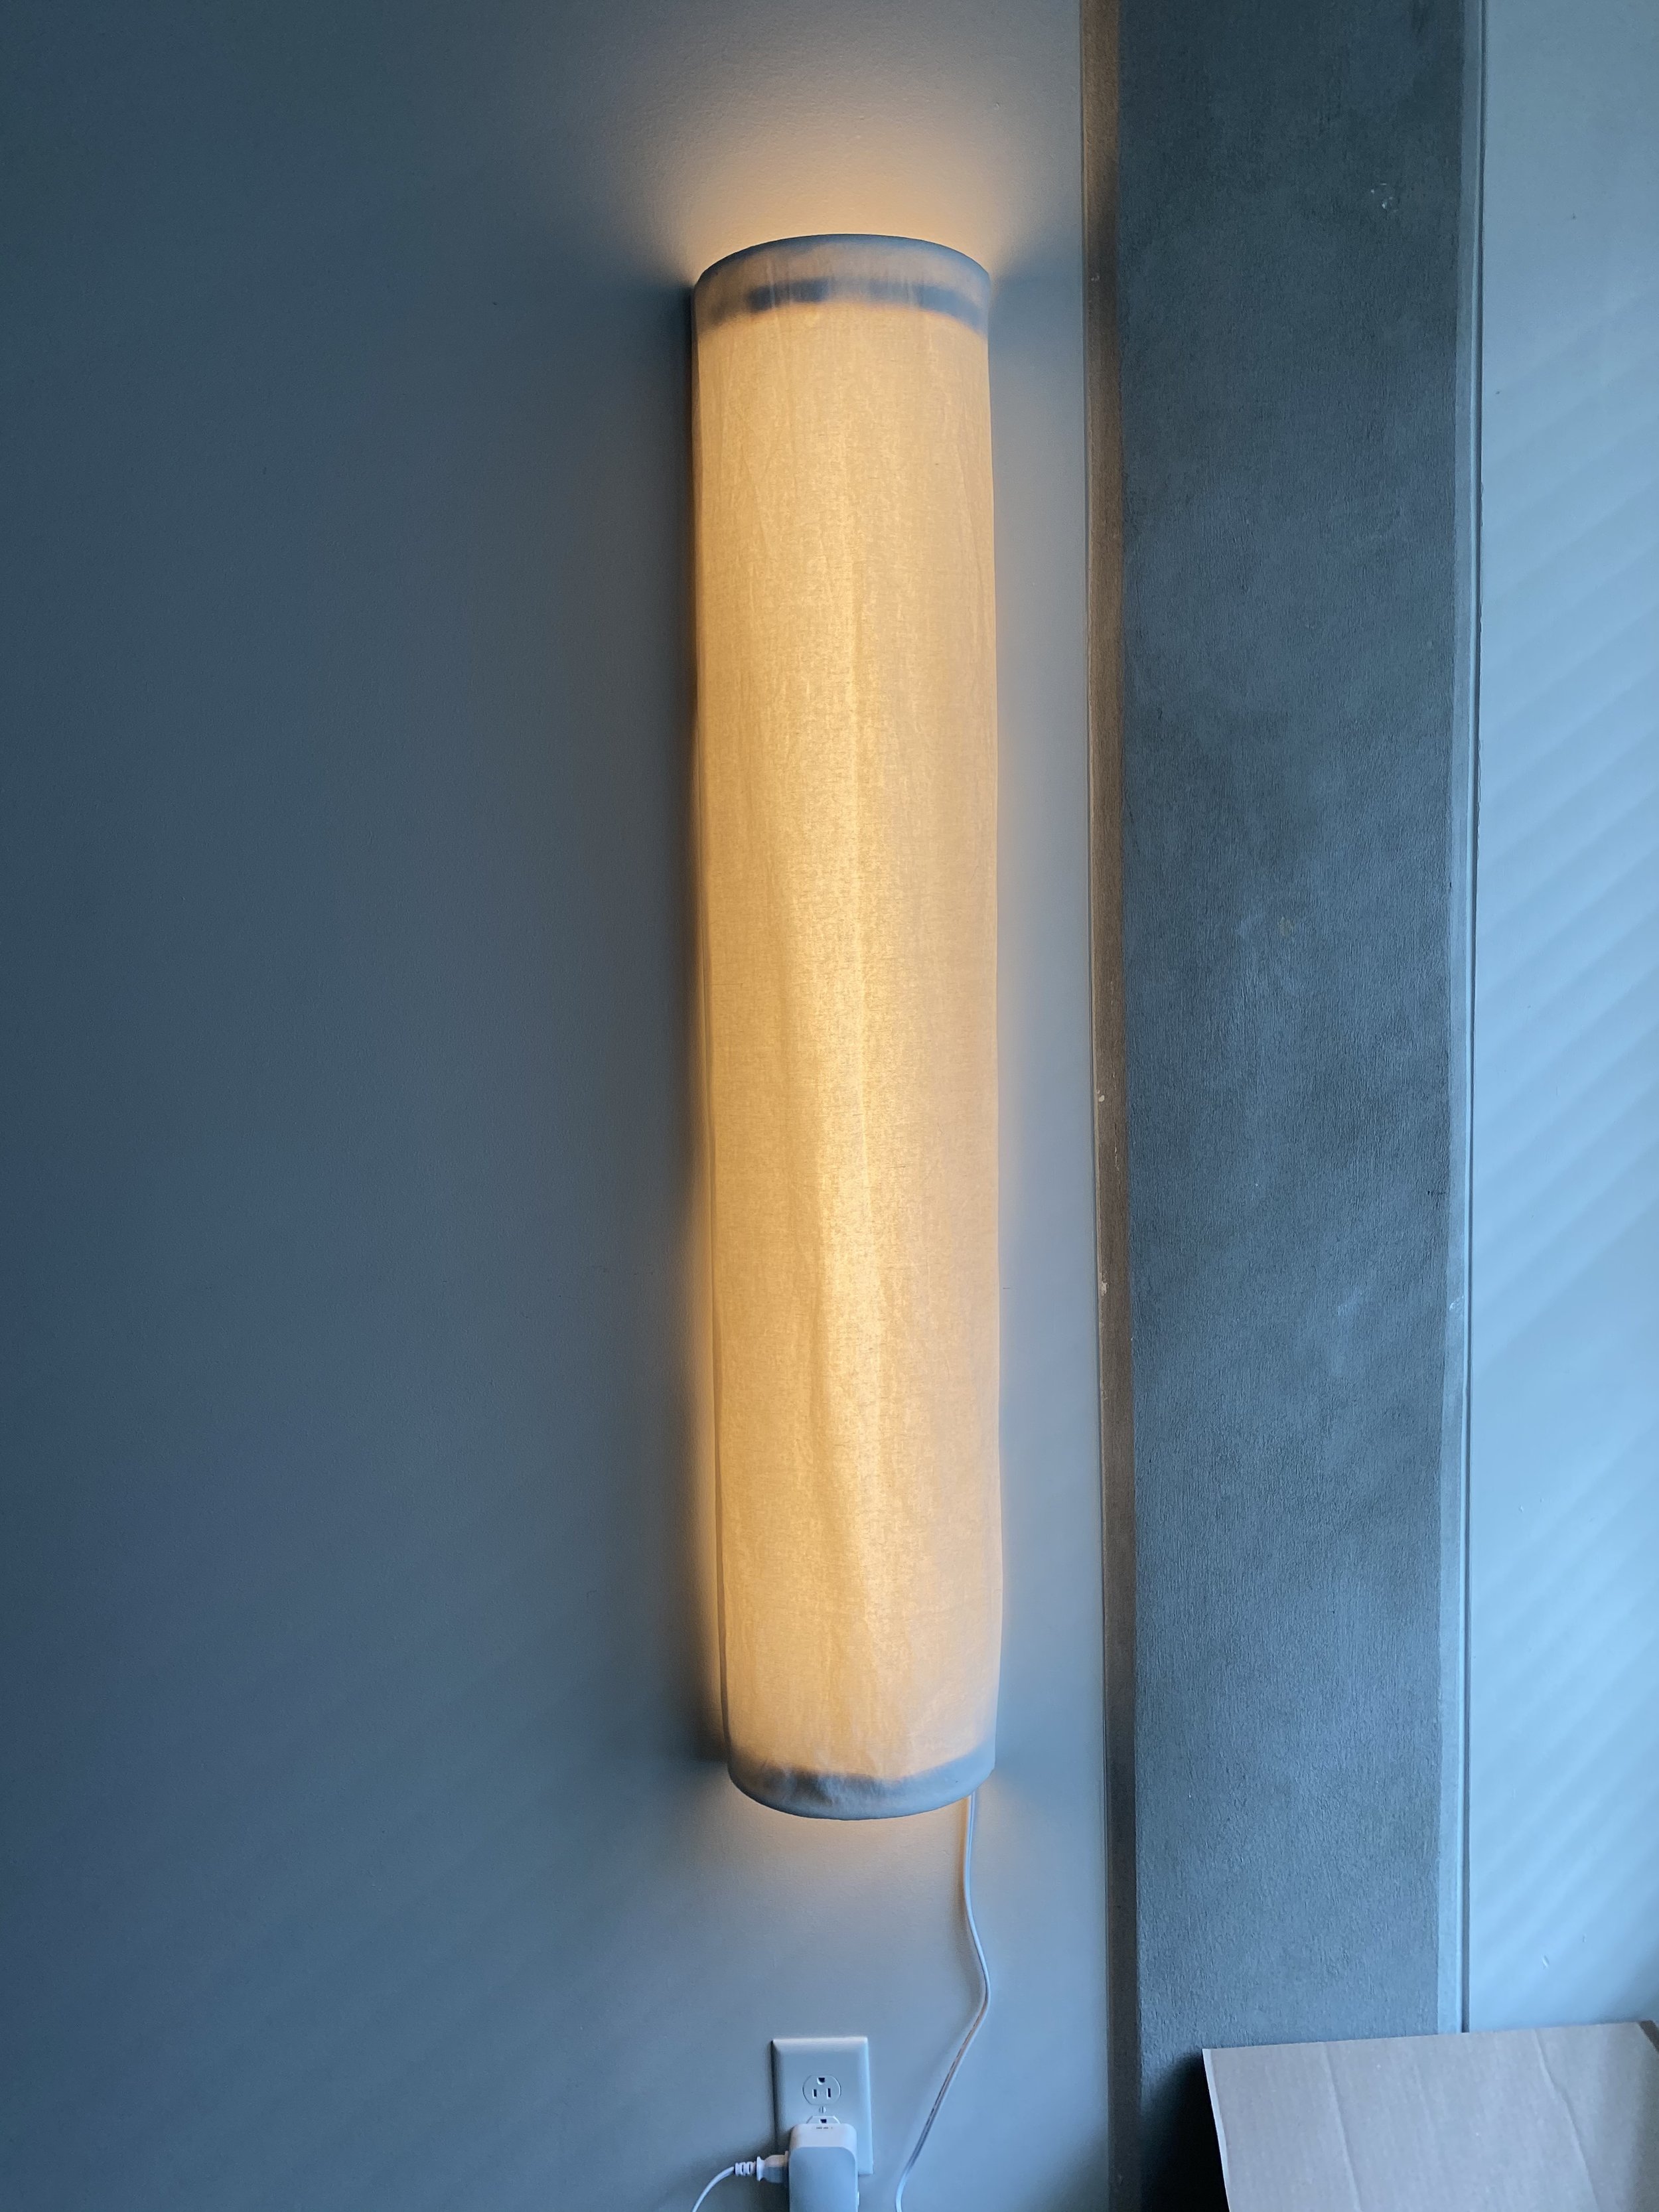
And VOILA! No one would ever know that your pair of wall-sconces are the byproduct of an old-curtain and a goodwill cake stand. This project was my first time fusing fabric and metal but I like the versatility of the two-mediums. Fabric is a fantastic way of dressing-up any shape, and its added light diffusion has me already thinking about my next lamp.

Special Desk for a Special Person
From barn to planer to stain to room
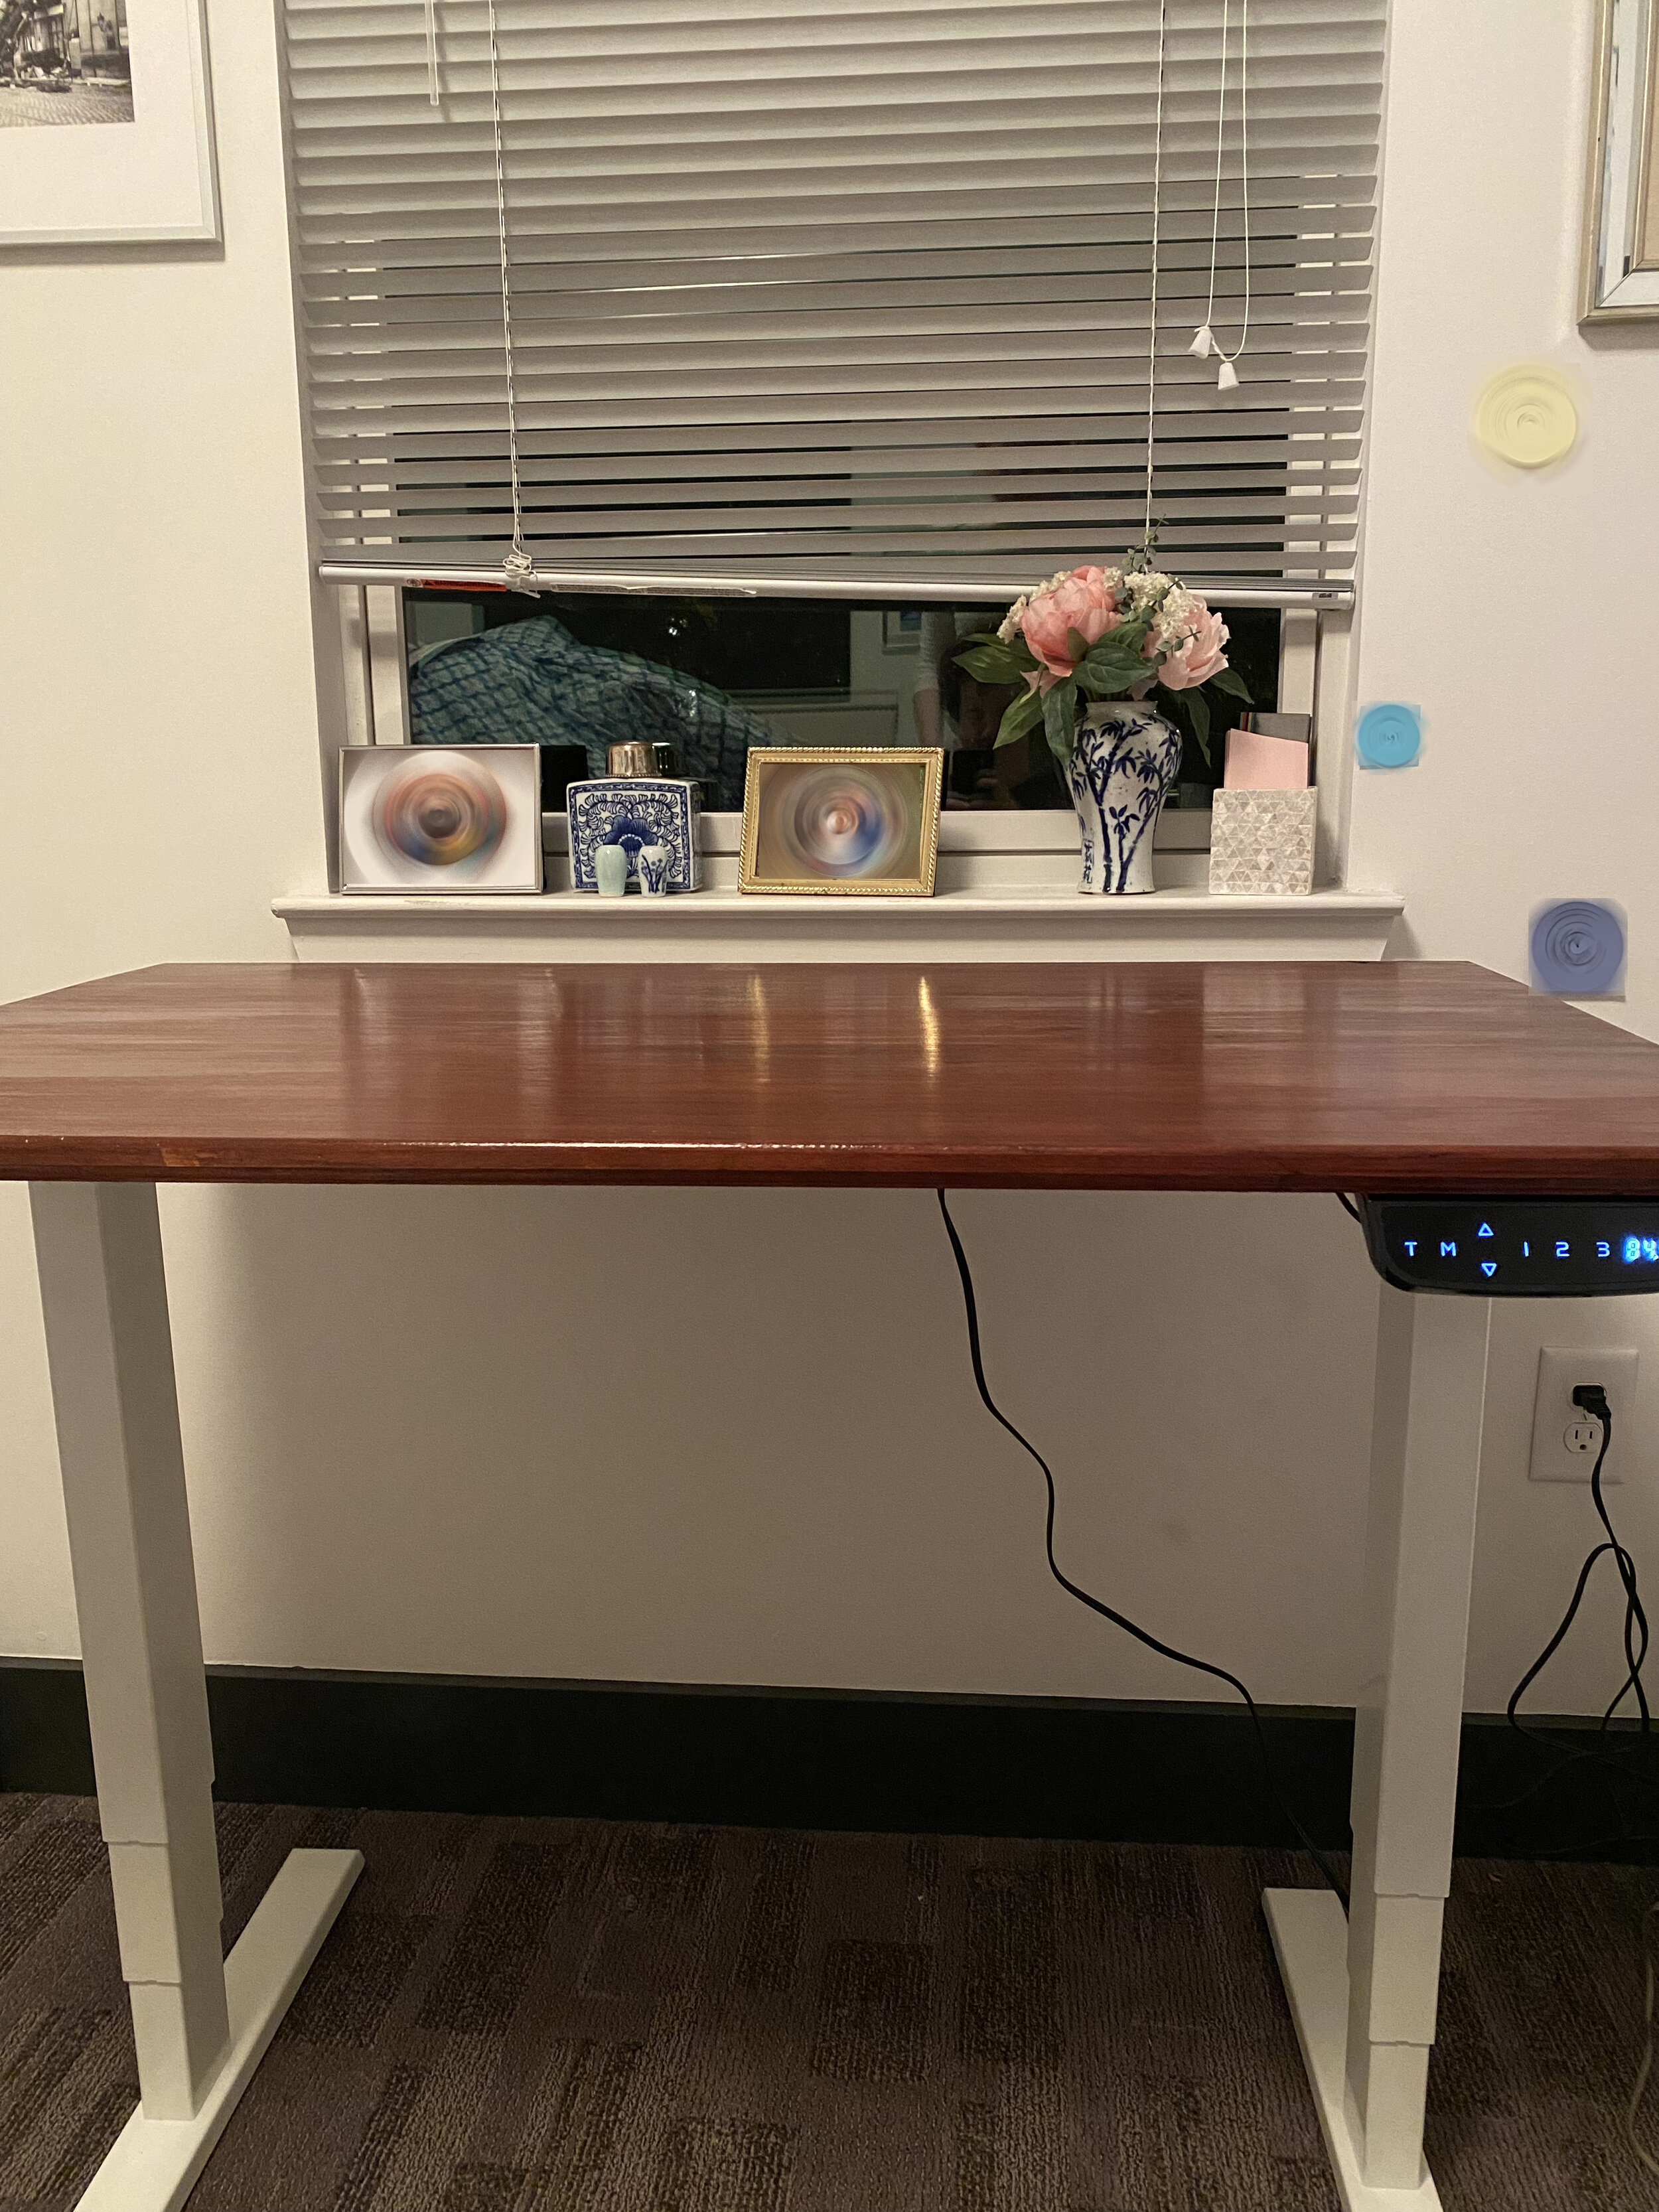
The day after taking the MCAT I wanted to relax so I went to the wood pile, picked a board, and made a desk for my girlfriend. She’s like me in that she enjoys working standing up when a change of “scenery” is needed. I had made a standing desk with a standing-desk base the year prior out of barn white-oak. She loved this idea so when she landed a big job I wanted to make something to commemorate the big event and thought what better way to enter the working world than with a desk!

The Barn find
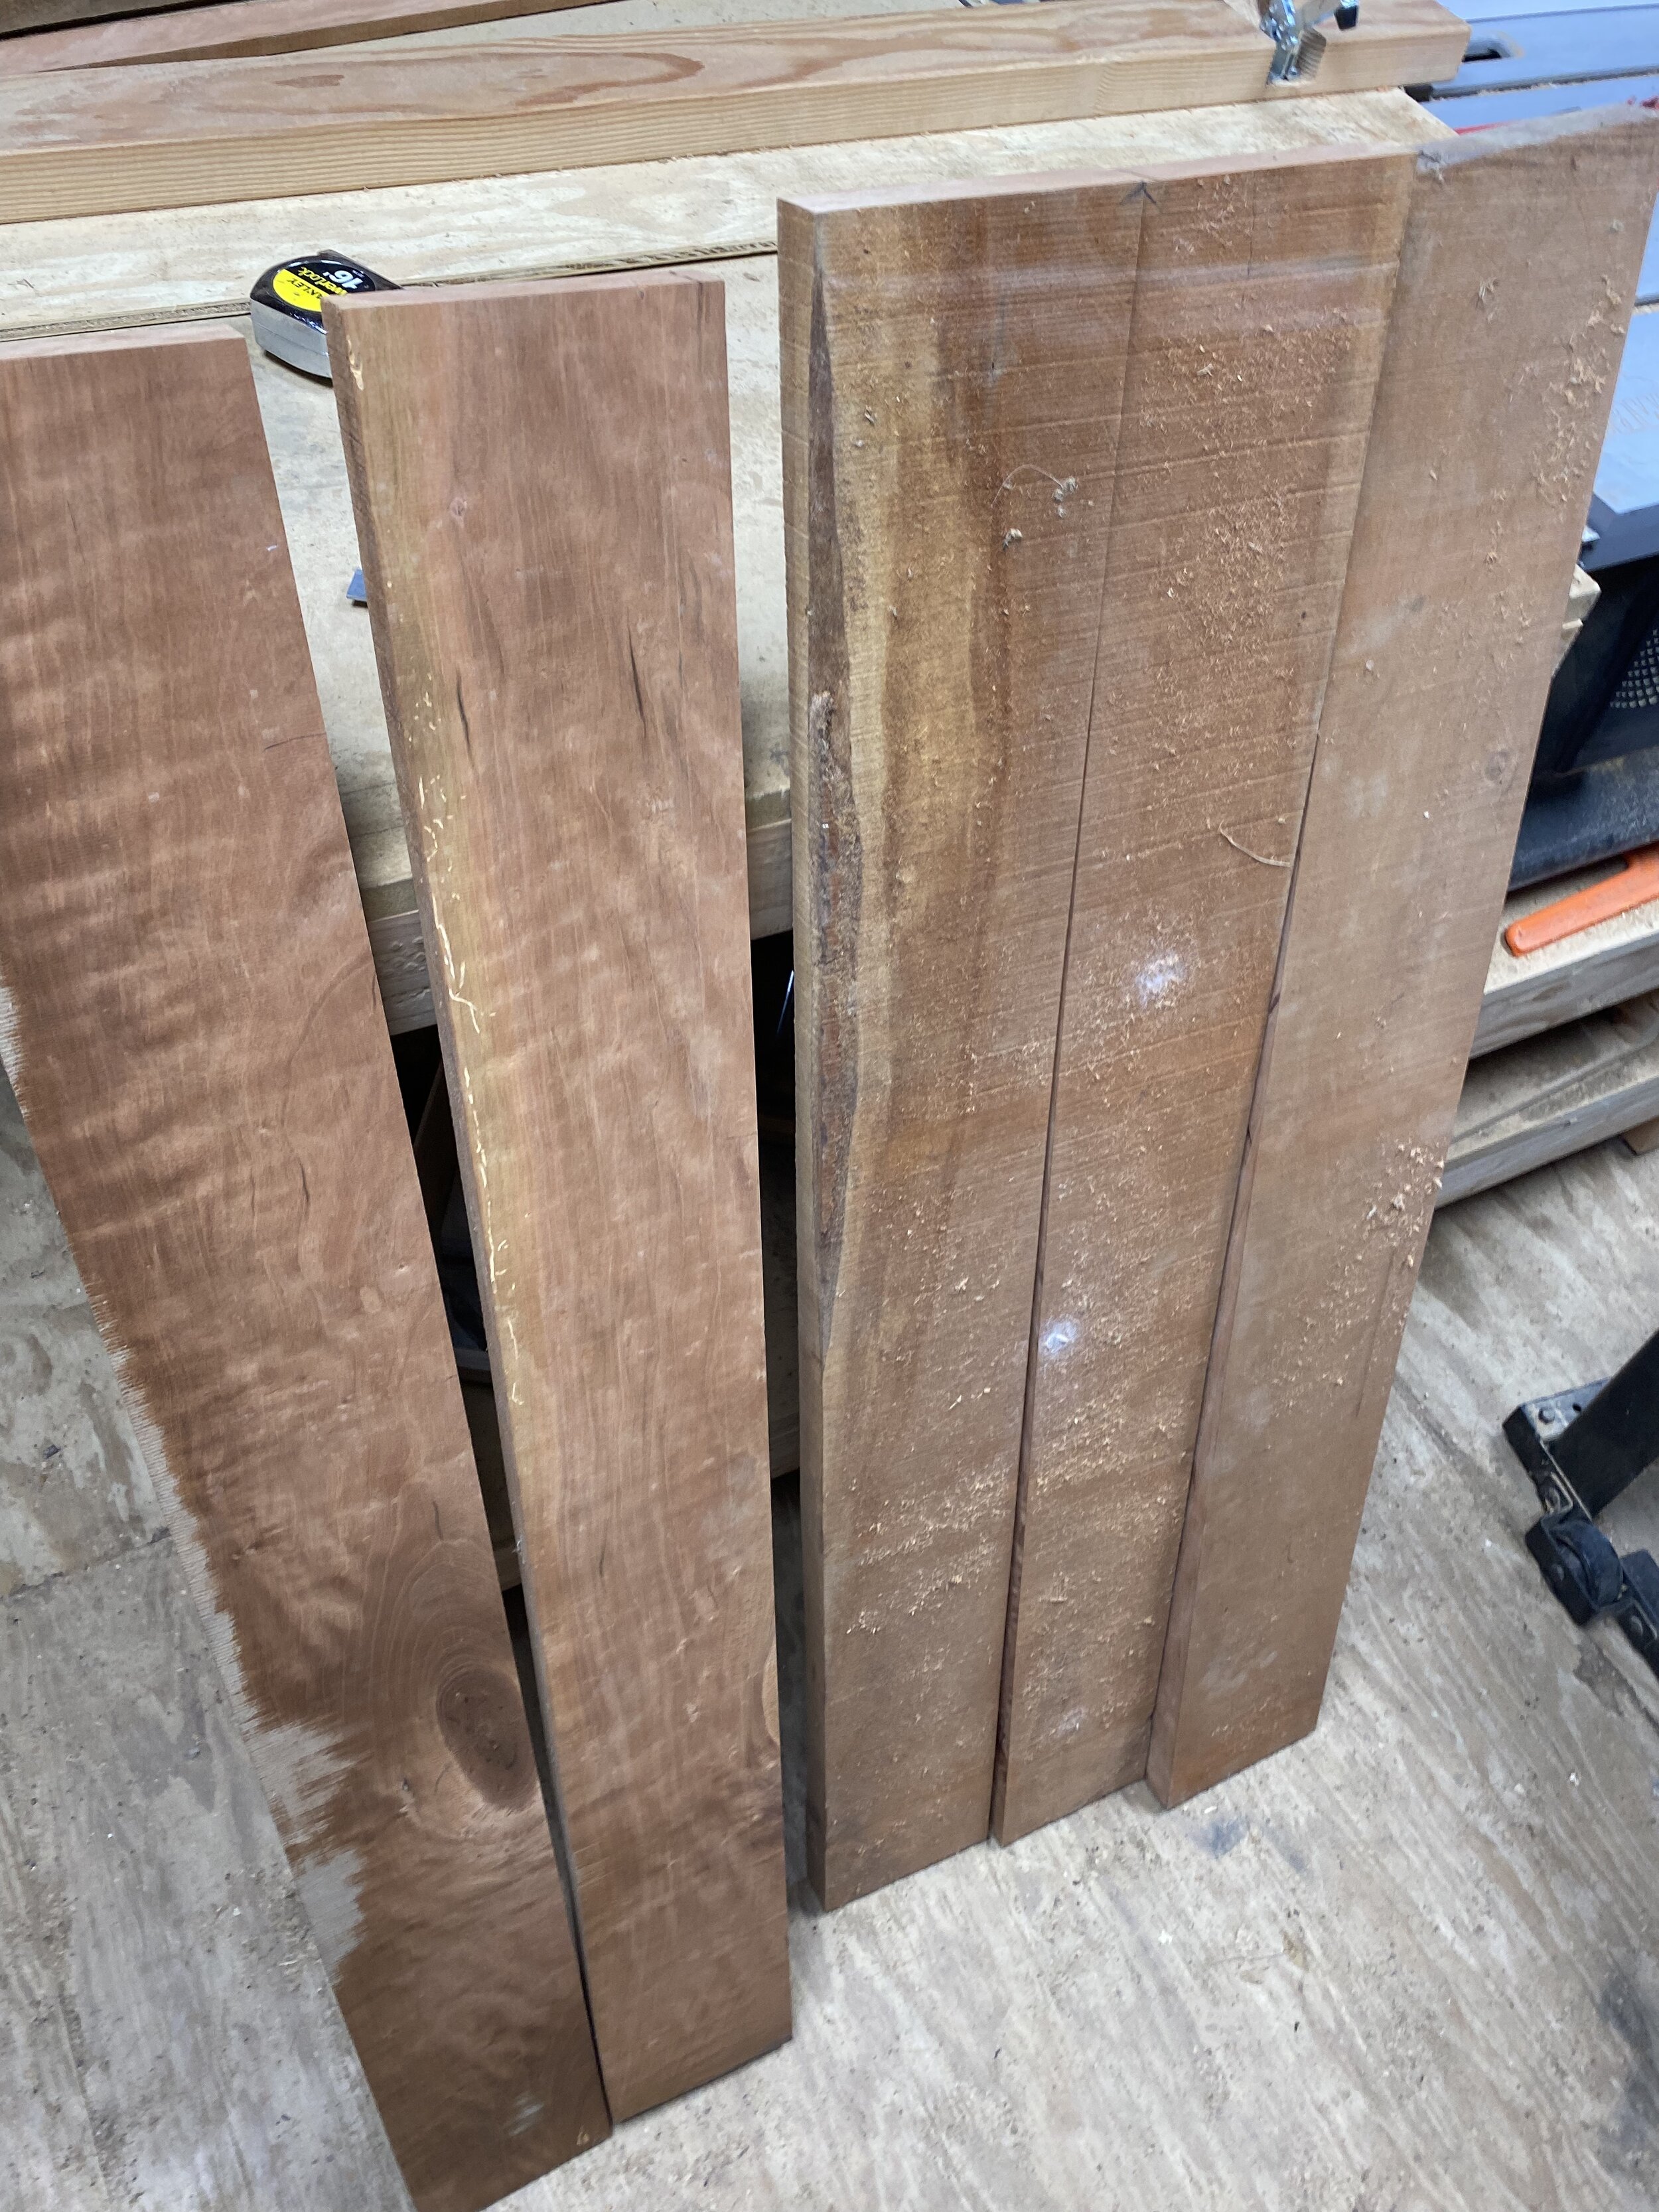
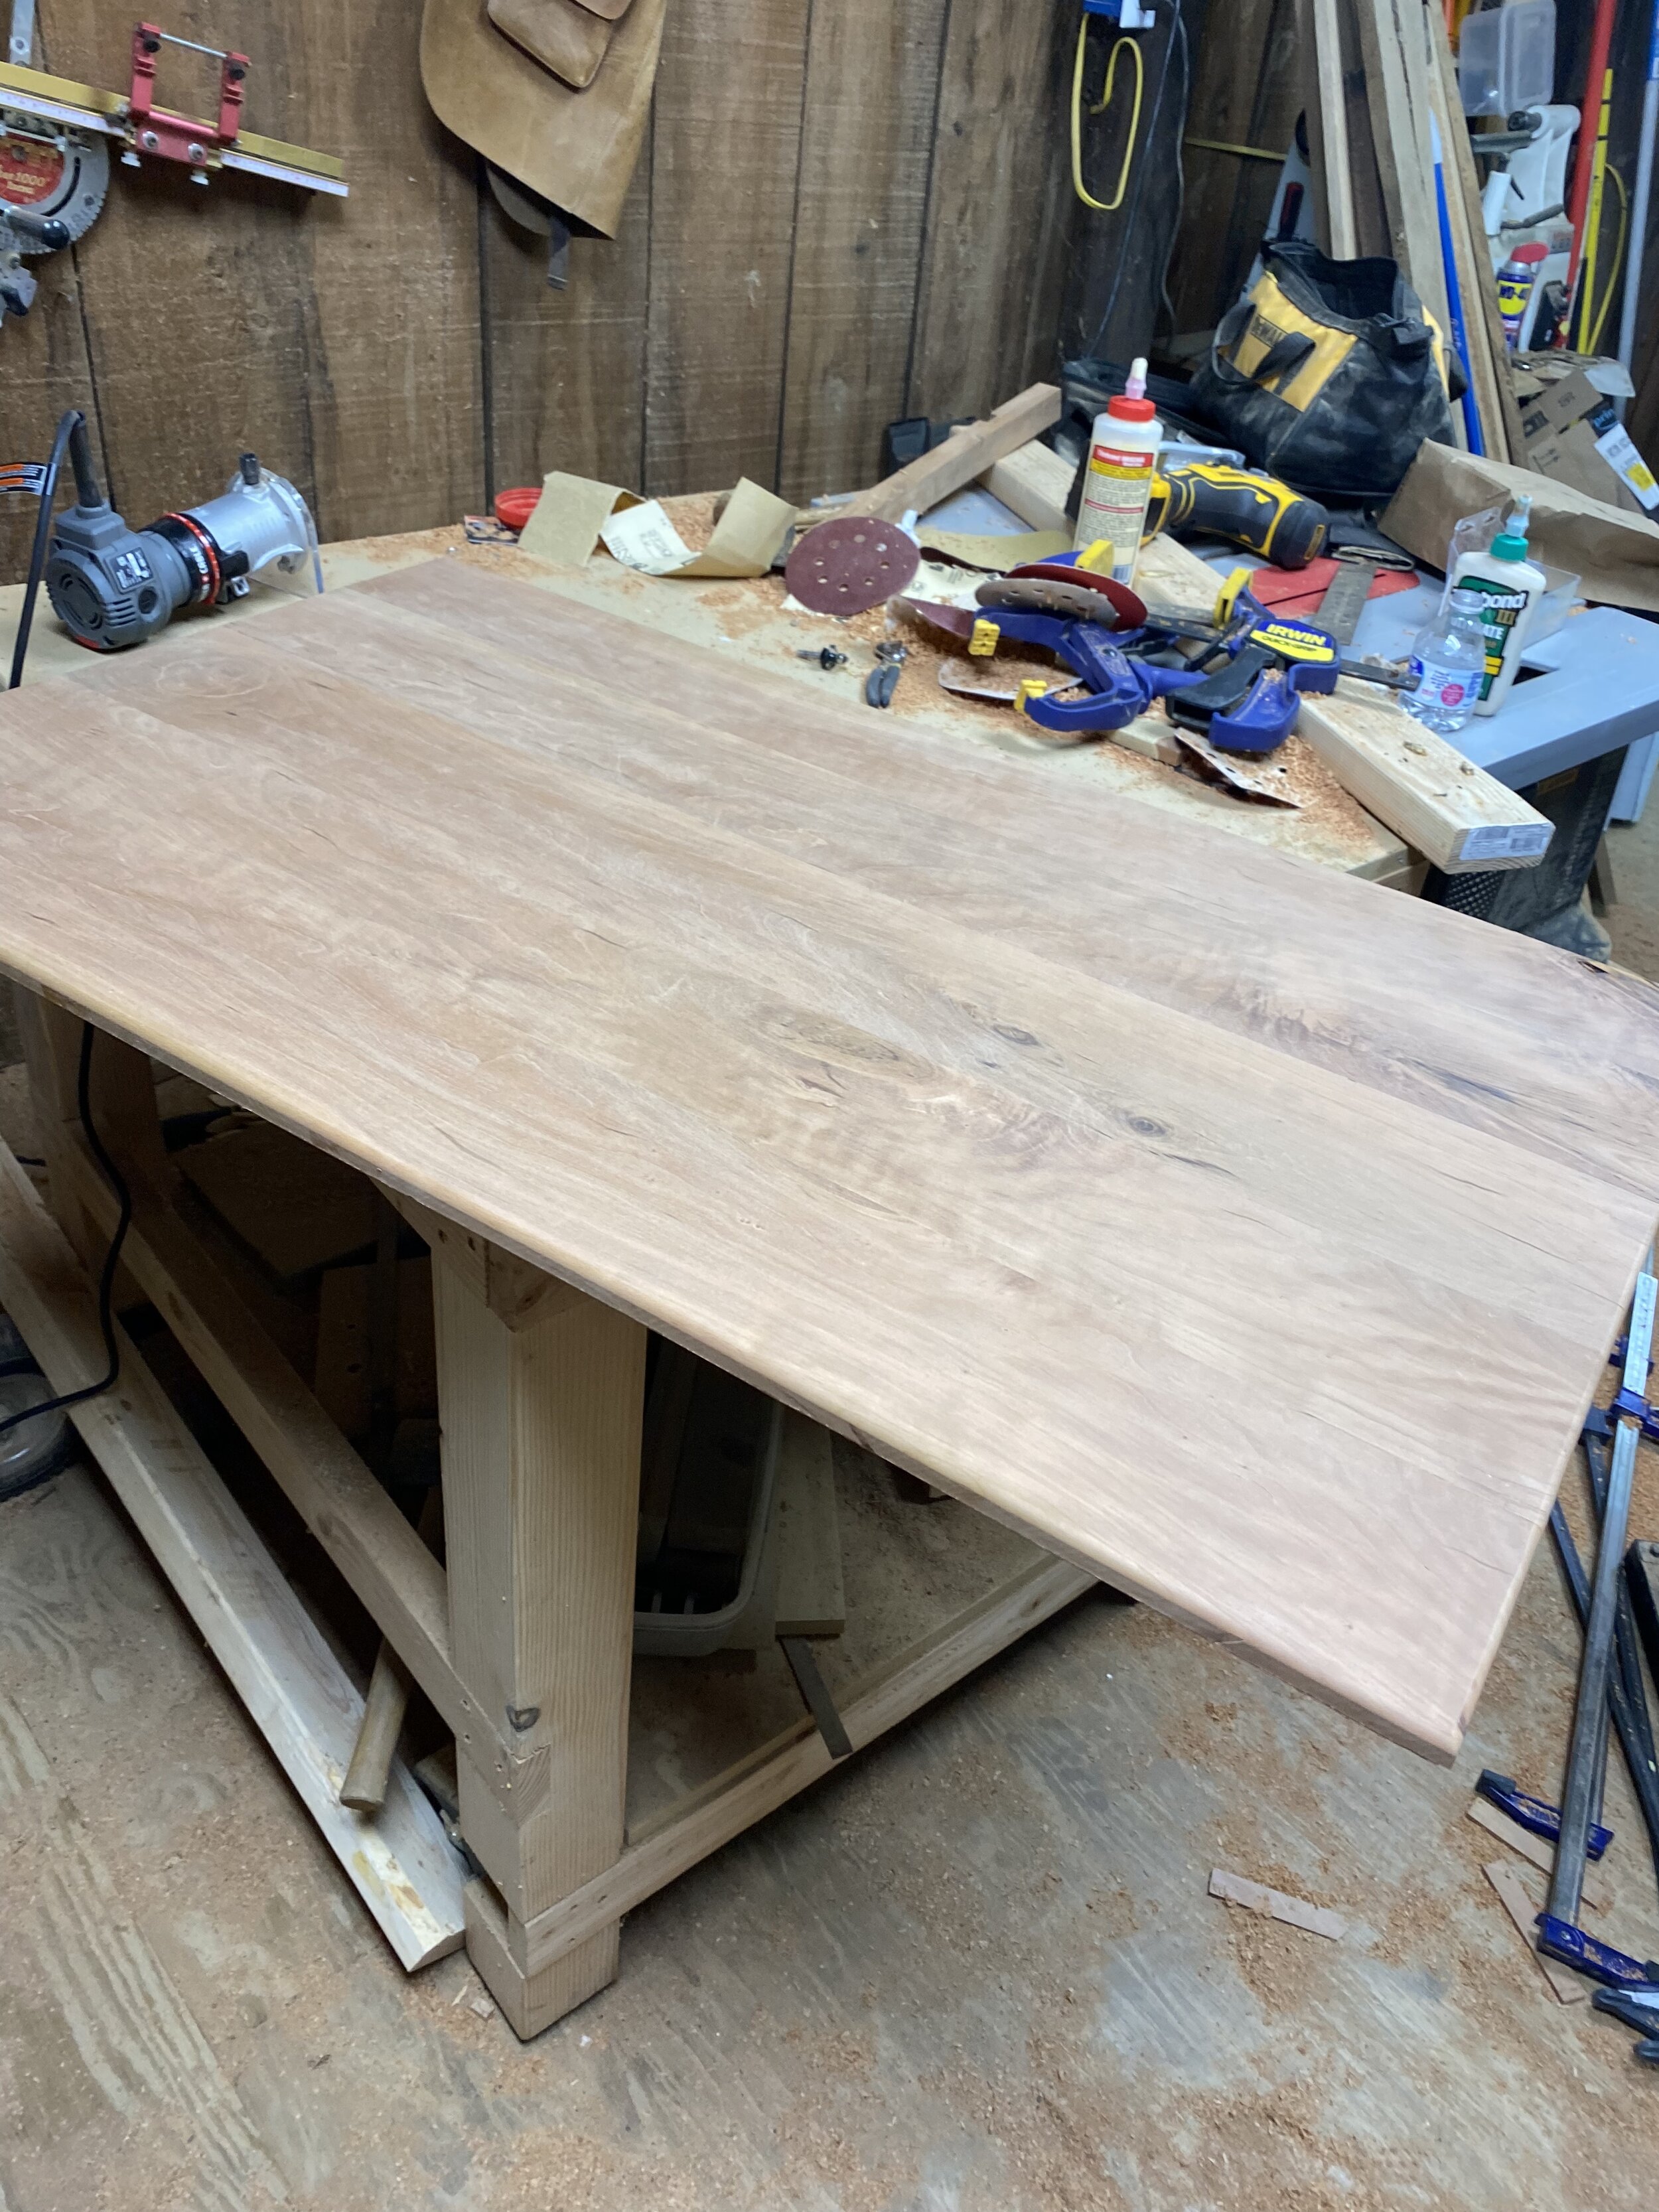
I wanted to share the entire process and let her decide the direction of the desk. I began at 9 A.M. in the rafters of the barn with a tape-measure and gloves, cooking under the paneled roof as I sorted through Appalachian cherry lumber plank by plank. A 9.5 foot, 8 inch wide, 5/4 inch thick board would do the trick. Weighing in at around 85 lbs it was going to be the main desktop. A smaller board provides the final desk-piece to create the 5 piece table-top.
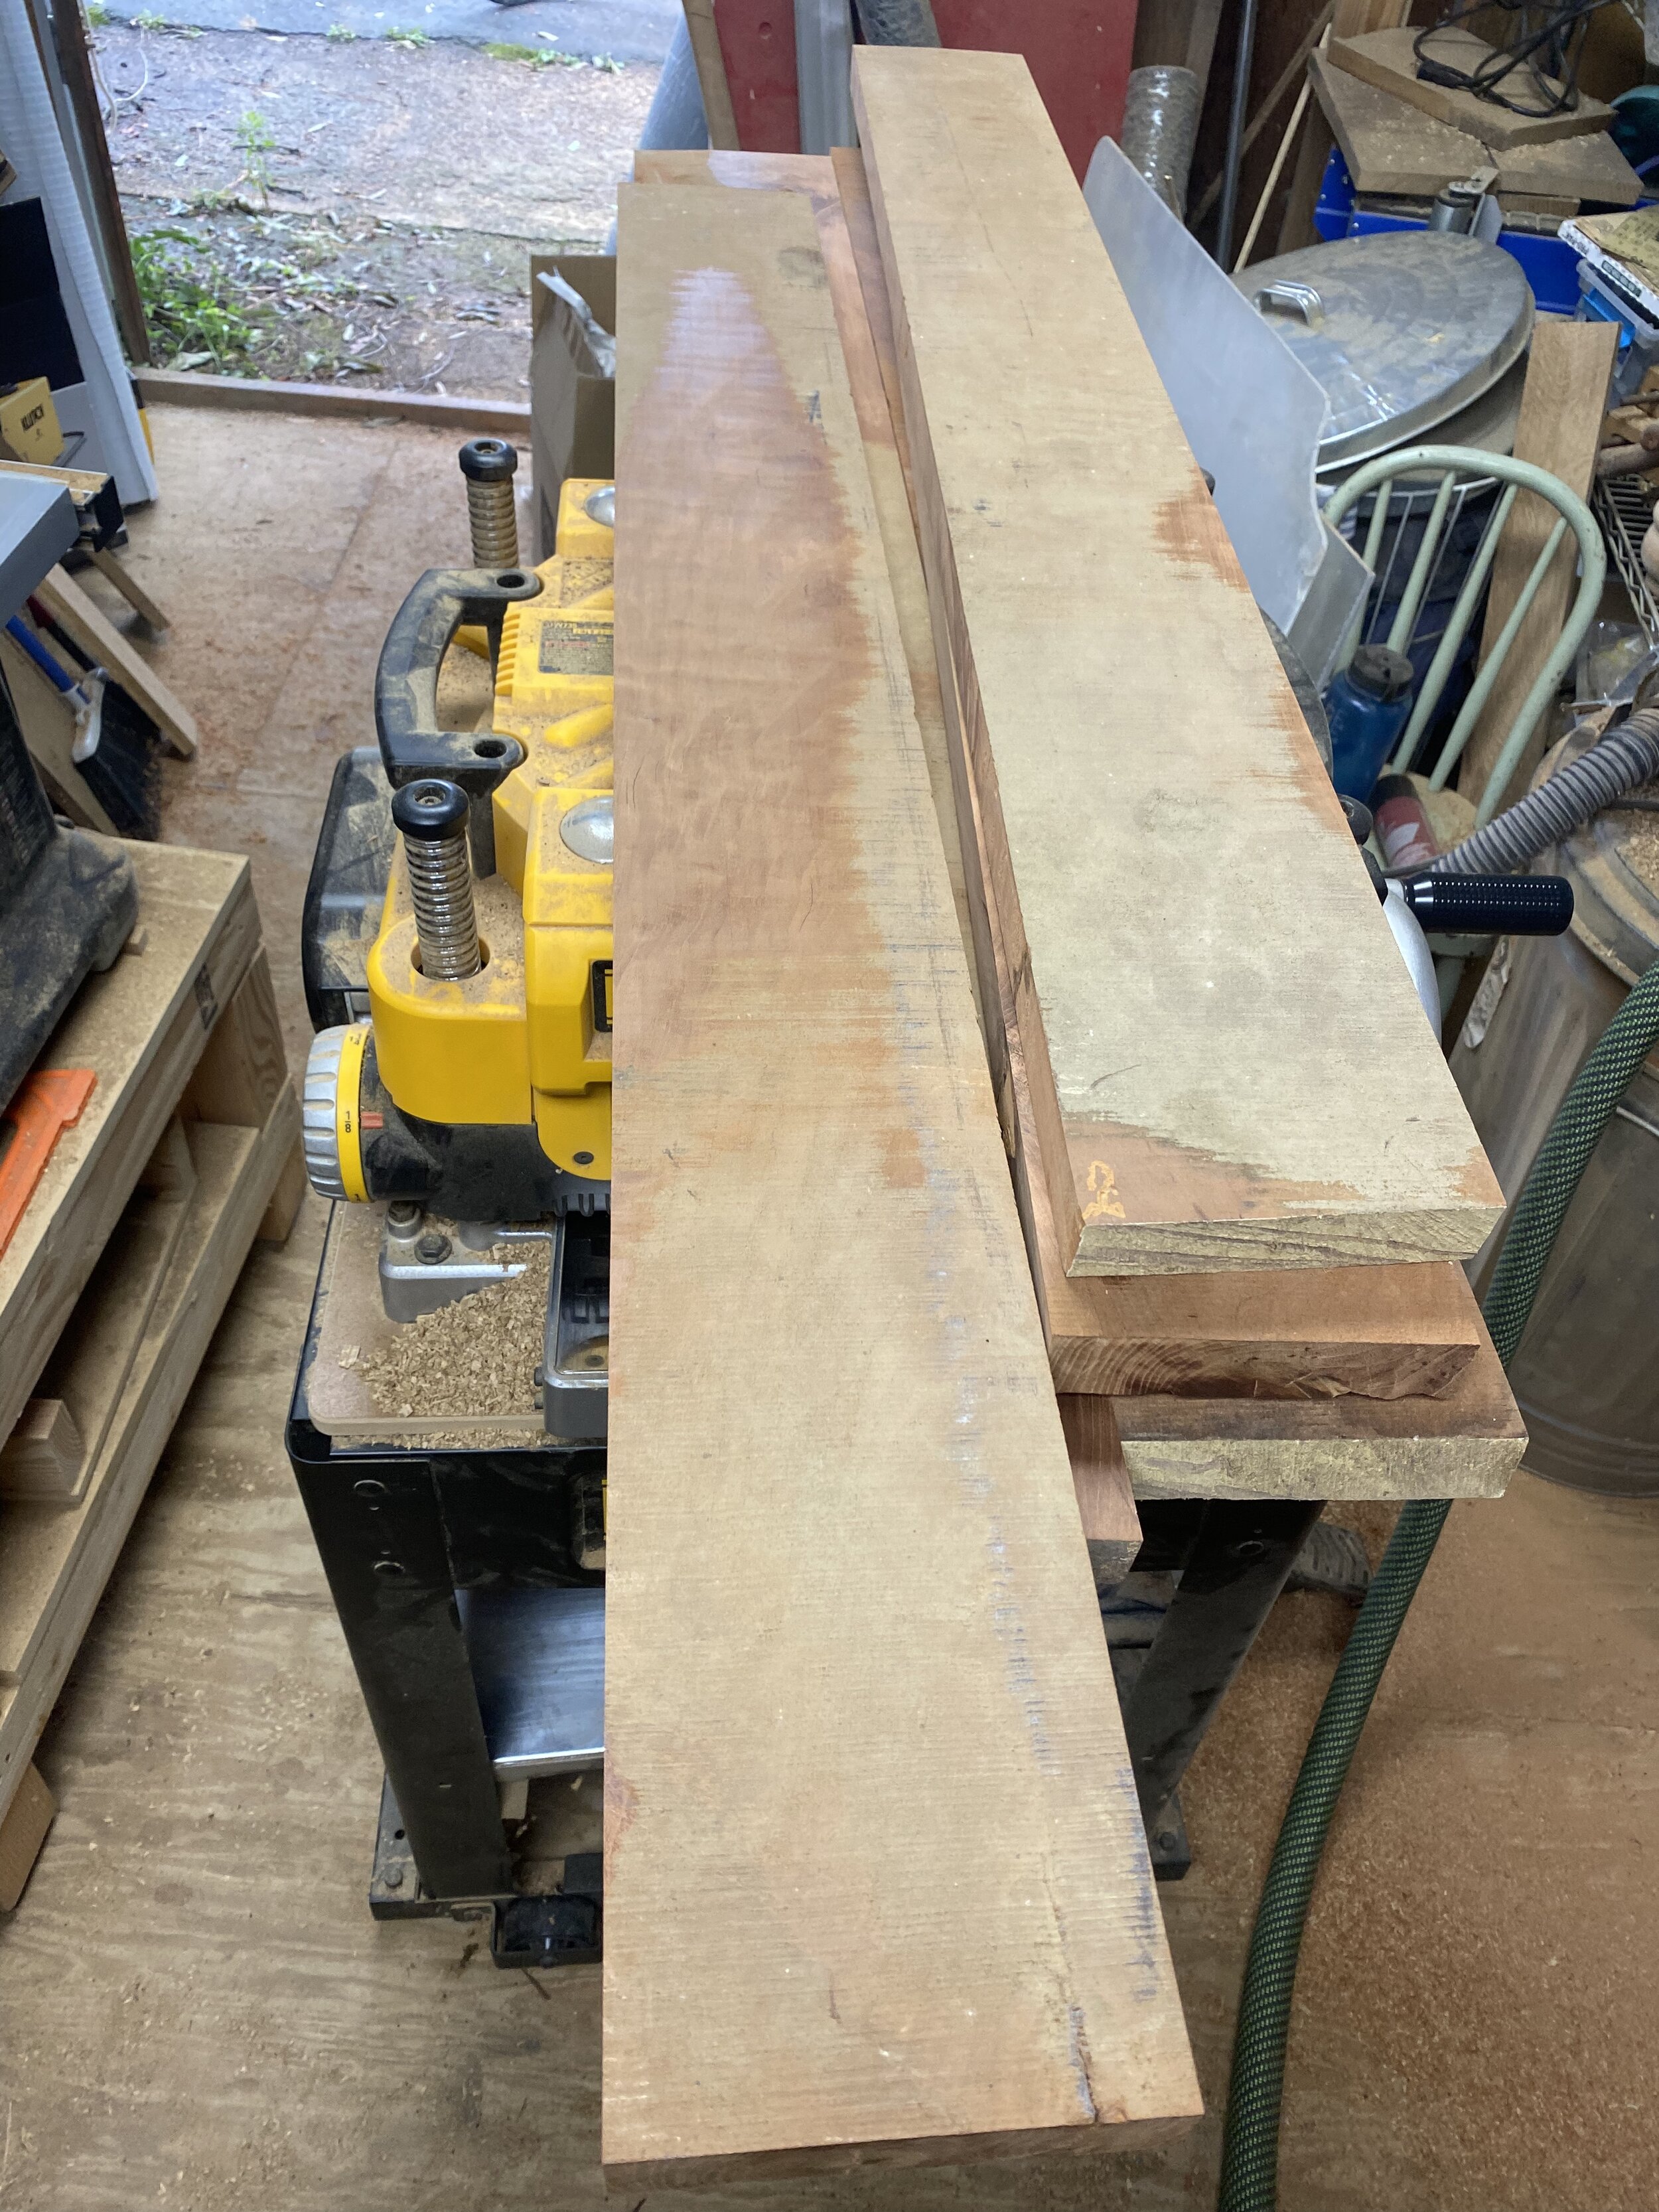
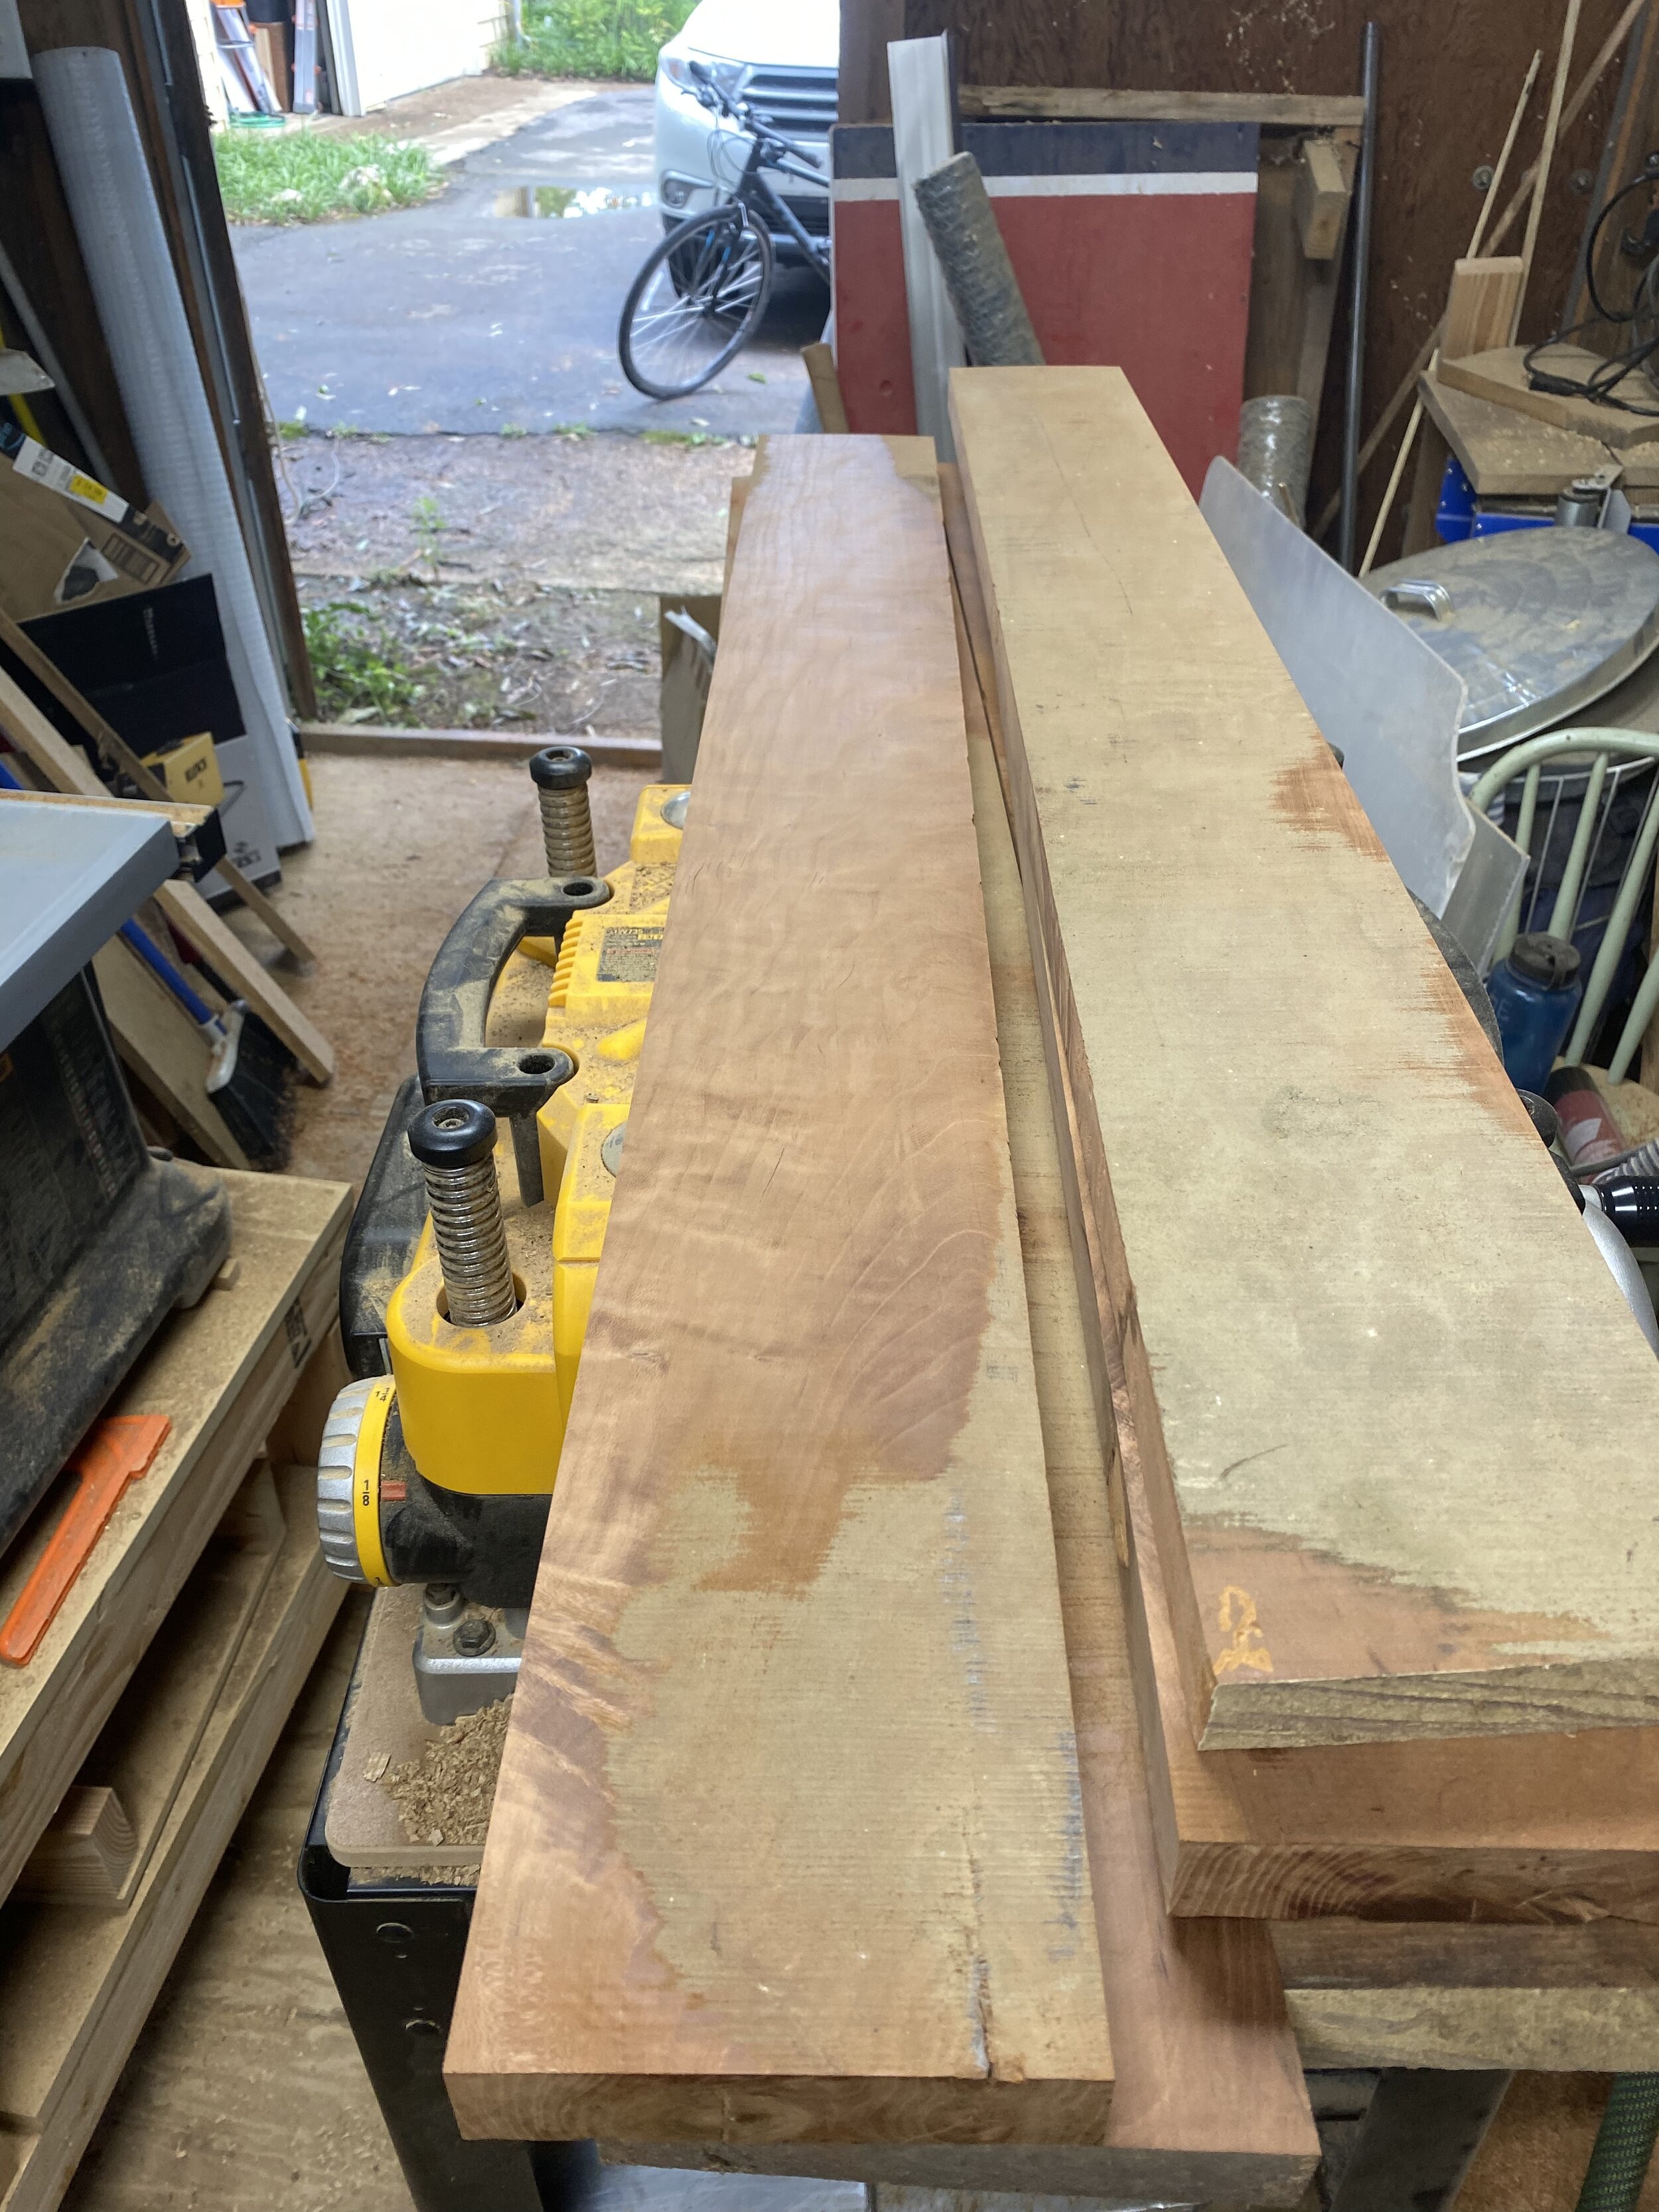
Ripped to the appropriate width and jointed on one side, the boards are ready to begin the trips through the planer. Layer by layer is planed off until all the barn dust disappears and the raw grain begins to breathe. The iron in cherry will oxidize over time as it’s exposed to oxygen for the first time, so the brown wood will look progressively red throughout the assembly process.
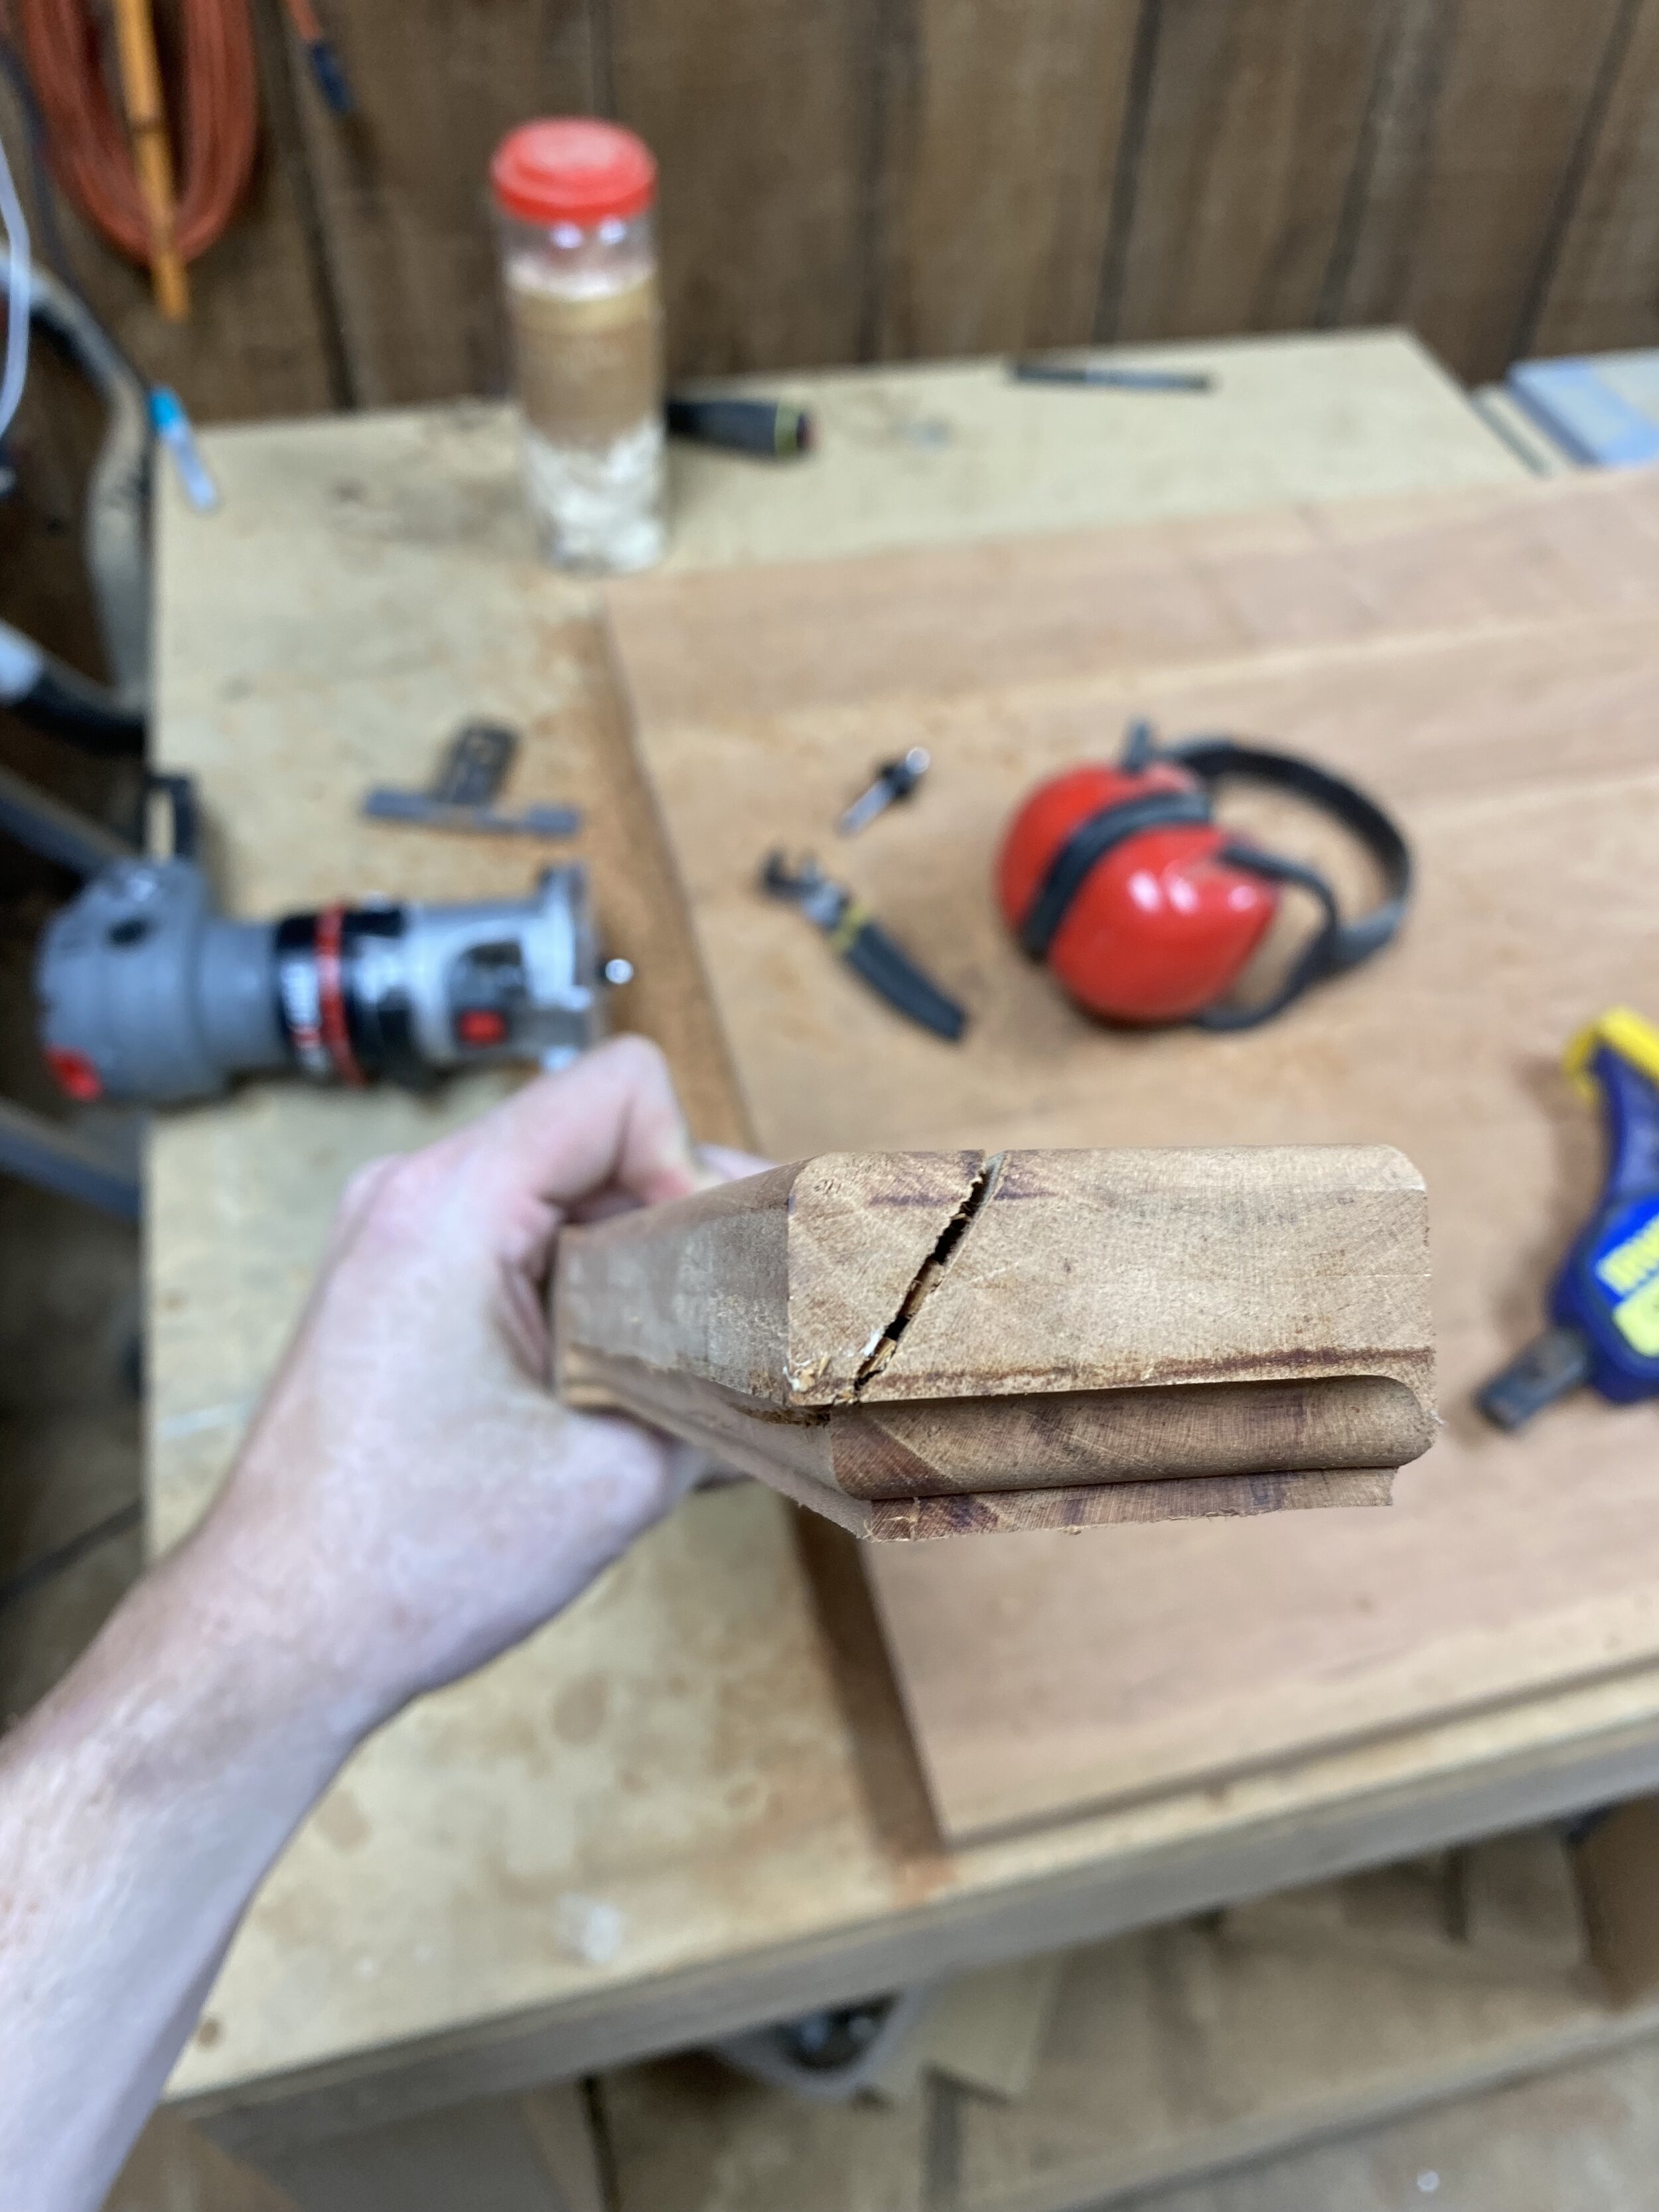
Once all the planks were 3/4 inch thick, I ripped them once more to the final width on the table saw and then laid down the boards in a satisfactory layout, we got the approval! I marked out 6 lines at the joints of every board for where the biscuits would be cut and placed for glue-up. Biscuit joining adds some structural stability to the joint but it mainly helps align all the co-planer surfaces so the table becomes one surface. After cutting cutting 48 biscuits it was ready for glue. I wiped the excess glue and began thing about the edge detail. My girlfriend wanted an ornamental edge-detail but knowing the surface and having made a design mistake myself, I insisted the ornamental detail be placed on the bottom, with a 1/8 inch round-over on the top. If you don’t have a rounded edge on the top of the table you will cut your forearms; this detail makes the desk much more comfortable while balancing the bottom-edge detail.


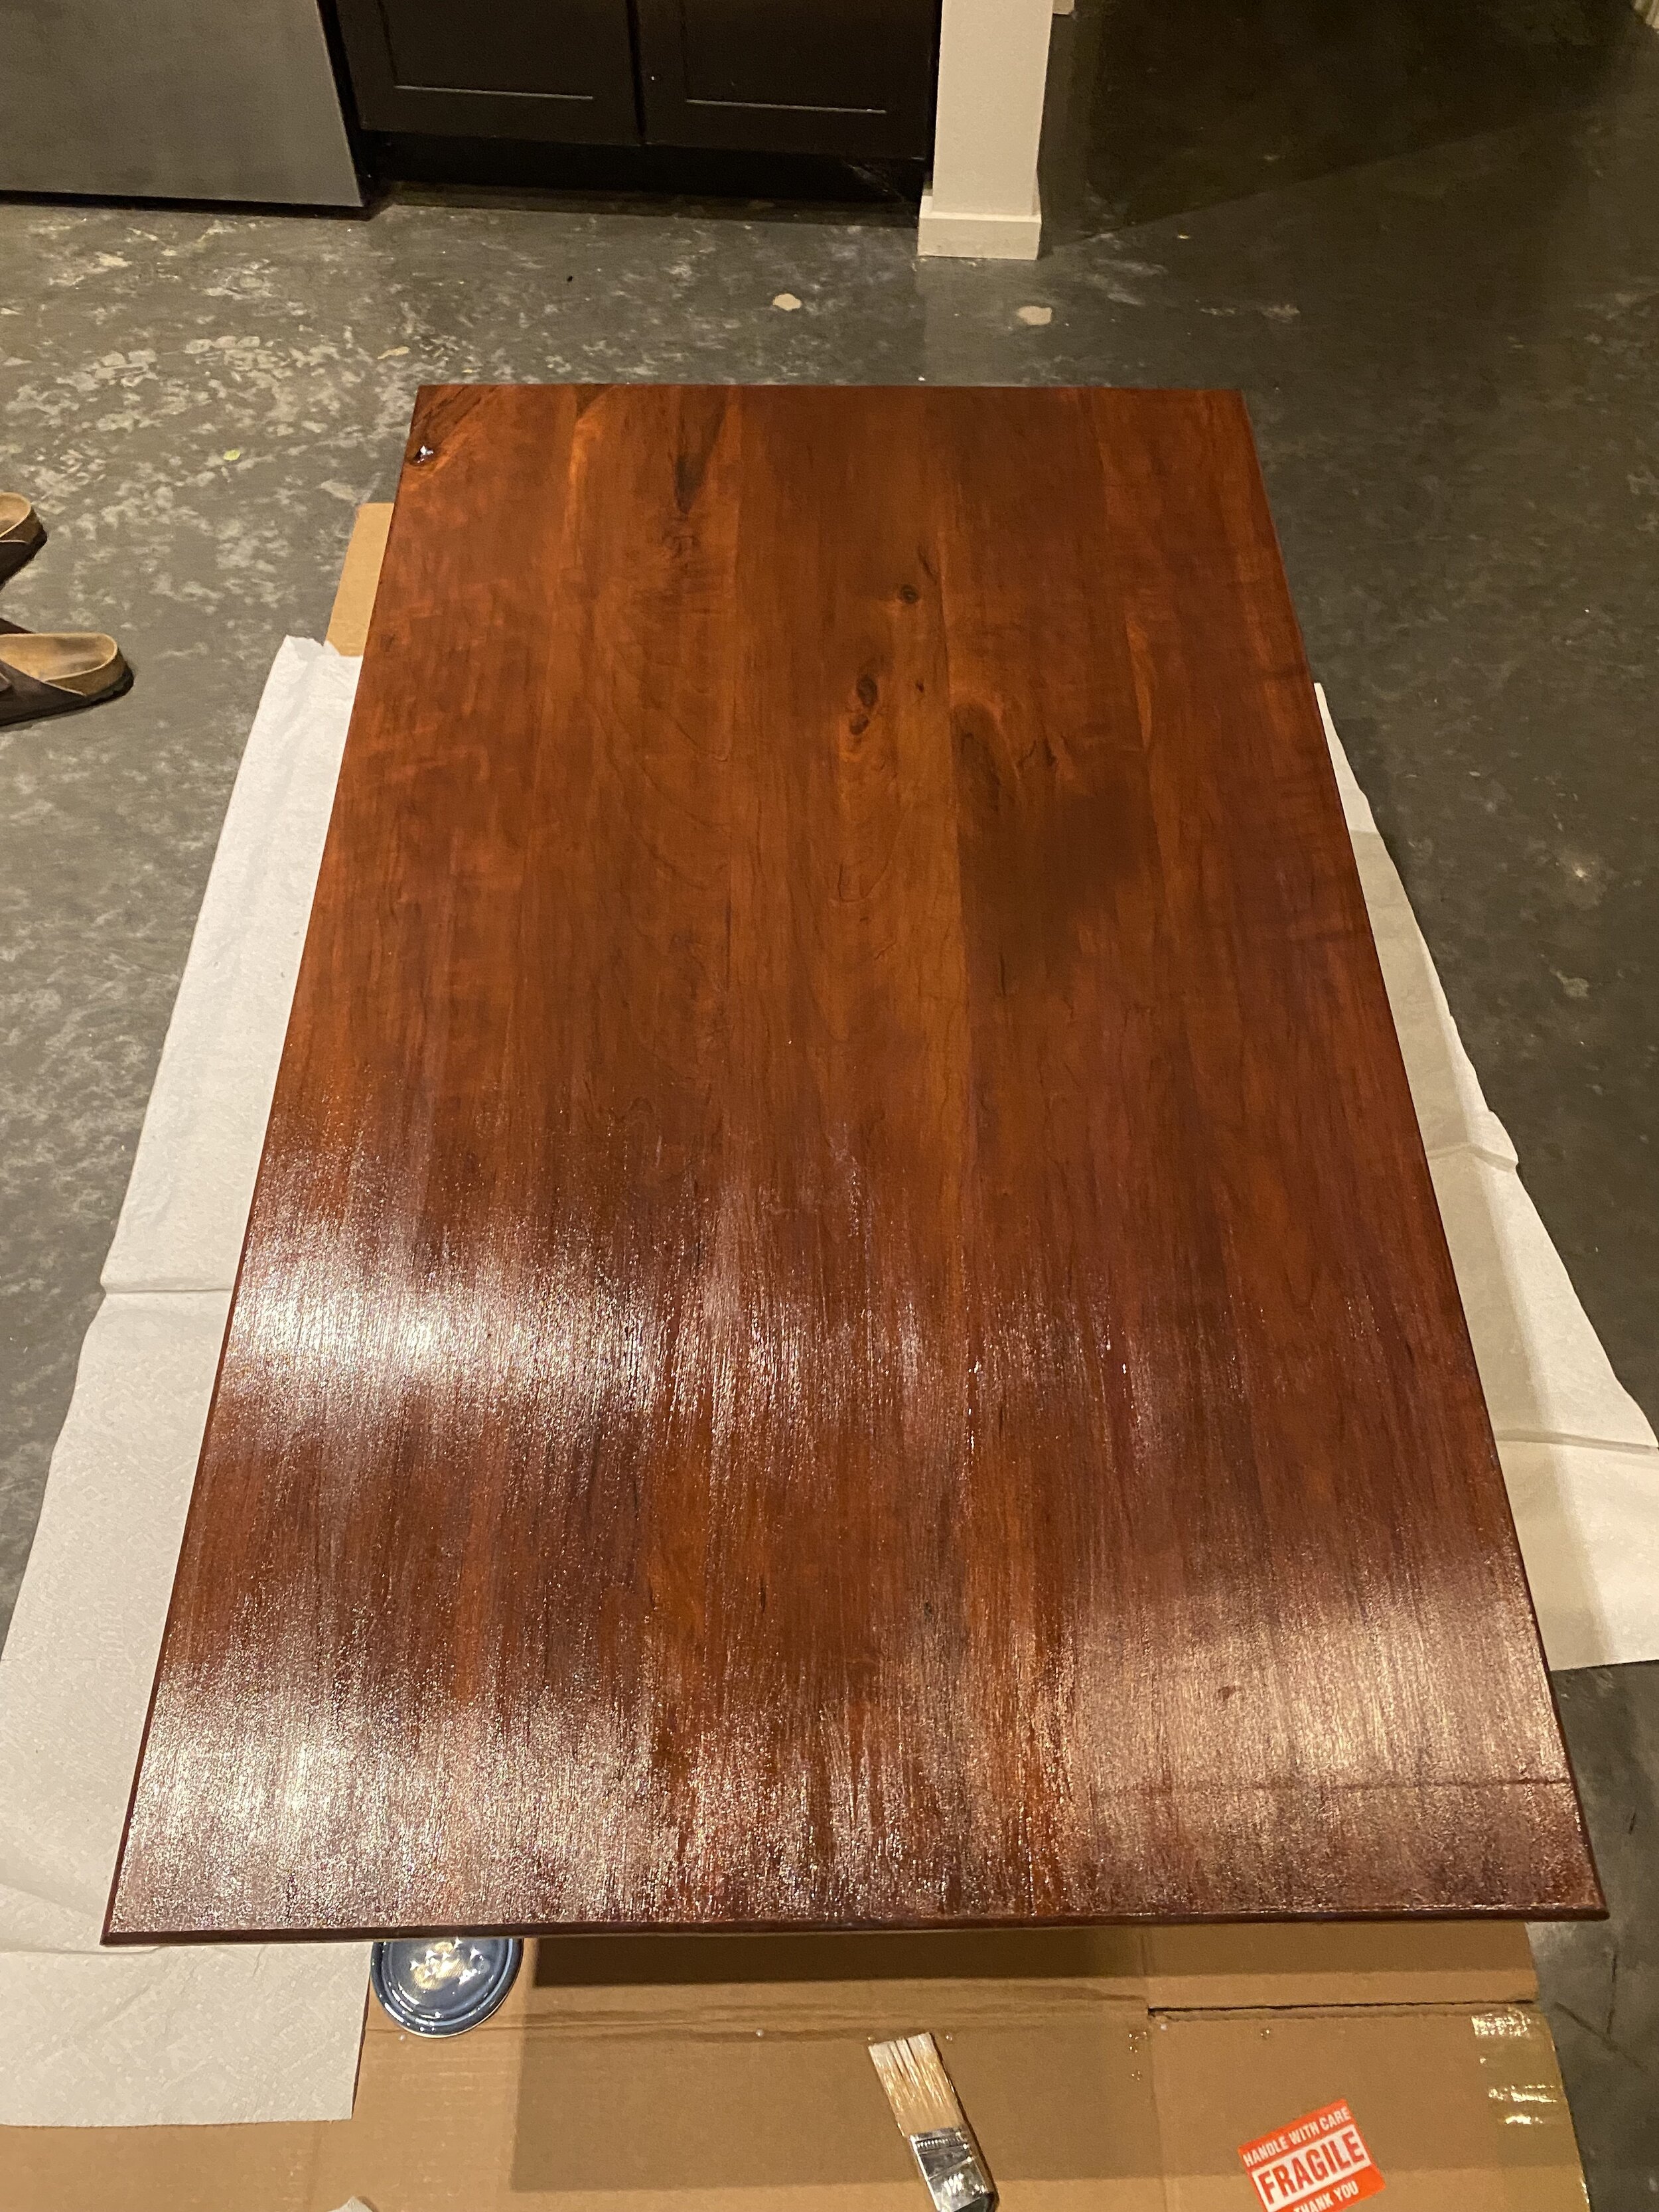
After extensive sanding and filling cracks with a combination sawdust and wood-glue, the surface was smooth and ready for a trip to the final destination. She wanted a dark stain so we used a water-based black cherry stain to darken the wood. It was so fun to see each layer bring more richness to the Appalachian cherry until it was as dark as the stain would allow. Following a 24 hour drying period we followed up the stain with 3 coats of Miniwax One Coat polyurethane and installed the table-top on the new desk-frame. The final step will to be buff the surface with a Scotchbrite pad on an orbital stander for a glass-like finish; however, that’s a project for a weekend when we have the time, until then it’s already being put to use.
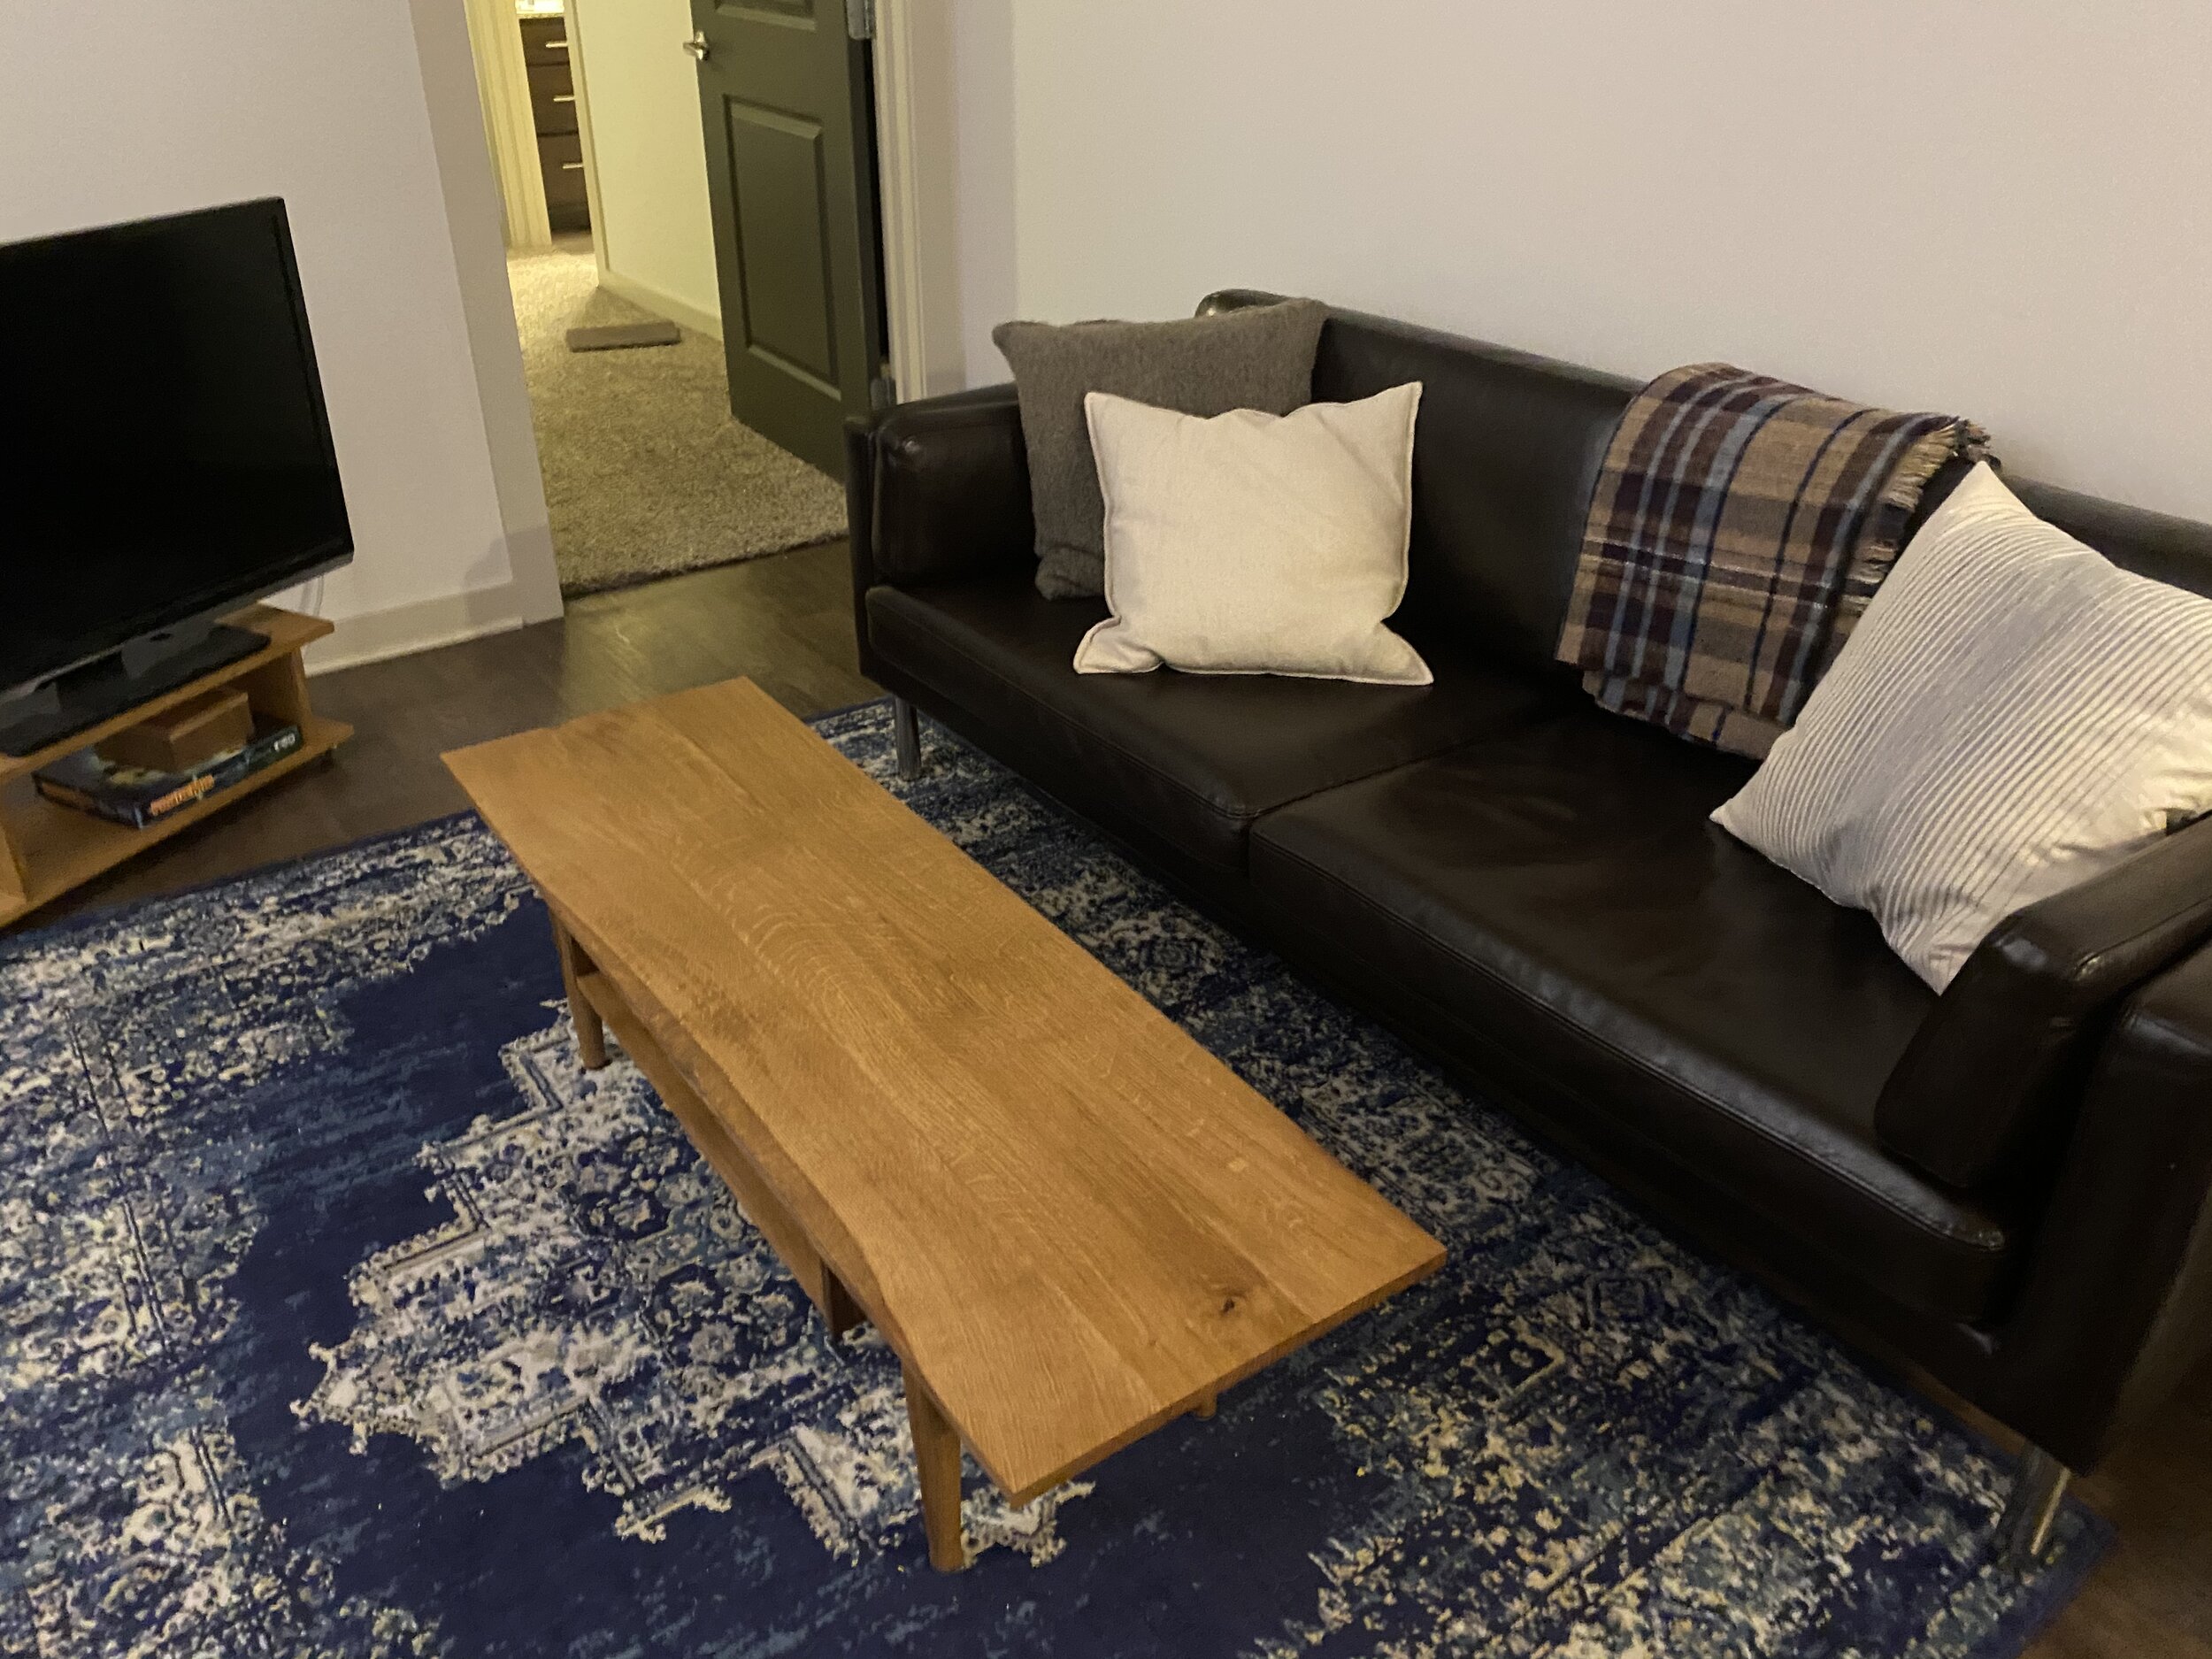
Coffee Table
Kaffeeklatsch, or the German tradition of a mid-day coffee break, is a routine that makes me feel at home. Kaffeeklatsch is a sacred time full of caffeine, interests of loved ones, and little formal structure. It’s a time to wander through each others’ lives and grow, all while your sympathetic nervous system gets aroused with its favorite stimulant. Because of kaffeeklatsch’s importance, I didn’t feel right purchasing a coffee table.

The coffee table is the centerpiece for this special hour and has always had a rich story in my life. All stories begin with our roots, so I decided to begin this coffee table beside my childhood coffee table. I wanted to pay homage to this instrumental piece of furniture, but I also wanted to reimagine it for my own space and aesthetic.
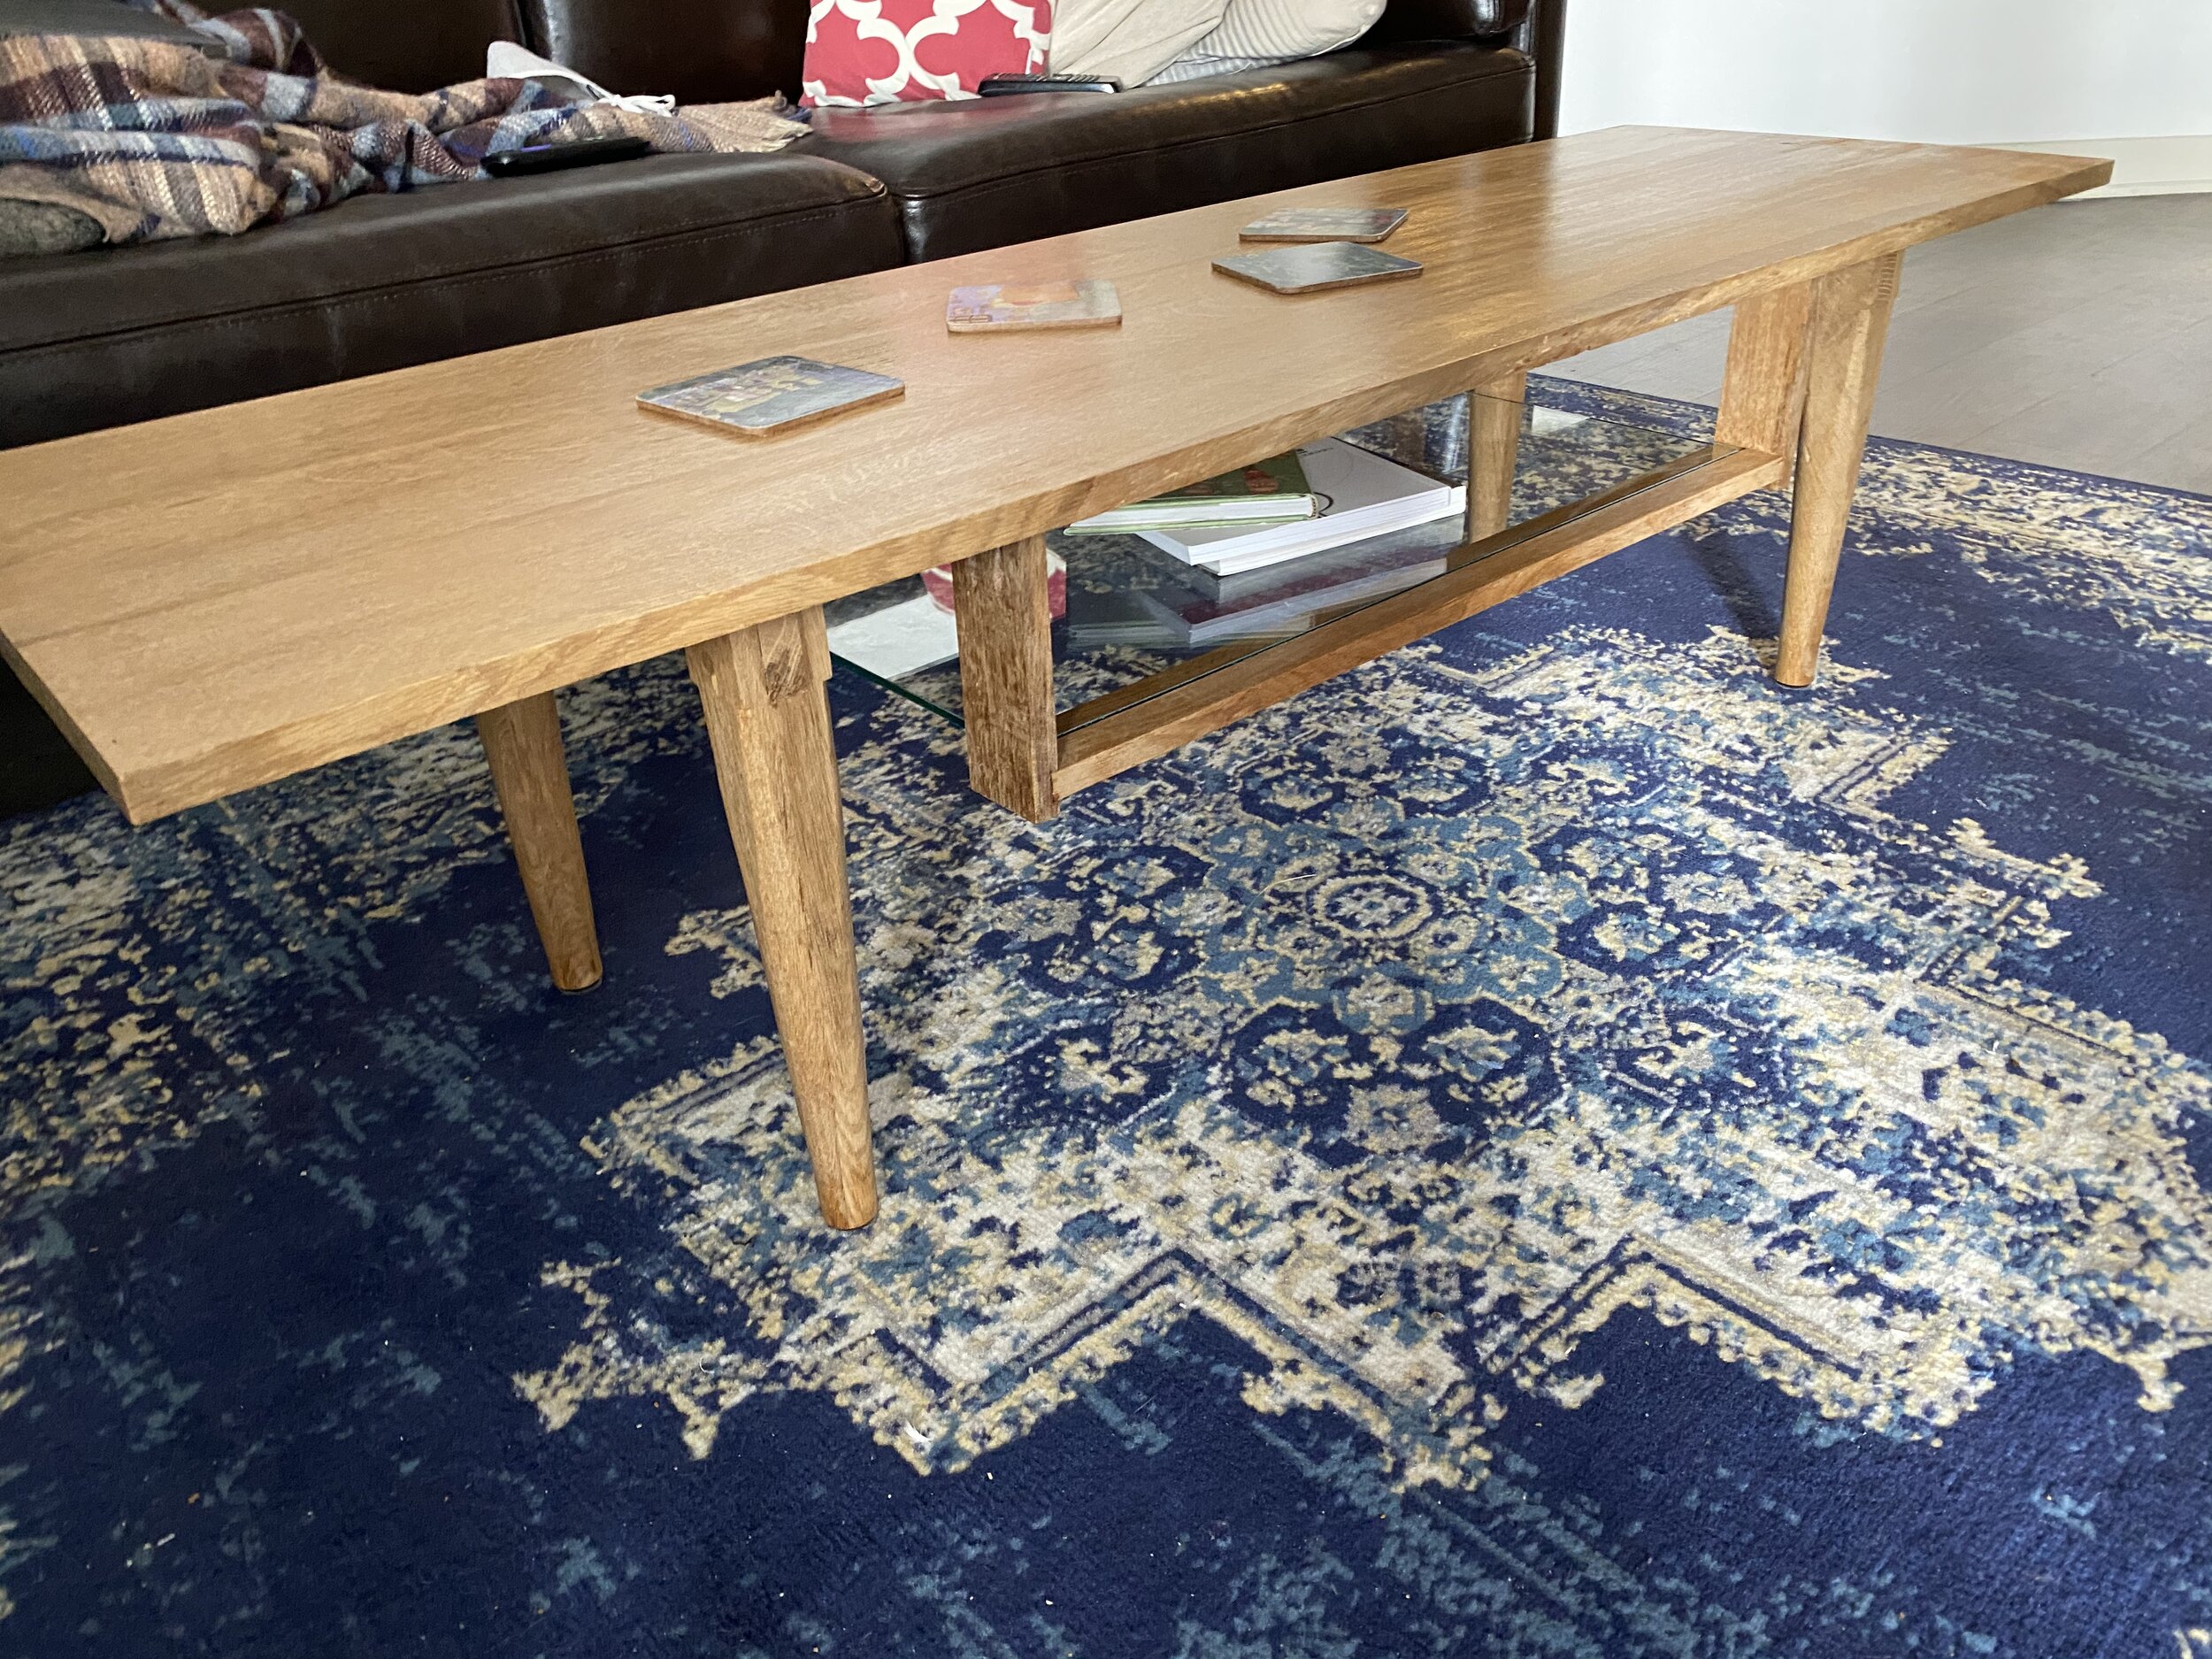
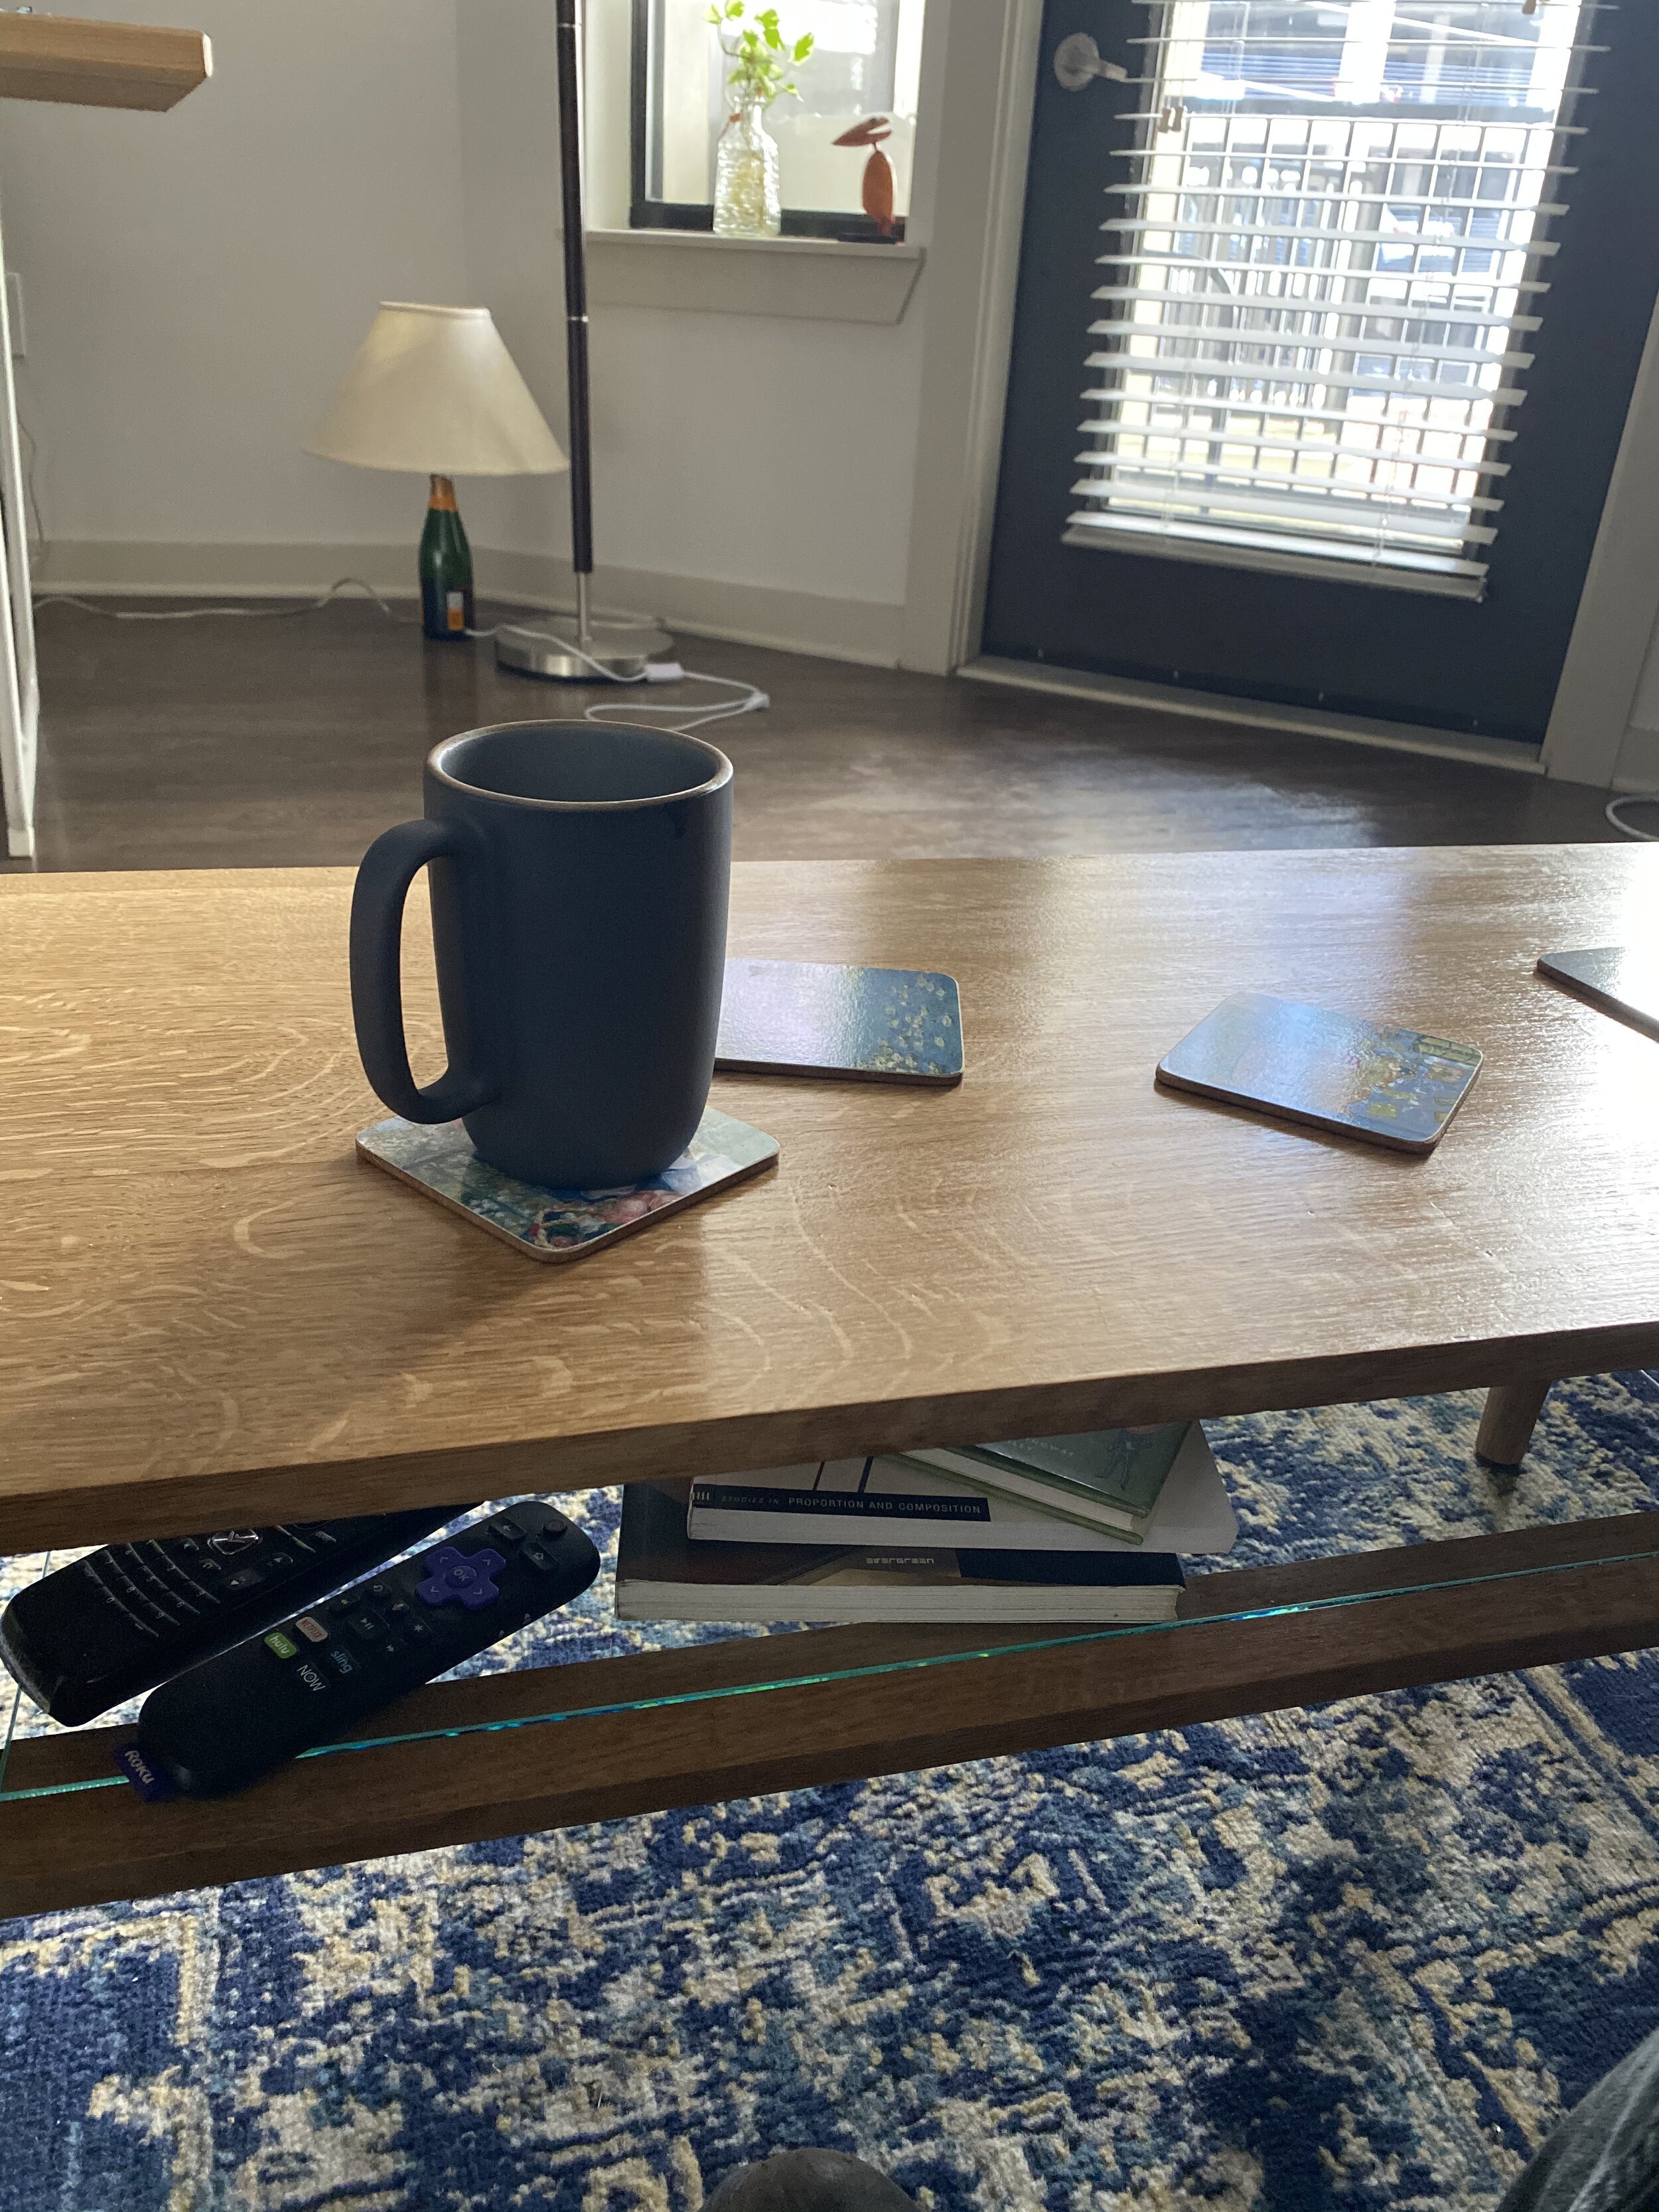
I have a series of design objectives that I like to incorporate into every project. My first challenge was to use glass in my table design. This was prompted by a brilliant designer’s comment to me that glass tables “Open up the room and bring light into neglected spaces.” I liked the idea of juxtaposing glass and white oak, so after taking the general form of my coffee table down on paper, I began playing with my other building objectives. I had never tried matching wood turned pieces before so the first construction goal was to turn identical legs.
Once I finished the legs I ripped, surfaced, and glued the top of the table together and prepared the legs for joining. I built a jig to slice the grooves into each of the legs. After cutting all 4 grooves to the appropriate width, I surfaced them with a chisel and friction fit the tongue into the legs. I continued to sand the surface to provide enough space for the glue and once the tongue was properly seated in the groove, I drilled holes and placed 2 dowels (3/8 inch wood dowels that I made using a sharpened piece of steel and a drill) into each tongue and groove.
The final step was to screw clips into the bottom of the table to mount the legs. After, I mounted the rails of the shelf and placed a piece of plywood the size of the glass I would have cut so the glass would sit perfectly between the shelf rails. I used pocket hole screws and glue to affix the rails to the underside of the table and I had a piece of 1/4 inch glass cut at a local glass cutter to install after the stain dried. To finish the piece I applied 2 coats of Mini-Wax Sanding Sealer and followed up this surface with 3 coats of Mini-Wax Semi-Gloss polyurethane.
Compass Set
A dovetailed black walnut box made to fit an antique German compass set. This project challenged my fine motor abilities and attention to detail. Working on the micro scale definitely takes more time, thought, and patience, but was a joy to do and the end product was a great first try. The tolerances on many of the wood pieces were very tights so slight misalignments on the jointer and planer led to major differences in board thickness. New things tried on this project were the felt work where the compasses lay (The appropriate amount of Super 77 spray glue works great for adhering the felt to any surface). Finally to the inlayed work on the front lid. I originally thought my first inlaying job would work, boy was I wrong. After carving the initials I realized that I wanted contrast so I filled the voids with a clear epoxy. The magnifying effect and the refractive index led to an eye-catching detail despite me biting off more than I can chew. I’m sure this has been done before but I love this effect because it offers an inlayed effect without the matching part (I clearly need more practice before I feel comfortable gifting anything with inlay/marquetry).


Mid-Century Table for Mother’s Day
This project was definitely one of my more ambitious projects but I’m so pleased with the final product. This project used a 12’ x 10” x 2” piece of red oak and 2 smaller pieces of black walnut. I wanted to challenge myself with the angled leg joinery and screw-less design. This was all assembled with custom dowels and drilling jigs and the table top was bolted in from the bottom. I know I said this was screw-less but I’m not that impractical. After making both legs, I worked to make them a little more symmetrical by clamping and chiseling away the slight inconsistencies. Had i used jigs more religiously earlier, I wouldn’t have run into this problem—luckily now I know better, jigs are a woodworker’s godsend. The final product is imperfect. There’s a blemish under one of the lower stretchers, a slight wobble, and some saw marks but it was a wonderful experience and the project was a great introduction to angled joinery.


The Meta Toolbox
One of my first experiences with dovetailing. Made out of makore for the body and a mystery wood (looks like olive or white oak). This project’s glue up turned out great and the dovetailing was going a little too well for my first time, all until I hit the mallet a little too hard and the side dovetails flew out, a testament to my lack of knowledge of proper grain direction. Luckily I was able to salvage the piece, chop off two inches to line up the sides properly again, and I was back in business with a singular, large dovetail. This project was a great introduction to hand joinery and the thinking on the fly mentality throughout the design process made the piece a challenging and rewarding experience.


The Tuxedo Set
This was a smaller project but I wanted to try a few new things with this little piece of black walnut leftover. The first requirement is that a bowtie and cufflink box must fit in the top compartment while a cummerbund must fit the lower compartment. I’ve always loved the beautiful figuring of black walnut so I thought that this box’s top would be a perfect place to showcase a beautiful knot and its transfixing grain pattern. I accomplished this by running a dado along three sides while cutting through the fourth side closest to the cufflink compartment. I recessed the bottom edge to seat a piece of 1/8 inch plywood flush with the bottom of the box and I chiseled out small channels along either long long sides to seat the divider and provide a little more structural support. Finally I put splines in all corners, took some time sanding all faces, and finished the piece with a tung oil trick. I love the finish that tacky tung oil provides. The sawdust combines with the sticky surface to create a natural wood filler that seeps into the pores and provides a smooth surface for the otherwise porous black walnut wood.